3D Puff Embroidery Settings for Hats
Table Of Content
- Machine Setup and Digitizing Essentials
- Machine Preparation
- Speed and Thread Selection
- Digitizing for 3D Puff
- Design Constraints
- Foam Integration and Stitching Phases
- Foam Placement
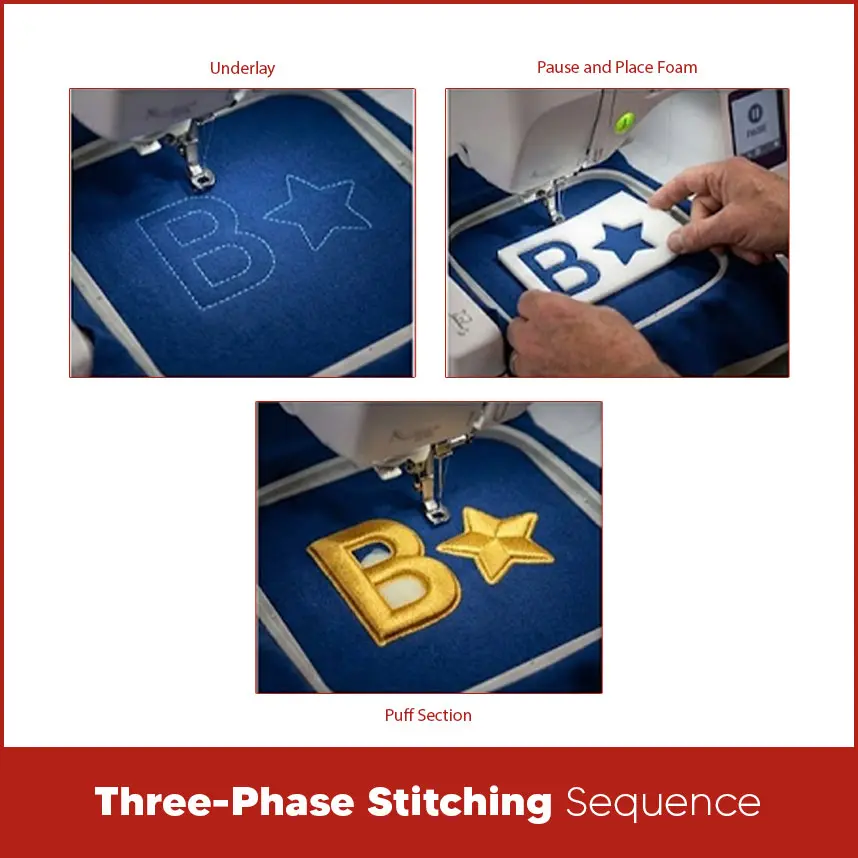
- Three-Phase Stitching Sequence
- Underlay
- Pause and Place Foam
- Puff Section
- Finishing Techniques for Professional Results
- Foam Removal
- Heat Finishing
- Final Touches
- Key Points for Digitizing
- Essential Materials for Quality 3D Puff Embroidery Results
- Foam Selection: Types, Thickness, and Color Matching
- Foam Types & Density
- Thickness Matters
- Color Coordination
- Sourcing Recommendations
- Quick Reference Table: Foam Choices
- Threads, Needles, and Stabilizers
- Thread Selection
- Needle Choice
- Stabilizer Smarts
- Cutaway Stabilizer
- Water-Soluble Stabilizer
- Quick Reference Table: Threads, Needles, and Stabilizers
- Non-Woven Fabric and Cap Setup
- Double-Sided Tape
- Clips
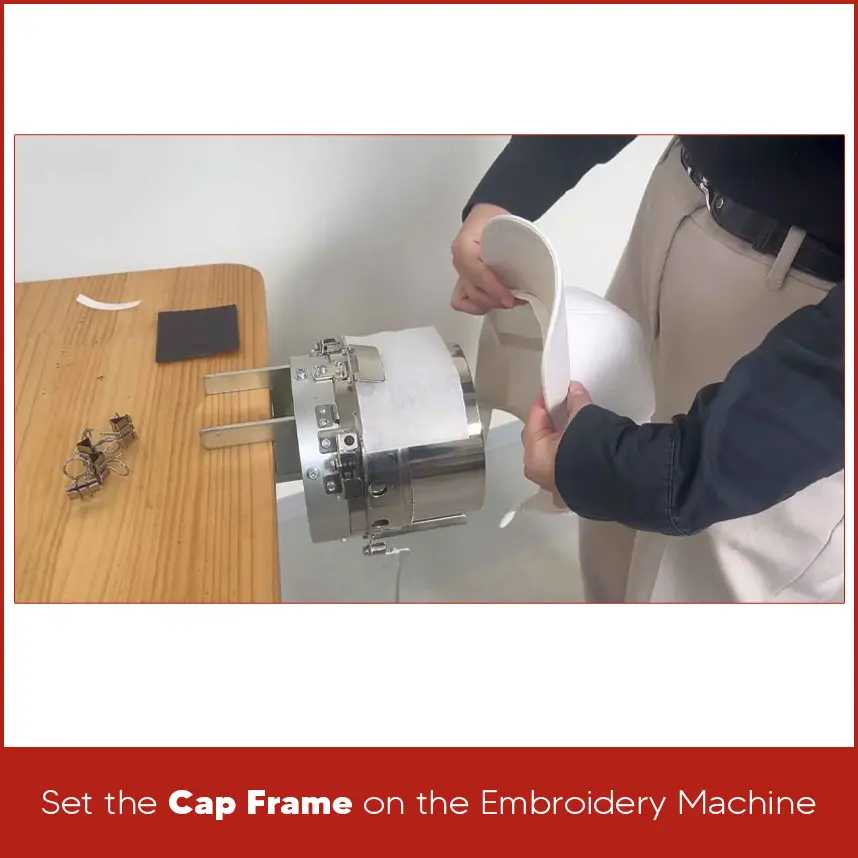
- Set the Cap Frame on the Embroidery Machine
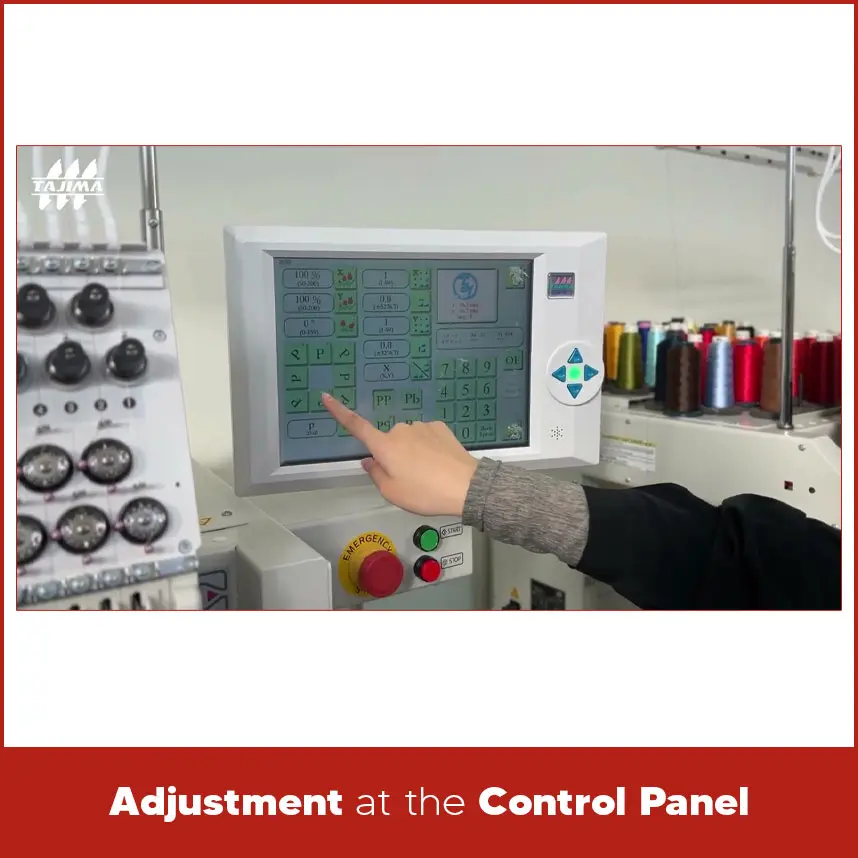
- Adjustment at the Control Panel
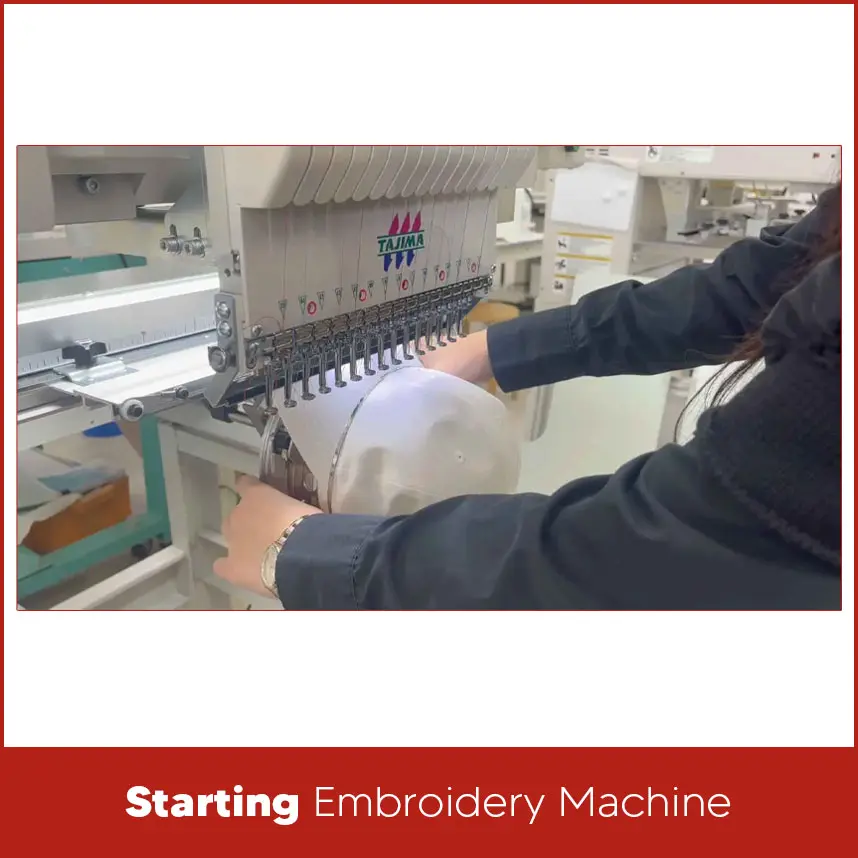
- Starting Embroidery Machine
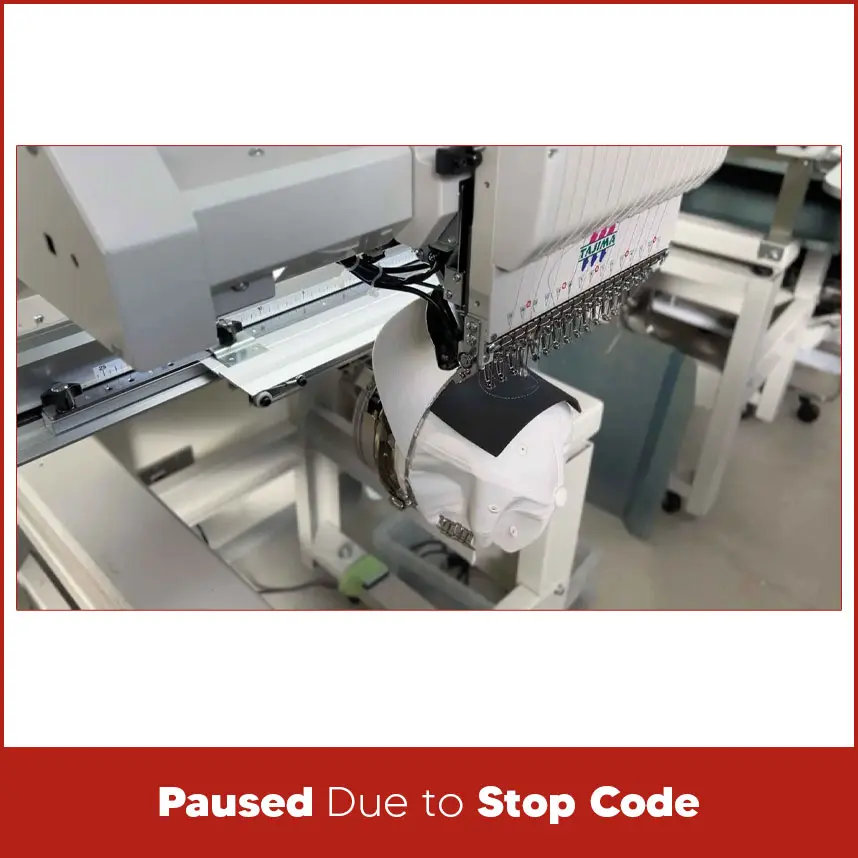
- Paused Due to Stop Code
- Place the Urethane Foam on the 3D Point
- Key Point for Cleanly Peeling Off Urethane
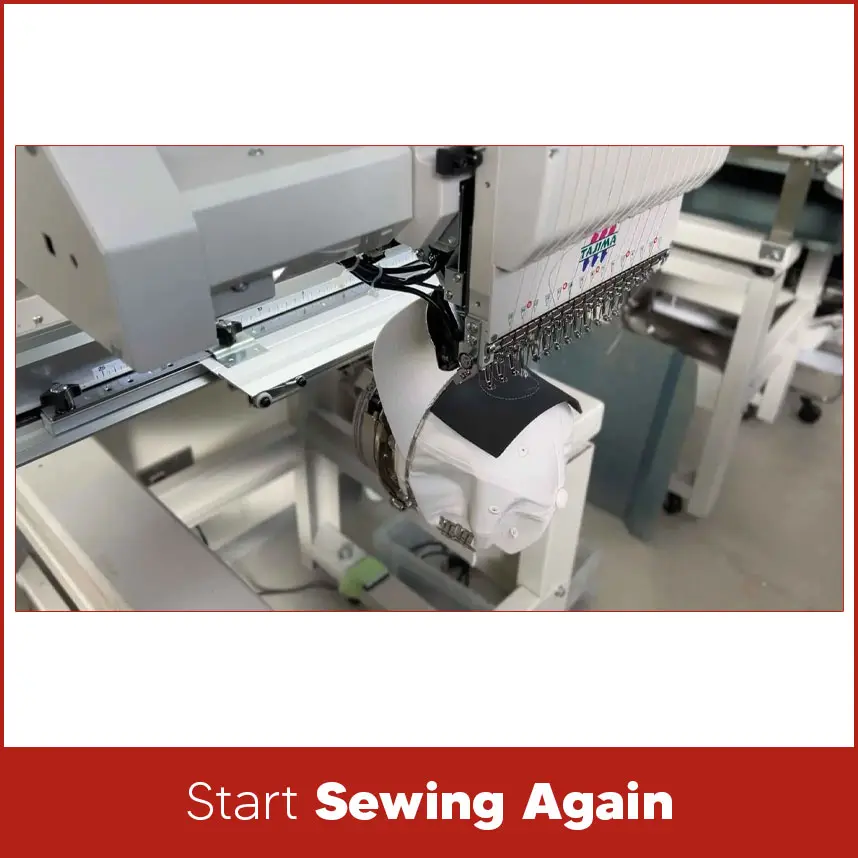
- Start Sewing Again
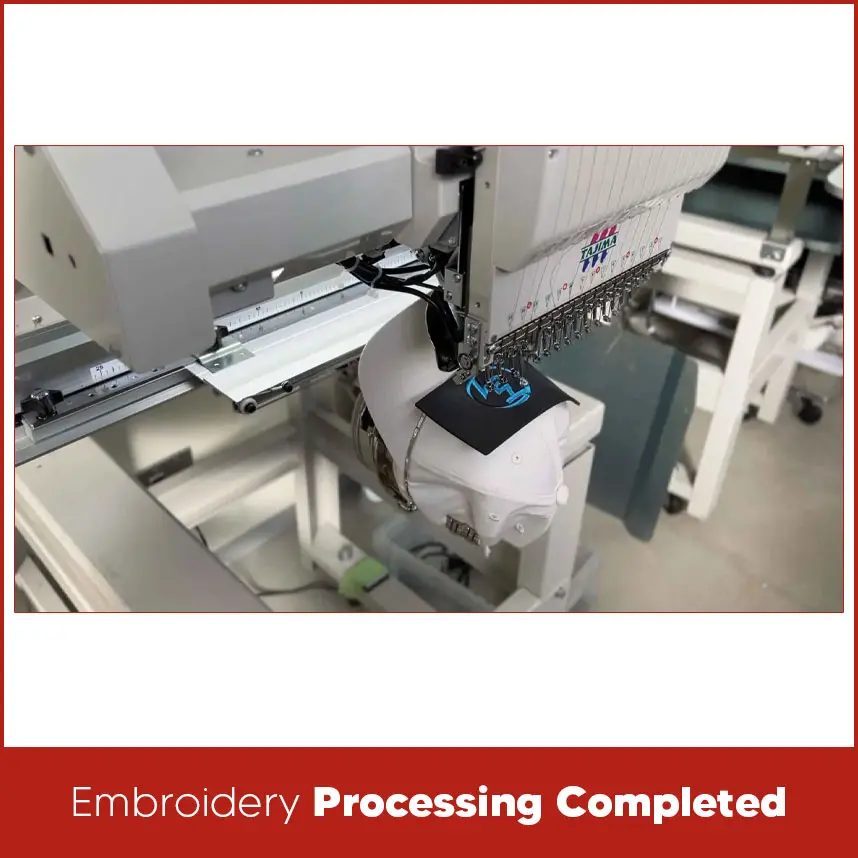
- Embroidery Processing Completed
- Summary
When you see a cap with bold raised letters that stand above the surface, that is 3D puff embroidery. It looks clean, sharp, and professional. Many popular cap brands use this technique because it gives depth and strength to logos.
But 3D puff embroidery does not work like normal flat stitching. If the stitch density is wrong, the foam shows. If the speed is too high, the thread breaks. If the digitizing is weak, the letters will break.
That's why understanding the correct 3d puff embroidery settings for hats is important before you start. In this guide, we will cover the right machine setup, digitizing structure, foam placement, stitching sequence & finishing steps. Everything here focuses on clean results and strong structure.
Machine Setup and Digitizing Essentials
Success with 3D puff embroidery starts long before the first stitch. Proper embroidery hat machine setup and accurate digitizing create the base for professional results.
Machine Preparation
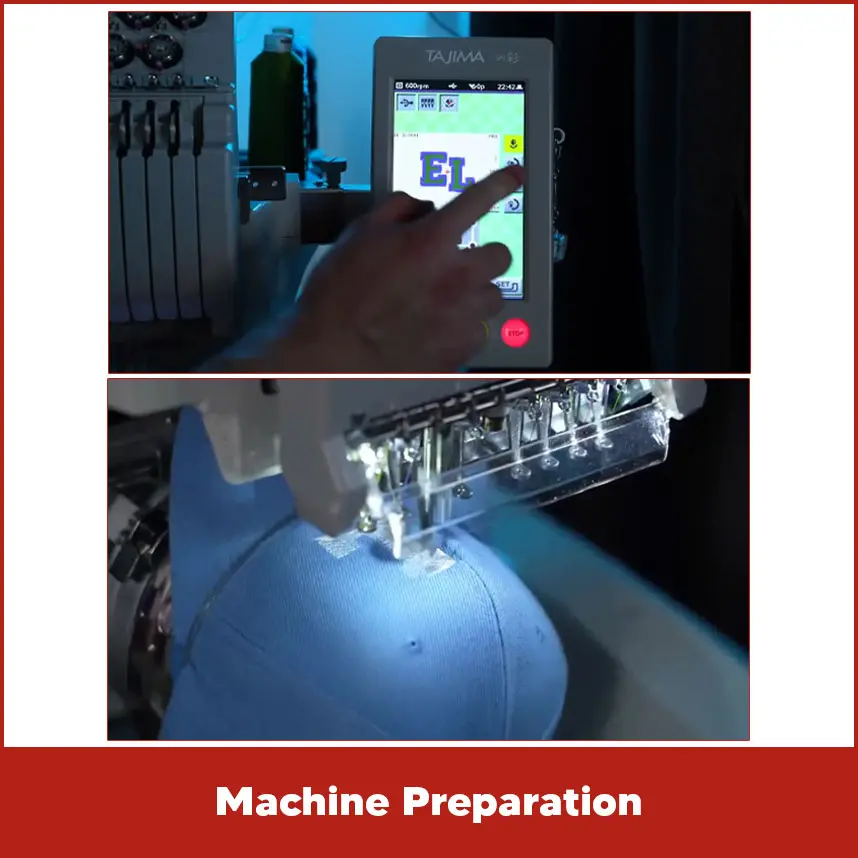
Use a hat embroidery machine with a proper cap frame. Make sure the frame locks tightly into place. A loose frame causes misalignment.
Keep the cap area clean and smooth before hooping. Pull the sweatband out so the machine does not stitch through it.
Set the cap firmly so the design area stays flat.
Speed and Thread Selection

Run the machine at a moderate speed. A range between 600 to 800 stitches per minute works well for puff embroidery. High speed creates friction and may cause thread breaks.
Use 100% polyester thread. Polyester handles heat better and holds tension well. It also gives bright color and strong coverage over foam.
Please note: Avoid rayon for puff designs because it reacts to heat and may weaken during finishing.
Digitizing for 3D Puff
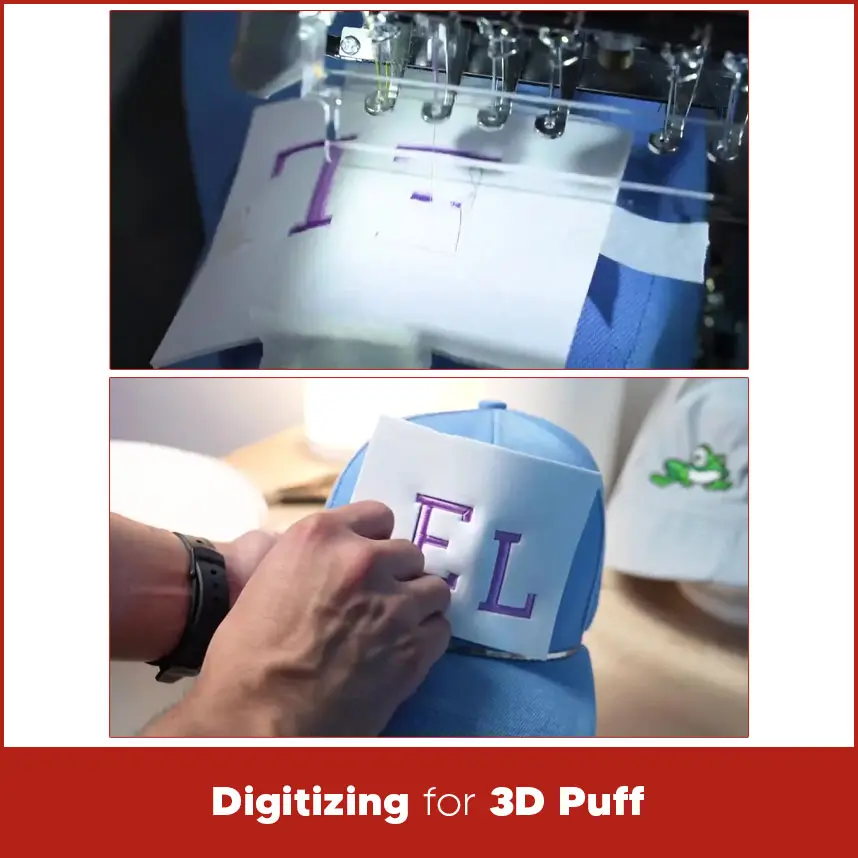
3 puff embroidery requires special digitizing adjustments:
Increase satin stitch width. Letters should be wide and bold.
Avoid thin lines and small details.
Keep column width at least 3 mm.
Adjust density tightly than flat embroidery.
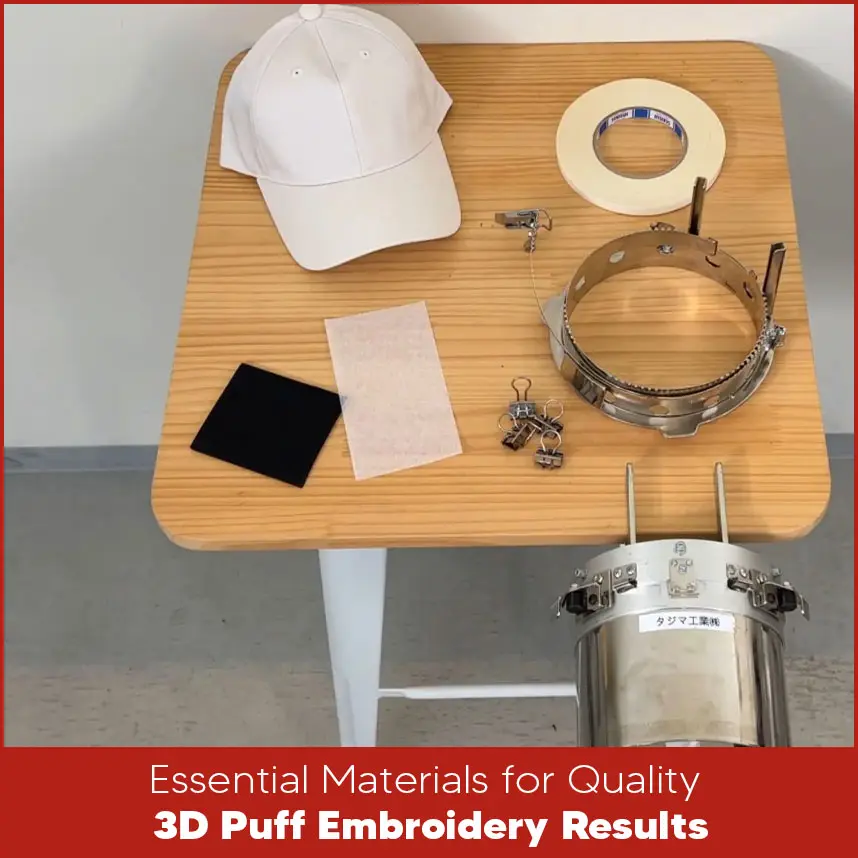
Use a density around 0.2 mm for clean foam coverage. Add proper pull compensation to prevent gaps. Use strong satin stitches for borders and edges. Avoid fill stitches on foam areas. 3D puff works best for: Block letters Bold logos Simple shapes Avoid: Small text Fine details Complex curves Keep design height under 2.5 inches for standard caps. Foam placement and stitch order determine the final look. Use urethane embroidery foam. Place it exactly where the puff area sits. Secure it with small pieces of double-sided tape so it does not shift. Do not cover areas that do not require puff. Proper sequencing protects the foam and create raise. Start with a light underlay stitch around the contour. This creates a baseline for foam placement. Insert a stop code during digitizing. The machine will pause after sewing the outline. This pause shows exactly where to place the urethane foam. If you forget to insert the stop code, you will miss the correct timing. After placing the foam, restart the machine. Running stitches hold the foam in place. Satin stitches then cover the foam completely. The top stitches must cut the foam edges cleanly. After embroidery finishes, tear away the extra foam carefully. Pull it away from the edges slowly. Use mild heat from a hair dryer to shrink small foam pieces. Keep a distance from the thread. Polyester thread melts if exposed to direct heat. Check for: Loose threads. Uneven edges. Gaps in satin columns. Trim cleanly. A sharp blade helps in tight areas. Follow these technical steps carefully: Insert a stop cord to place the foam Insert a stop code that pauses the machine after sewing the contour. This shows where to place urethane foam. Insert stitches to hold down the urethane foam. Add running stitches that secure the foam before the satin stitches begin. Insert stitches to cut urethane on end faces. Use satin stitches along the edges to cut the foam cleanly. Change thread density to 0.2 mm for sharp cutting. You need: A cap A cap frame Foam Stabilizer Polyester thread Sharp needle Use high-density embroidery foam made for machine embroidery. It tears cleanly and holds shape. 3 mm foam works best for most caps. 6 mm foam creates extra bold effects but needs stronger digitizing. Match foam color with thread color. If thread shifts slightly, matching foam prevents visible gaps. Buy foam from embroidery supply stores. Choose foam made for industrial embroidery use. Use 100% polyester thread. It handles friction and heat better than rayon. Use 80/12 sharp needle. 75/11 also works for lighter materials. Sharp needles cut through foam cleanly. Tearaway Stabilizer Best for standard structured caps. Easy removal. Use for soft caps or mesh areas. Gives extra stability. Use as topper on mesh caps. Keeps stitches from sinking. Fix non-woven fabric to the cap frame using double-sided tape. Place the cap on top. Pull out sweatbands so the machine does not stitch them together. Use small and controlled strips of double-sided tape to hold the non-woven backing and foam in place. Place the tape along the edges of the stitching area, not inside the main design zone. This keeps the surface smooth and flat. A firm hold prevents shifting during stitching. When the cap stays stable, the stitches land exactly where they should. Proper taping improves alignment and reduces the risk of uneven borders. Use embroidery clips to secure the cap tightly on the cap frame. Place the clips on both sides so the fabric stays stretched and balanced. Clips prevent movement while the machine runs at high speed. Even slight movement can distort satin columns in 3D puff embroidery. Strong support protects stitch accuracy and keeps the raised letters sharp and even. Place the cap frame carefully onto the embroidery machine arm. Slide it into position and push it forward until you hear or feel a click. The click confirms that the frame has locked securely. Do not force the frame into place. A properly locked frame keeps the cap stable during stitching and prevents needle strikes or shifting during operation. Check the design orientation before you begin stitching. Caps usually embroider in reverse direction, so rotate the design 180 degrees at the control panel if needed. If the design was already rotated during digitizing, skip this step. Always confirm the orientation on the screen to prevent upside-down embroidery. Use the tracing function to test the design area. Watch the needle path closely and make sure it does not hit the cap frame. Tracing protects both the needle and the frame and prevents costly mistakes. After completing all setup steps, start the embroidery machine. Stay near the machine during the first few stitches. Watch thread tension and listen for unusual sounds. Early monitoring helps you catch problems before they damage the design. The machine will pause automatically after sewing the outer contour of the puff area. This pause happens because you inserted a stop code during digitizing. The stop allows you to place the foam at the correct moment. If you forget to insert the stop code, the machine will continue stitching and you will lose the correct timing for foam placement. Proper data preparation prevents this issue. Place the urethane foam directly inside the stitched outline. Align it carefully with the contour line. Use small pieces of double-sided tape to secure the foam so it does not shift. Proper placement ensures full coverage and clean raised structure. Misalignment at this stage will affect the final shape. Remove the excess urethane foam slowly and gently. Pull it away from the edges without tearing the stitched border. If small foam pieces remain, apply light heat using a hair dryer. Keep a safe distance to avoid damaging polyester thread. Controlled heat melts small foam fibers and leaves the edges clean and sharp. Restart the machine after placing the foam. The machine will run holding stitches first. These running stitches secure the foam firmly in place. Next, satin stitches will cover the foam completely. The edge stitches cut the foam cleanly along the borders. Proper density and sharp needle penetration create smooth edges and strong height. When the embroidery finishes, remove the cap from the frame carefully. Inspect the edges and surface of the design. Check for gaps, loose threads, or uneven satin columns. If the top or bottom section looks uneven, adjust the cap frame alignment before the next run. Correct positioning improves future results. 3d puff embroidery settings for hats require correct digitizing, proper foam thickness, strong satin stitches, controlled speed, and stable hooping. Every step matters. If stitch density is weak, foam shows. If stop code is missing, foam placement fails. If speed is too high, thread breaks. Clean structure and correct machine setup produce bold raised embroidery that looks professional and durable. If you want expert hat digitizing without trial and error, DigitizingUSA is ready to help. We prepare 3D puff designs carefully. We balance stitch density, set proper stop codes, and adjust foam settings correctly. We deliver quality embroidery digitized designs within your timeline, and we also provide a wide range of embroidery digitizing services at minimal flat rates. Send your hat design today and get clean, sharp 3D puff results that stand outDesign Constraints

Foam Integration and Stitching Phases
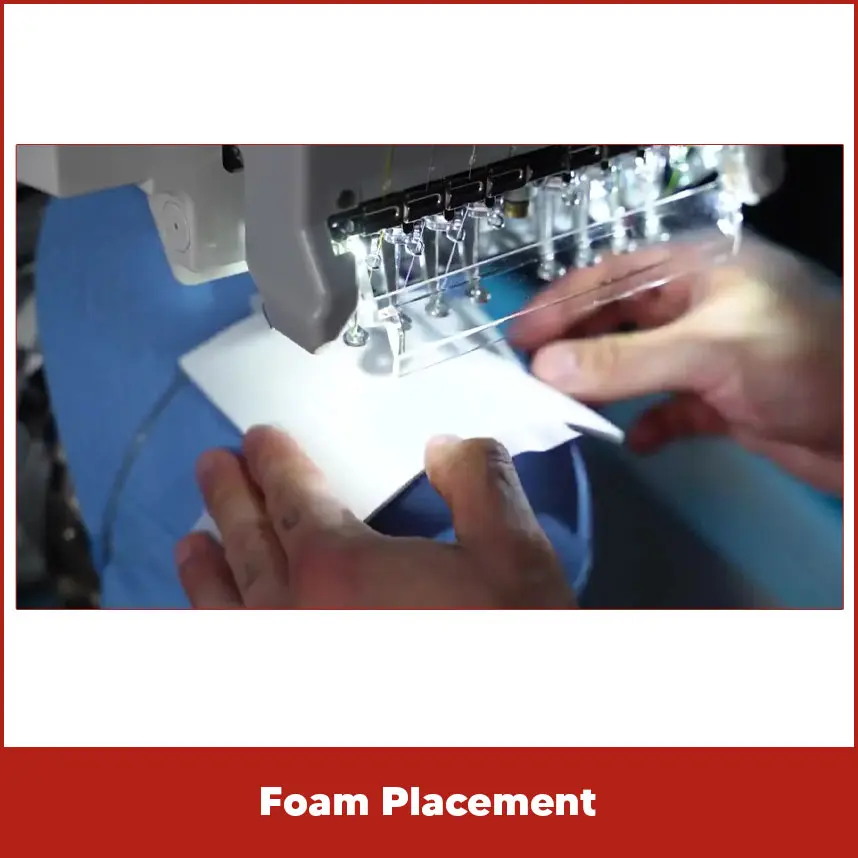
Foam Placement
Three-Phase Stitching Sequence
Underlay
Pause and Place Foam
Puff Section
Finishing Techniques for Professional Results

Foam Removal
Heat Finishing
Final Touches
Key Points for Digitizing
Essential Materials for Quality 3D Puff Embroidery Results
Foam Selection: Types, Thickness, and Color Matching
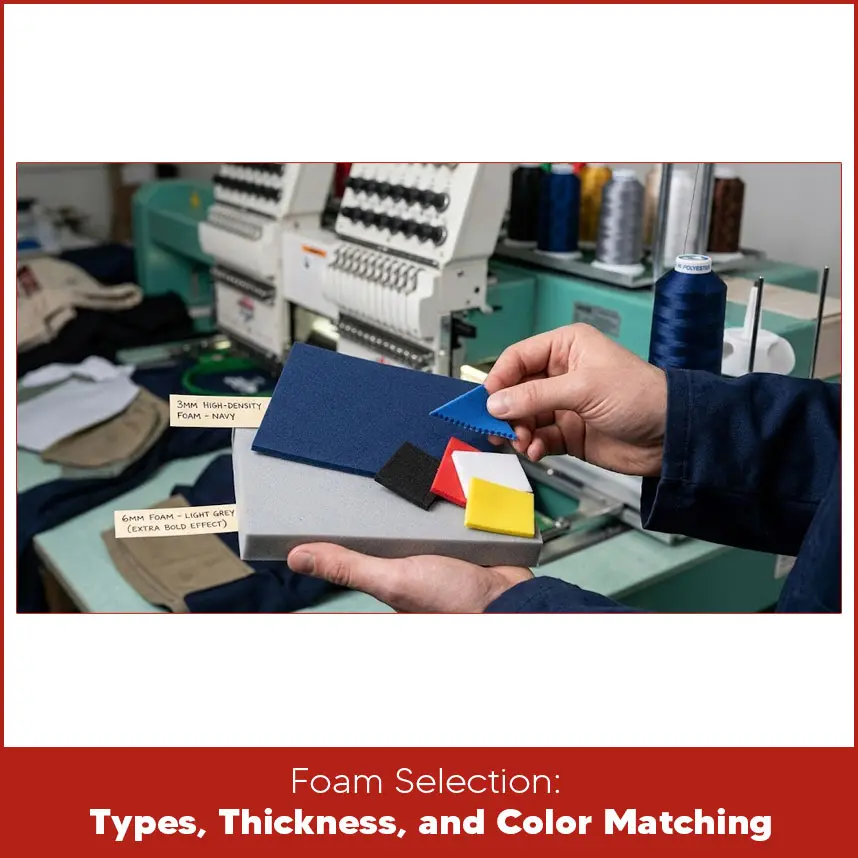
Foam Types & Density
Thickness Matters
Color Coordination
Sourcing Recommendations
Quick Reference Table: Foam Choices
Threads, Needles, and Stabilizers
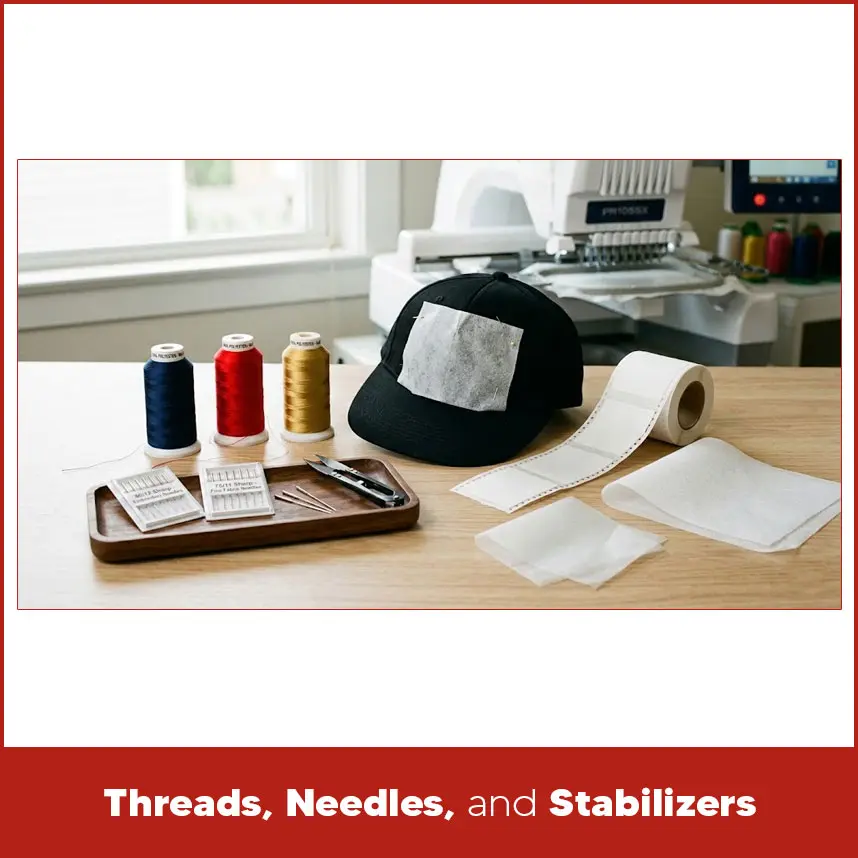
Thread Selection
Needle Choice
Stabilizer Smarts
Cutaway Stabilizer
Water-Soluble Stabilizer
Quick Reference Table: Threads, Needles, and Stabilizers
Non-Woven Fabric and Cap Setup
Double-Sided Tape
Clips
Set the Cap Frame on the Embroidery Machine
Adjustment at the Control Panel
Starting Embroidery Machine
Paused Due to Stop Code
Place the Urethane Foam on the 3D Point

Key Point for Cleanly Peeling Off Urethane

Start Sewing Again
Embroidery Processing Completed
Summary


