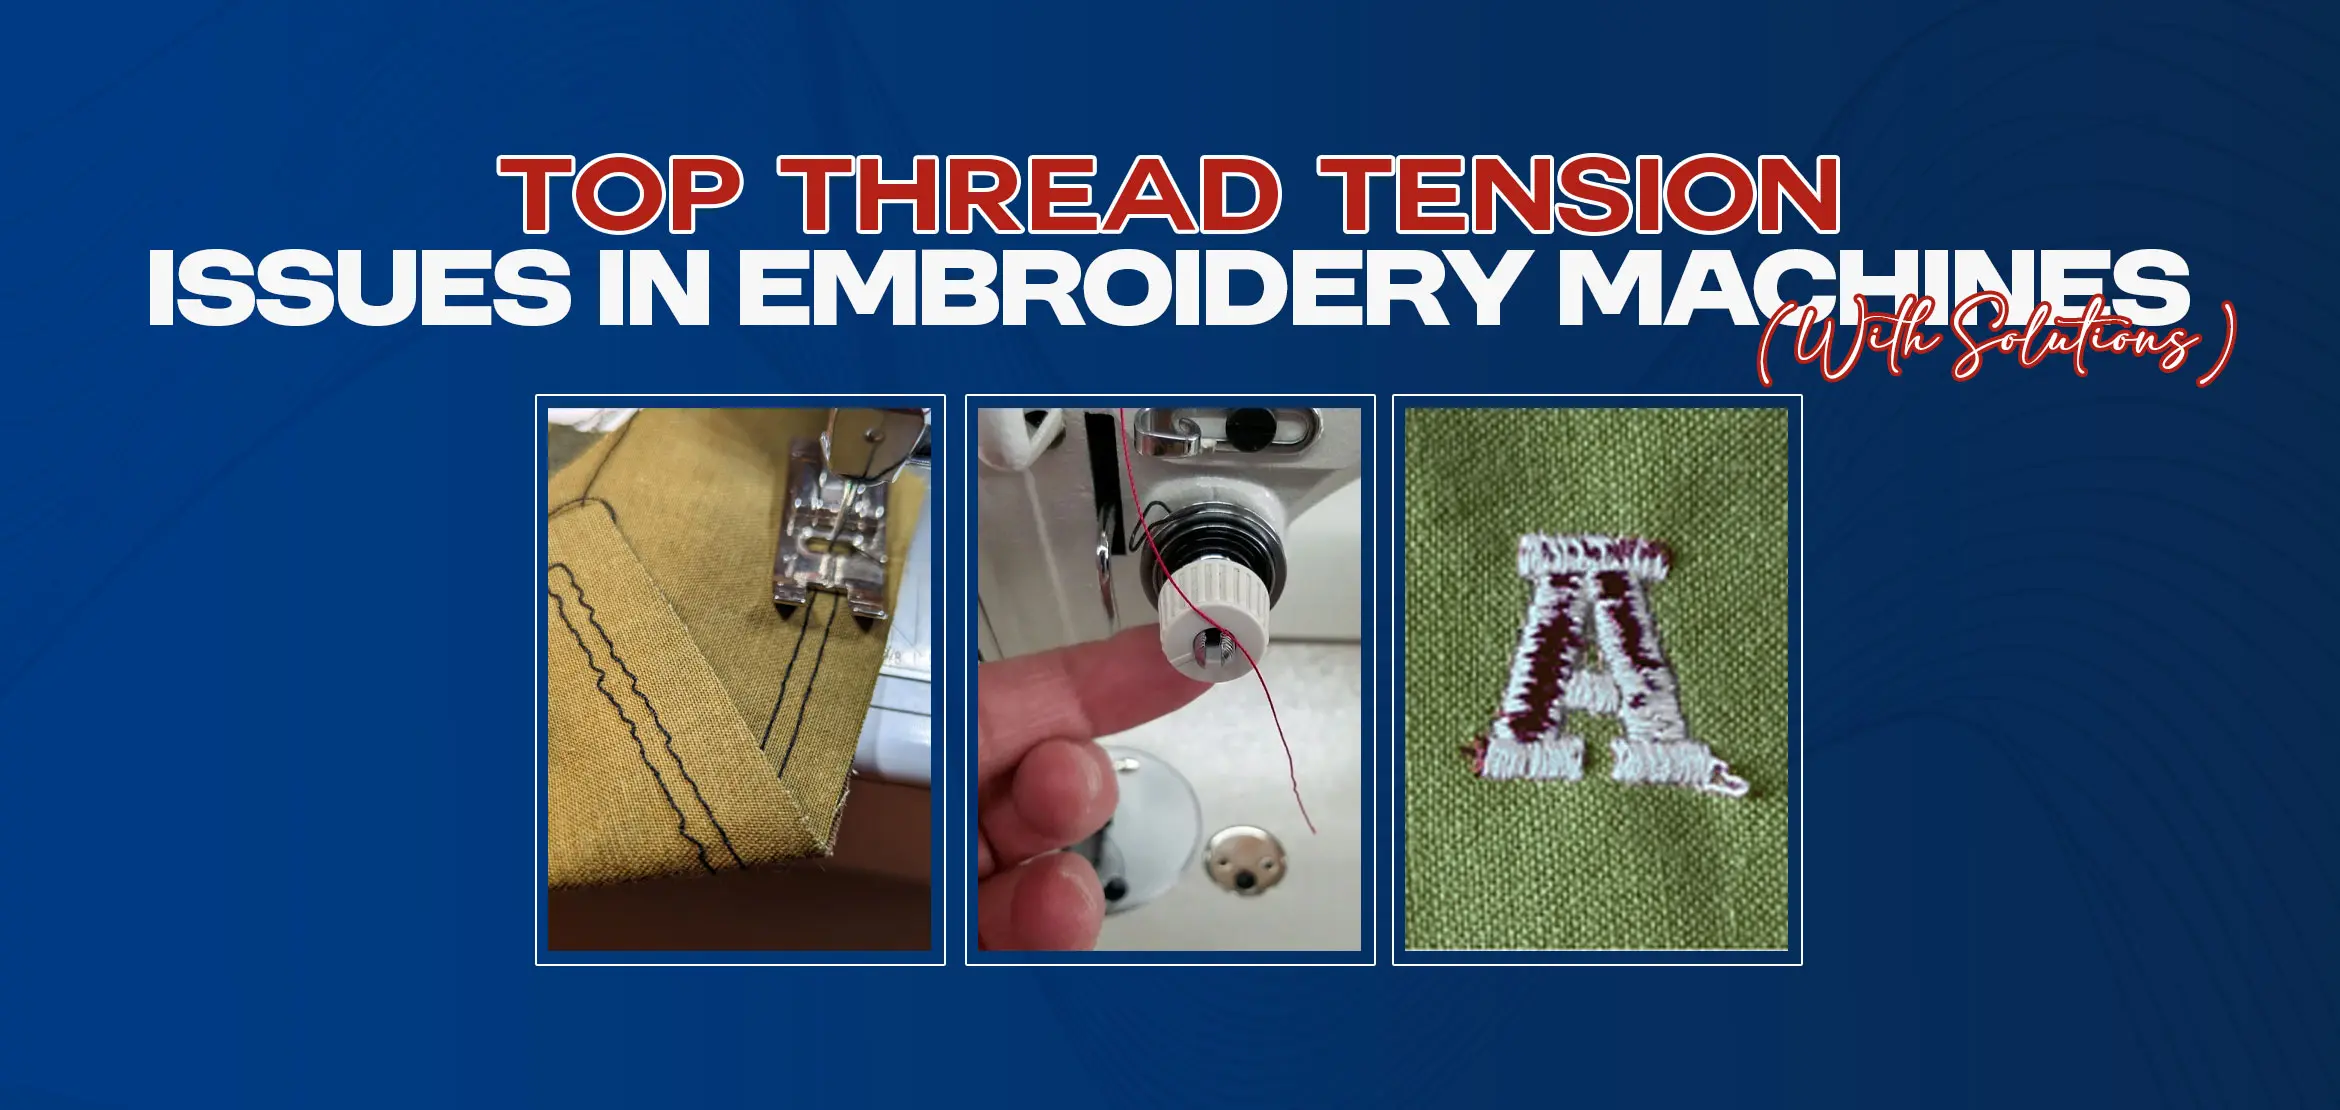
Top Thread Tension Issues in Embroidery Machines (With Solutions)
Table Of Content
- Why Thread Tension Matters in Embroidery Machines?
- Problem 1: Upper Thread Tension is Too Tigh
- Solution
- Problem 2: Upper Thread Tension is Too Loose
- Solution
- Problem 3: Uneven Tension Between Upper and Bobbin Thread
- Solution
- Problem 4: Bobbin Thread Showing on Top of Fabric
- Solution
- Problem 5: Thread Breaking Frequently During Embroidery
- Solution
- Problem 6: Puckered Fabric After Stitching
- Solution
- Problem 7: Skipped Stitches or Uneven Stitch Quality
- Solution
- Problem 8: Metallic or Specialty Threads Causing Tension Trouble
- Solution
- Problem 9: Machine-Specific Tension Problems (Brother, Janome, etc.)
- Solution
- How to Test and Balance Thread Tension Before Every Project?
- Summary
When you start embroidery projects and are excited to see it coming to life but then the thread starts to bunch, loop or break on the fabric. It makes you feel frustrated, especially when you have already re-threaded the machine, changed the needle or checked the bobbin many times. Most of the time, this happens because the thread tension is not set correctly. These issues spoil your mood, right? But no worries guys, we bring this guide for you.
This guide will cover common embroidery machine thread tension issues & their solutions. These steps are easy and will definitely help you get neat, smooth and professional stitches every time.
Why Thread Tension Matters in Embroidery Machines?
So basically thread tension is like the balance between the top thread from the spool and the bottom thread from the bobbin. When both pull the same volume, they meet right in the middle of the fabric. Your stitches look even and nice on both sides. If the balance is off even a little, the whole design looks bad. Machines run faster and use more types of thread, so these problems show up more. Wrong tension causes thread breaks that waste time and money. It also makes fabric pucker, which ruins projects. Good tension cuts waste by up to 30% and makes your work look professional. Just check it before you start. That small habit saves hours and also money.
Problem 1: Upper Thread Tension is Too Tigh
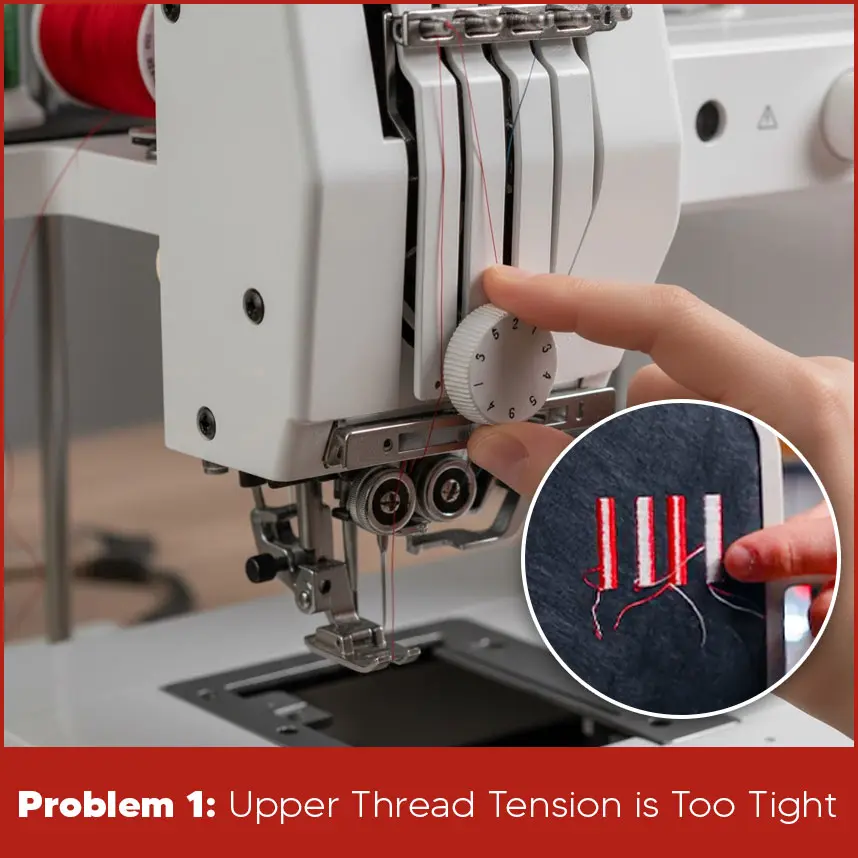
You sew a test piece and look at the back. You see small & tight knots everywhere. That means the top thread is pulling too hard. It drags the bobbin thread up to the bottom side. This causes breaks and tears in thin areas. It usually comes from dust in the tension discs or turning the dial too high without a test.
Solution
Turn off the machine and lift the presser foot first. This lets you rethread without a fight. Pull the top thread out completely. Then put it back through every guide and disc. Make sure it sits flat. Turn the tension dial down one number, like from 4 to 3. Sew a simple square on scrap fabric. Check the back. If knots are still there, turn it down half a number more.
The goal is even stitches with no more than one third bobbin thread showing on the bottom. Brush the discs clean, too. If it does not help, change to a new size 75/11 needle. You will see smooth stitches right away.
Problem 2: Upper Thread Tension is Too Loose
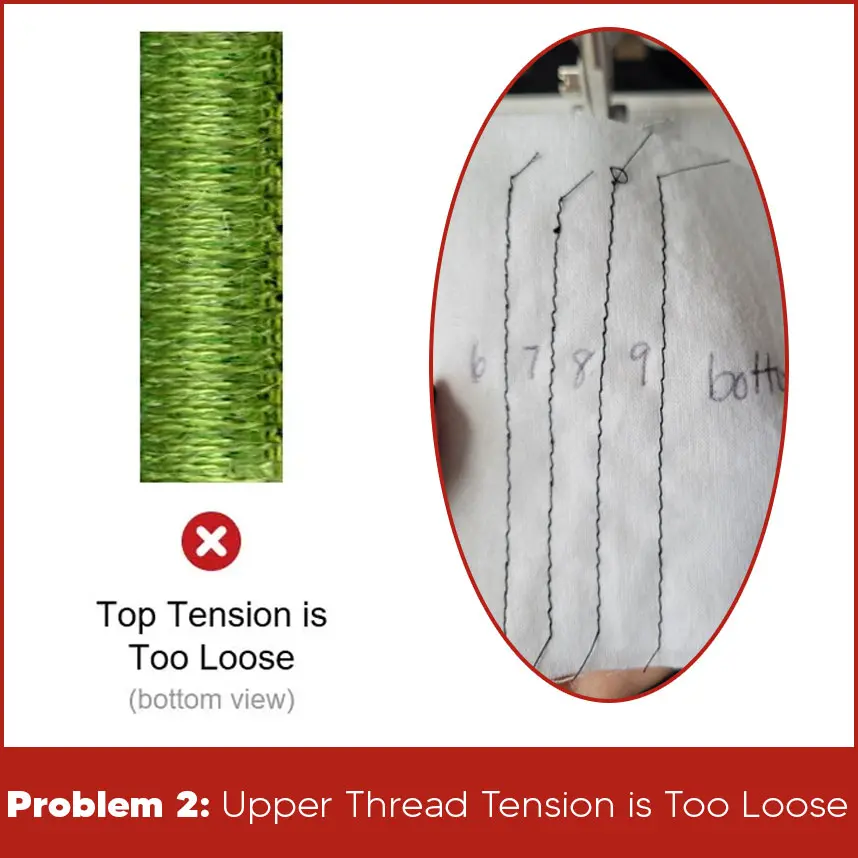
Now the bottom has big loops of the top thread. The design looks messy and pulls the fabric out of shape. This usually starts after you change the thread or if the spool cap is loose.
Solution
Lift the presser foot and rethread the top. Check that the spool sits straight. Turn the dial up one number, like from 3 to 4. Sew a test square. Look at the bottom. More loops means turn it up a bit more. If the fabric puckers, turn it back down. Both threads should lock in the middle.
Make sure the bobbin is not overfilled, 80 to 90% is best. Sew at 600 stitches per minute. The loops will stop.
Problem 3: Uneven Tension Between Upper and Bobbin Thread
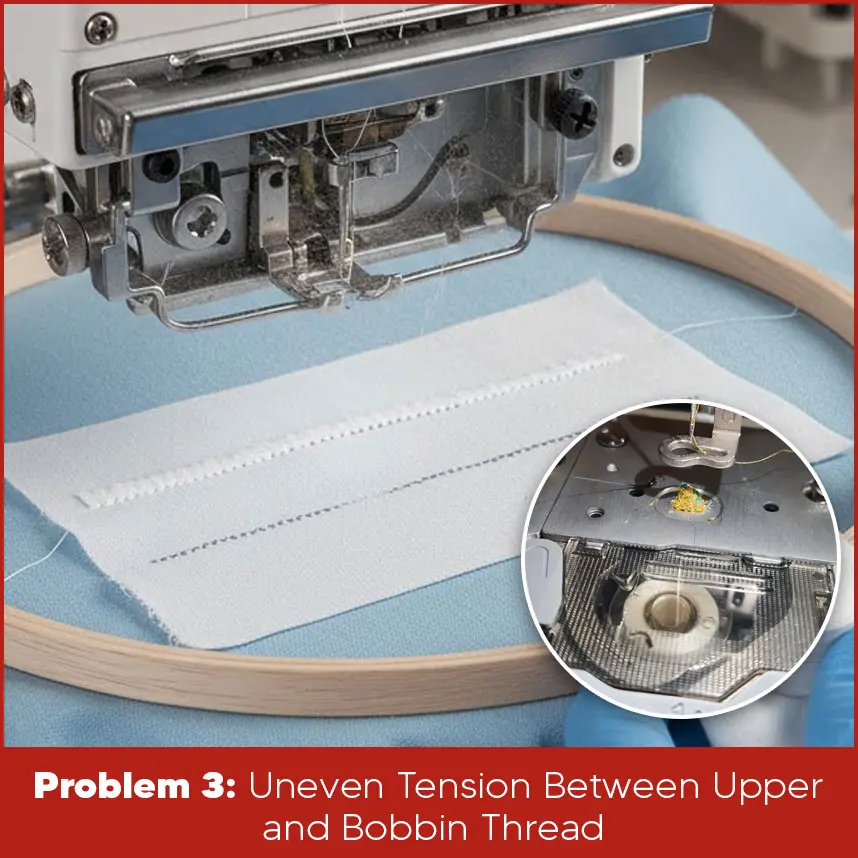
One thread pulls harder than the other. Stitches look thick in some spots and thin in others. This comes from different thread weights or a dirty bobbin case.
Solution
Take the bobbin out and wipe the case with a dry & clean cloth. Wind a new bobbin at an even speed. Use 40-weight thread on top and bottom for most work. Sew a zigzag line for a test. Flip the fabric. If the top thread covers more than two/thirds of the back, loosen the top dial a little. If the bobbin thread does most of the work, turn the bobbin screw clockwise just a little turn. Test again until they balance.
Problem 4: Bobbin Thread Showing on Top of Fabric
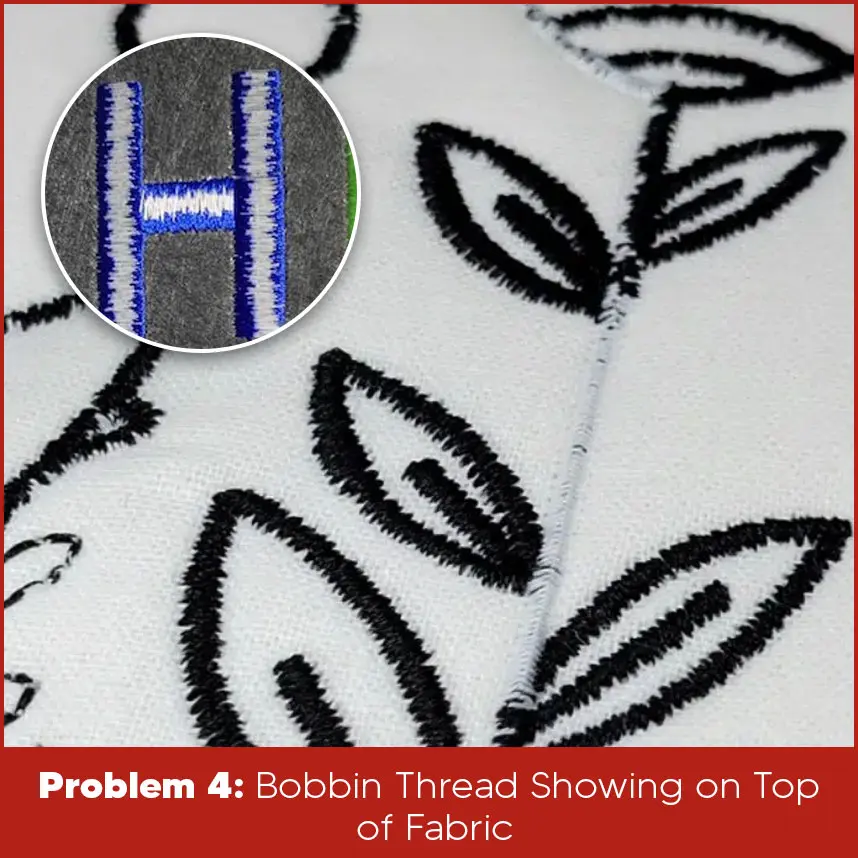
The bobbin thread is showing on the top of the design. It looks bad, especially on light fabrics.
Solution
The bobbin is too tight. Take the case out and turn the small screw counterclockwise a quarter turn.
Test after each change. Rethread the top fully. Clean the area under the needle plate.
Use pre-wound bobbins set to 25-35 grams for best results.
Slow to 500 stitches per minute if needed.
Problem 5: Thread Breaking Frequently During Embroidery
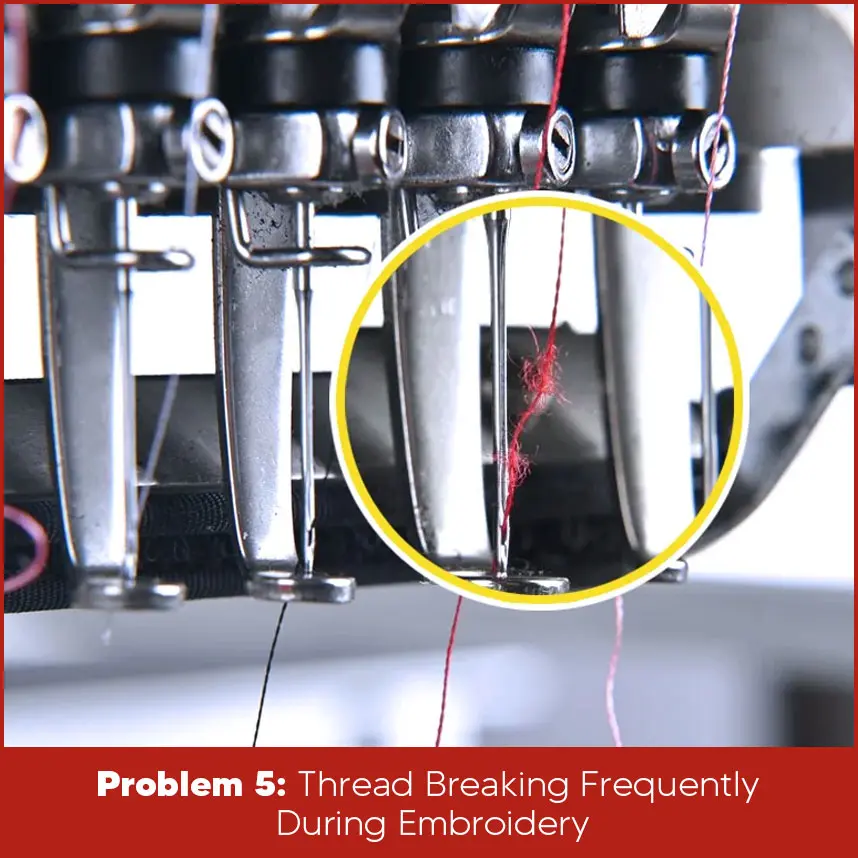
Your thread breaks right in the middle of a big design. This happens most on long runs. The machine keeps stopping. You lose the thread and time. It seems like the thread just breaks or stops working. Most times the top tension is too tight. Or the needle is old and has a tiny rough spot that cuts the thread. Old thread gets dry and weak. The spool spins wrong and twists the thread. All these little things add up and make the thread break over and over.
Solution
Feel along the top thread path for snags. Set top tension to 3-4. Change to a new 80/12 needle. Use fresh polyester thread. Wind bobbins slowly. Oil every 10 hours.
Problem 6: Puckered Fabric After Stitching
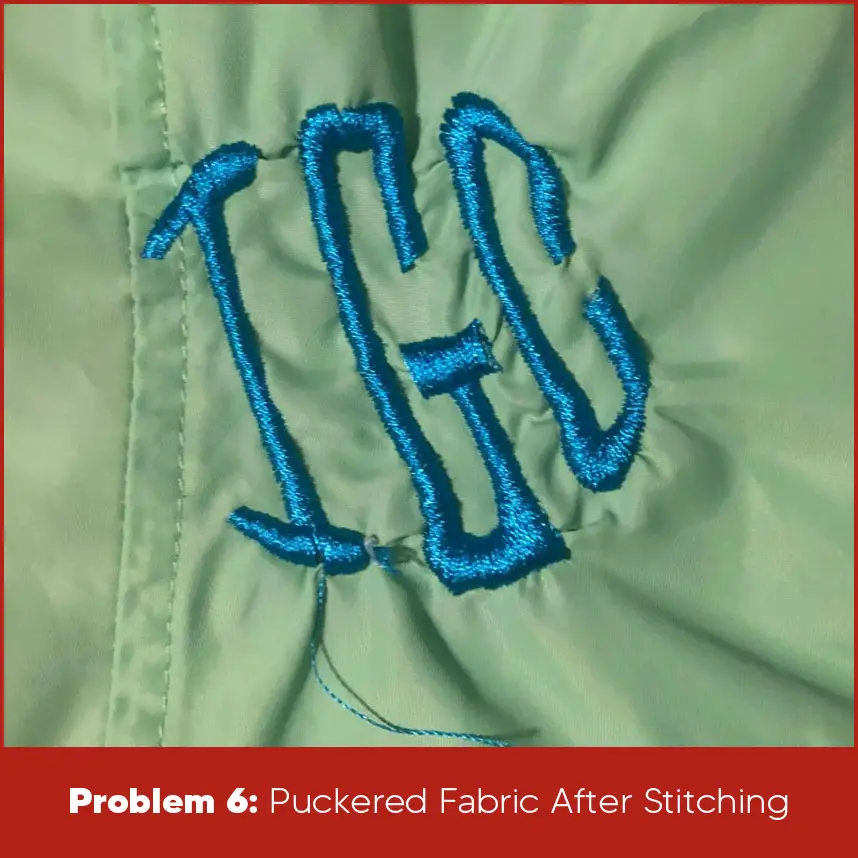
You take the hoop off and the cloth looks like an old wrinkled shirt. The design pulls the fabric in funny ways. Knit shirts and silk do this the worst. You spent hours stitching and now it looks bad. The top tension pulls too hard. Or you forgot the stabilizer under the cloth. The hoop was too tight or too loose. Fast speed pushes the fabric around. When you wash it later, the cloth shrinks differently from the stitches. Everything bunches up.
Solution
Turn top tension down to 2.5 or 3.5 for stretchy cloth. Always put cut-away stabilizer under the fabric before you hoop. Spray a little sticky on the stabilizer so the cloth stays flat. Hoop the fabric so it’s tight and smooth but not pulled too hard. Set the speed to 400 stitches per minute. Sew a test on the same cloth. Take it out and press with a warm iron, no steam. Still wavy means add one more layer of stabilizer. Use tear-away on top for thick designs. When you finish, press again from the back. Your clothes stay smooth and flat every time.
Problem 7: Skipped Stitches or Uneven Stitch Quality
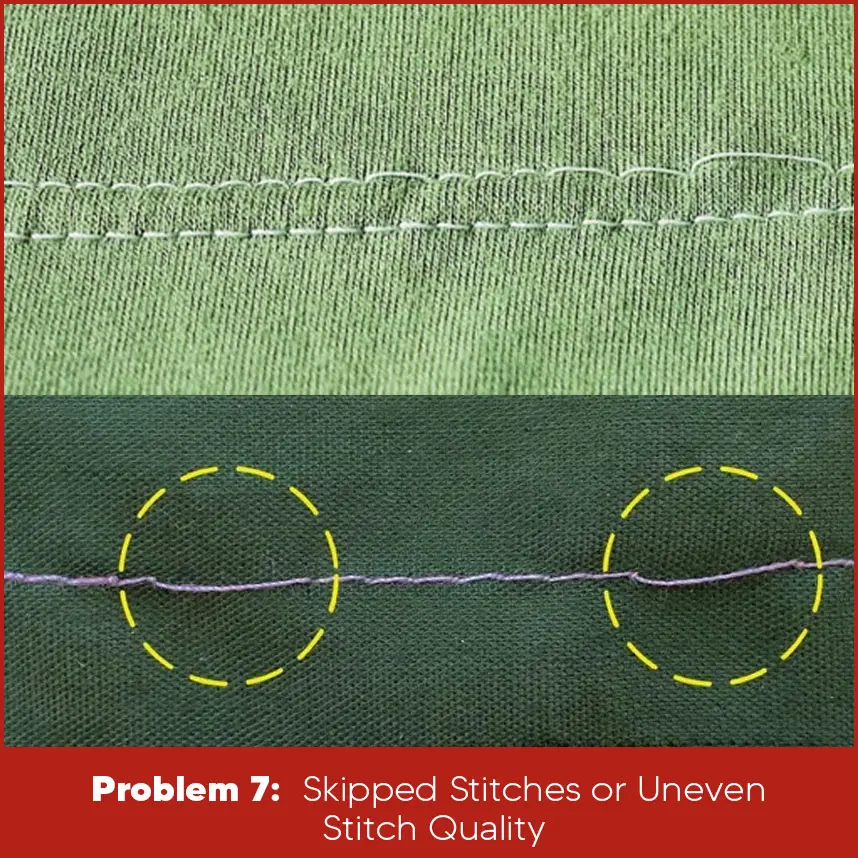
You look closely and see empty spots with no thread. Some lines are thick and some are thin. Outlines that should be straight look wavy. Dust and lint stop the hook from grabbing the thread correctly. Loose top tension lets the loop get away. Thick cloth needs a bigger needle but you used a small one. The machine runs too fast for the fabric. One skipped stitch ruins the whole look.
Solution
Open the bobbin and brush out every bit of dust. Dust causes most skips. Blow gently or clean properly. Change the needle every 4 to 6 hours. Use size 75 for thin cloth and 80 for thick. Lift the presser foot and rethread the top all the way. If you see loops on the bottom, increase the top tension by one number but don’t go over 4. Sew a zigzag line on scrap. Every spot filled means good. Tighten the bobbin screw a tiny turn if bottom thread shows too much. Test again. Clean under the needle plate weekly. Your stitches stay full and even.
Problem 8: Metallic or Specialty Threads Causing Tension Trouble
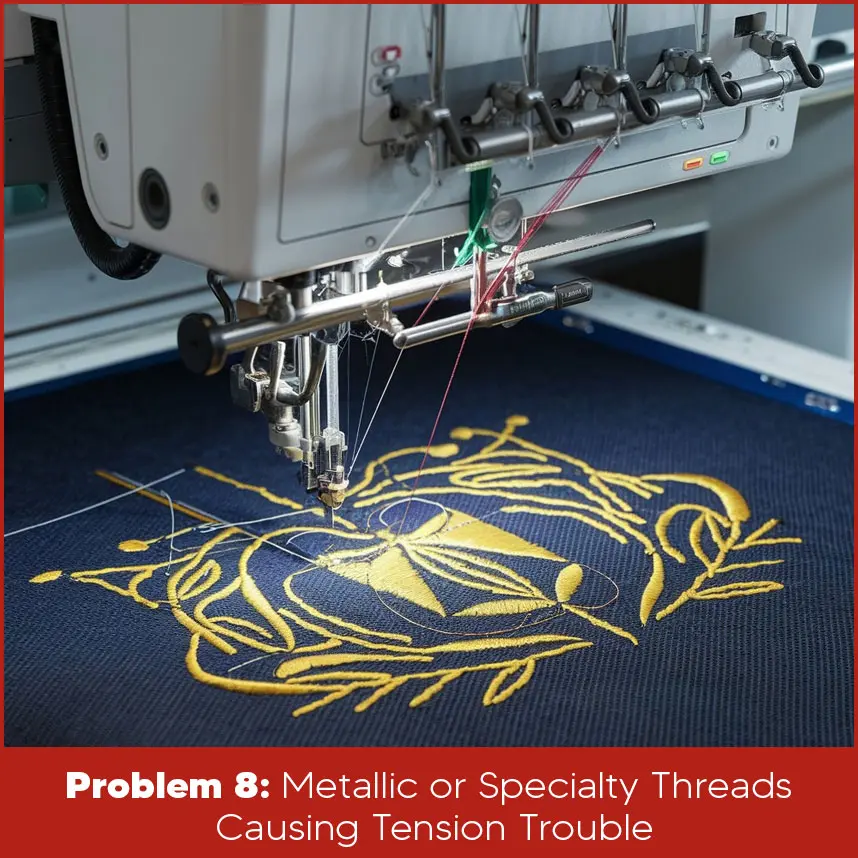
Shiny metal thread looks pretty for two minutes then breaks. Rayon puffs up and jams. Polyester drags and makes knots. You want sparkle but get breaks and mess. Metal thread does not like tight tension and fast speed. It twists easily. Cheap thread has weak spots. The needle eye is too small and rubs the shine off. You keep stopping to fix it and lose the fun.
Solution
For metal thread, turn top tension to 1 or 2. Slow the machine to 350 or 400 stitches per minute. Use a thin 60 weight bobbin thread. Put the spool sideways so thread pulls off the side not the end. Use a new metal needle size 75/11 with big eye. Sew short test rows first. For rayon set tension 3 to 4 and use a light needle. For polyester, keep normal 40 weight thread at tension 3 to 4. Clean the tension discs before you start. Sew at medium speed. Change needle after completing a large project. Your threads move smoothly without harm or breaks.
Problem 9: Machine-Specific Tension Problems (Brother, Janome, etc.)
.webp)
Your Brother machine works well one day and loses the next.Janome sticks when dust gets in the spring. Every brand acts a little differently. You follow the book but still get loops. Brother bobbins loosen if you bump them. Janome upper discs grab lint fast. Oil dries out and parts stick. You clean one machine and forget the other. Small brand tricks make big problems if you miss them.
Solution
For Brother clean the silver tension discs every week with a soft brush. Start top tension at 3 for most designs. Oil the hook once a month, where the book shows. Test on scrap every time you start. For Janome, check the small spring bar above the needle. Wipe it clean and loosen a little if thread sticks. Use bobbin fill thread in the bobbin. Oil moving parts monthly. For all machines read the manual charts.
Clean lint after every shift. Oil every 10 hours. Test tension monthly with the H shape. Your machine stays happy and stitches perfectly every day.
How to Test and Balance Thread Tension Before Every Project?
Use the H test: Sew a 1-inch H (light top thread, dark bobbin). Cut the middle crosses. Pull threads. Top breaks first? Loosen top. Bobbin first? Tighten bobbin screw. Drop test bobbin case: It should fall 1 inch when you shake. Five minutes saves the day.
Summary
These are the main thread tension issues and fixes. Balance top and bobbin, clean often, test always. Your embroidery will look great. If you still have trouble, then no worries, Digitizing USA is here. We provide custom embroidery digitizing services at minimal flat rates, no extra or hidden charges, we also provide unlimited revisions until you are satisfied, because your satisfaction matters the most to us. So say goodbye to the problem and hello to Digitizing USA. Contact us now.


