
Common Challenges in Cap Embroidery and How to Solve Them
Table Of Content
- 12 Most Common Challenges in Cap Embroidery and Their Solutions
- Challenge #1: Running Your Machine Embroidery So Fast
- Solution
- Challenge #2: Forgetting About Digitizing
- Solution
- Challenge #3: Improper Hooping
- Solution
- Challenge #4: Not Watching Thread Tension
- Solution
- Challenge #5: Overlooking the Bobbin
- Solution
- Challenge #6: Not Changing Needles Often Enough or Using the Wrong Ones
- Solution
- Challenge #7: Incorrect Placement
- Solution
- Challenge #8: Not Using Backing or Using the Wrong Type
- Solution
- Challenge #9: Not Enough Space
- Solution
- Challenge #10: No Stability
- Solution
- Challenge #11: Misalignment in Design
- Solution
- Challenge #12: Thread Breakage
- Solution
- Summary
Doing embroidery on caps looks easy but the reality is it is so tricky because of their curved surface. A cap is not flat like a shirt. It has seams, a curve and a small space to work on. Because of this, many people even skilled embroiderers face problems when they try to stitch a design on caps.
We have brought this guide for your ease. In this guide, we will cover all common and uncommon challenges that will definitely help you understand the cap embroidery issues you face and how you can fix them easily. Let’s start.
12 Most Common Challenges in Cap Embroidery and Their Solutions
Here are the 12 most common challenges you should avoid. Understand these challenges and give their solutions, they will ease your life so next time you will embroider your caps without challenges. Let’s have a look.
Challenge #1: Running Your Machine Embroidery So Fast
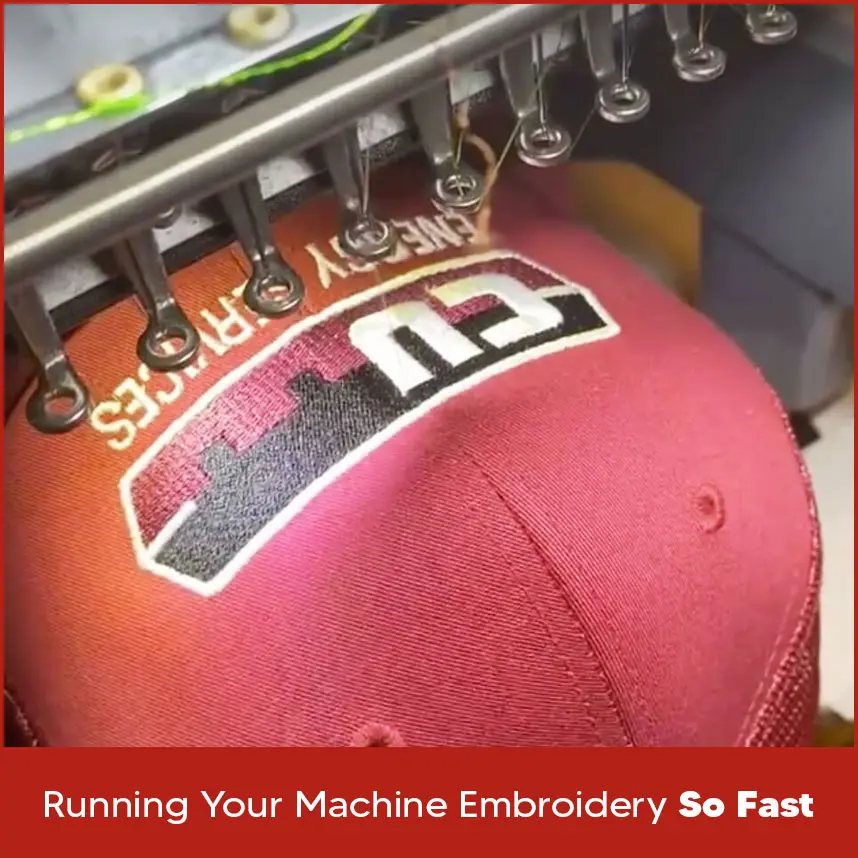
Many people run their machines very fast when stitching caps. Caps have seams and thick spots that need slow, careful work. If the machine moves so fast, the thread may break or skip and the design may not line up well.
Solution
Slow your machine down. For tough caps, keep the speed between 500 and 600 stitches per minute. For soft caps, you can go a little faster but always test first. When stitching over seams, let the needle move slowly so it doesn’t break or pull the thread.
Challenge #2: Forgetting About Digitizing
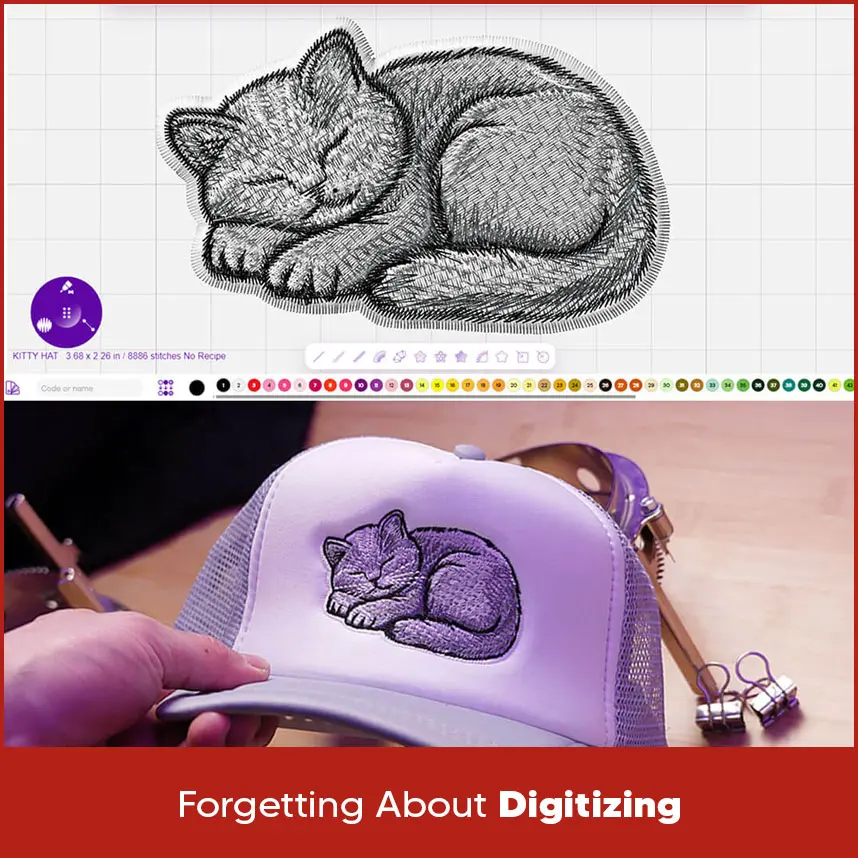
Digitizing is what turns a picture or logo into a file your embroidery machine can stitch. Many people use the same file for flat surfaces and caps but caps are curved so the design needs to be digitized differently. A design that looks good on a T-shirt does not mean it also looks good on a hat.
Solution
When digitizing caps, always start stitching from the bottom center and move upward and outward. This helps the design stay balanced and prevents pulling. Use fewer stitches in curved areas and add underlay stitches for support.
If you feel that cap digitizing is so tricky and you will not handle it, no worries, you can send your designs to Digitizing USA, the most trusted, leading professional service provider that specializes in embroidery digitizing. We always make sure your design stitches perfectly every single time. Feel free to reach out to us for any embroidery digtized designs.
Challenge #3: Improper Hooping
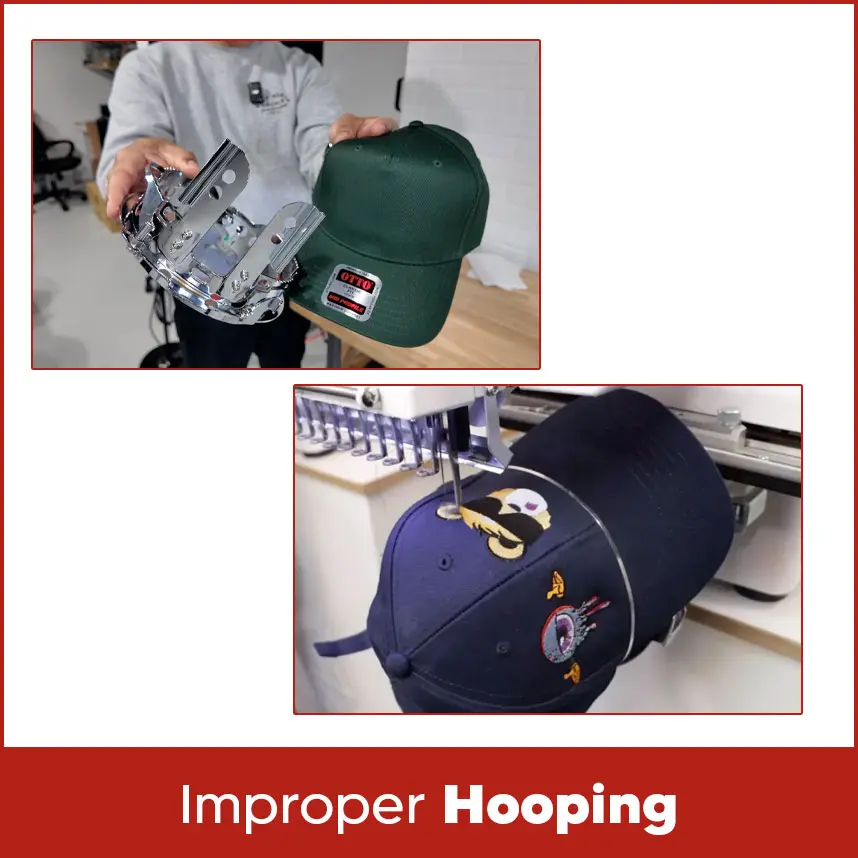
Hooping is one of the most important parts of cap embroidery. If your cap is not hooped correctly, your design can shift, wrinkle or end up looking messy. Caps are curved and thick, which makes them harder to hoop than flat fabrics like shirts. Most of the beginners make the mistake of pulling the cap too tight or leaving it too loose, which causes problems when stitching starts.
Solution
Start by placing your stabilizer in the frame first. It helps keep your cap secure then attach the cap to the hoop. Pull the fabric gently so it feels firm but not stretched. The surface should look smooth without wrinkles or folds. Make sure the center seam of the cap matches the middle of the hoop. You can use small clips or pins to hold any extra fabric behind the frame so it doesn’t get caught.
Before starting your stitching, please double check that the cap is tight and even in the hoop. Taking a few seconds to check & it can save your time.
Challenge #4: Not Watching Thread Tension
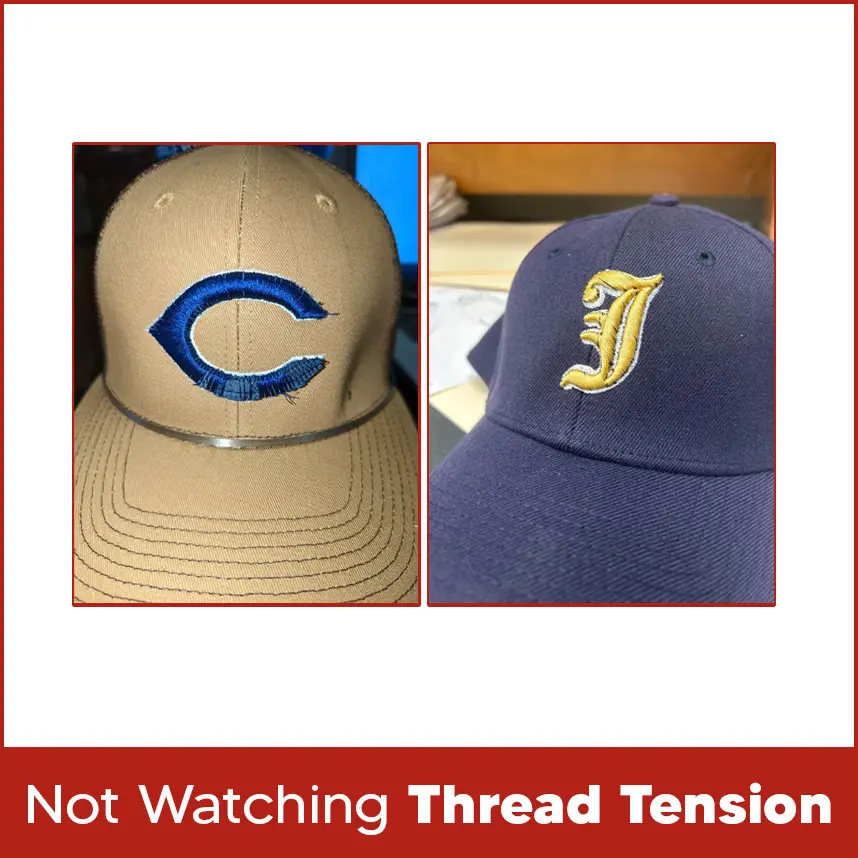
Thread tension controls how your stitches look. If the thread is too tight, the fabric will definitely wrinkle. If it’s too loose, the stitches will look messy. Most of the time people forget to check the tension before starting and that the biggest reason for uneven stitches that are difficult to fix.
Solution
Always test your thread tension before starting your main design. Take a small piece of similar fabric and stitch a few test lines. Look closely at both sides, the stitches should be flat and smooth. If the top thread shows too much on the bottom, loosen it a little. If the bottom thread shows on top, tighten it slightly.
Remember that different threads have different thicknesses so check the tension whenever you change thread colors, brands or materials. This small attention helps make your embroidery neat and professional.
Challenge #5: Overlooking the Bobbin
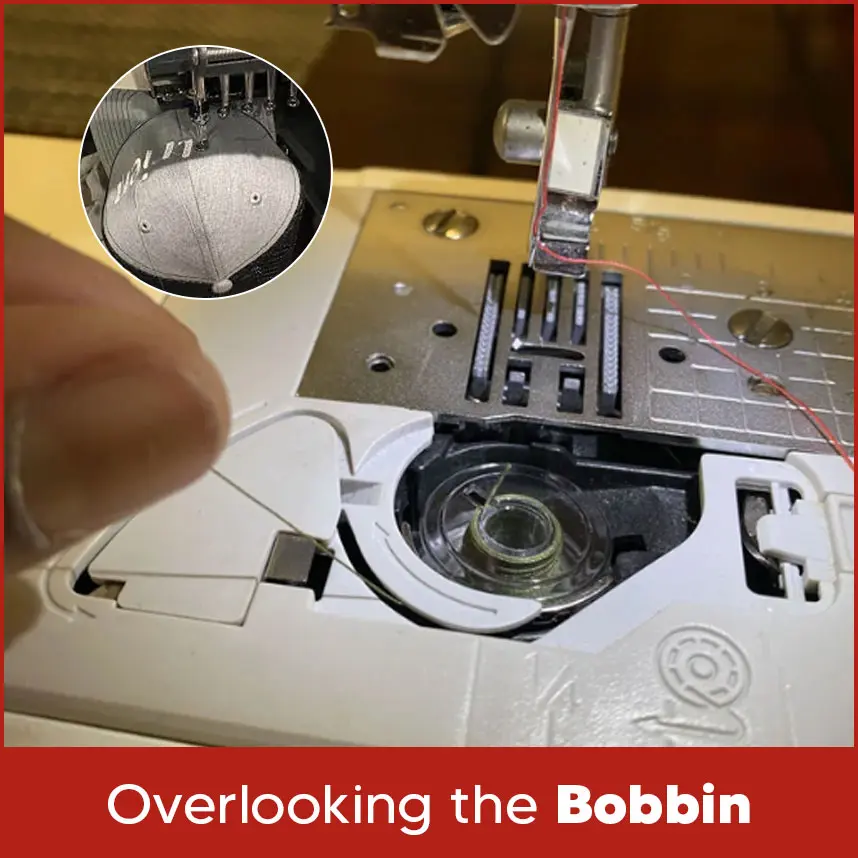
Bobbin is small but it’s a very important part in stitching. Many embroidery problems happen because people do not check bobbin. If it runs out or winds unevenly, your stitches can break or move out of place easily. Sometimes the bobbin runs out in the middle of a project and leaves gaps in the design.
Solution
Always check bobbin first and then start with a bobbin. If it’s running low, stop and replace it before it runs out completely. Try not to remove the hoop when changing the bobbin, as that can shift your cap and move the design.
Keep the bobbin area clean. Dust and small thread bits can create and cause problems. Cleaning the bobbin area regularly helps your machine run smoothly and keeps stitches even.
Challenge #6: Not Changing Needles Often Enough or Using the Wrong Ones
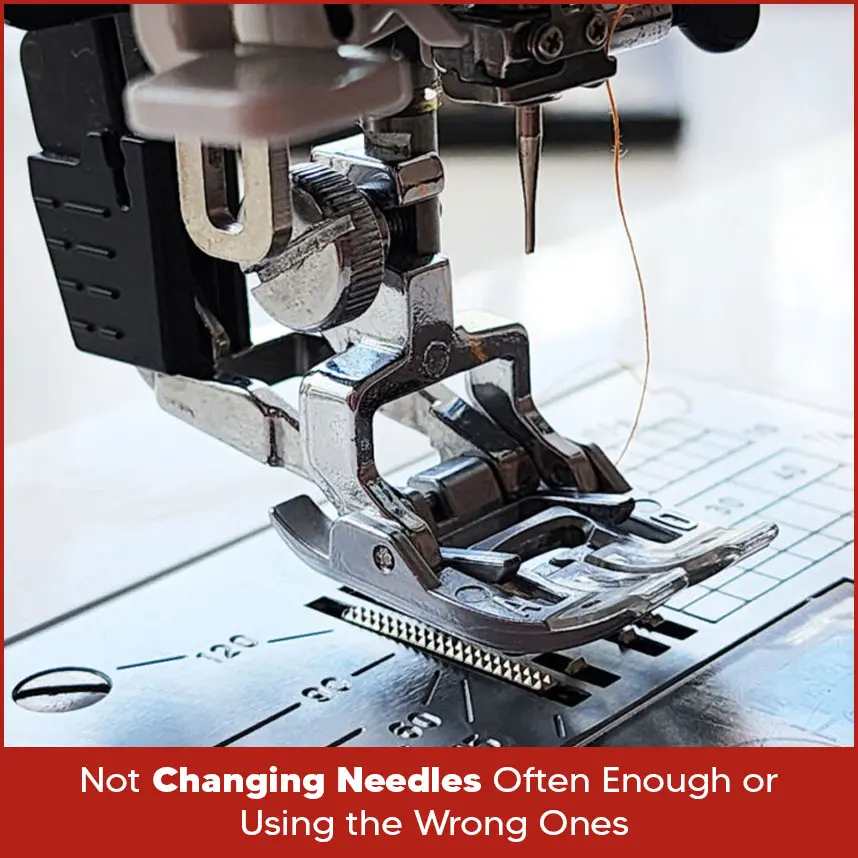
Needles wear out faster than most people think. A dull or bent needle can make holes, skip stitches or break threads. This happens often when working with thick or tough caps.
Solution
Use sharp, strong embroidery needles. For most caps, needle size 75/11 or 90/14 works best. The larger size 90/14 is better for thick fabric while 75/11 works well for lighter caps.
Change your needle every 6 to 8 hours of stitching or sooner if you hear strange sounds, see skipped stitches or notice broken threads. A fresh needle keeps your stitches clean and smooth.
Challenge #7: Incorrect Placement
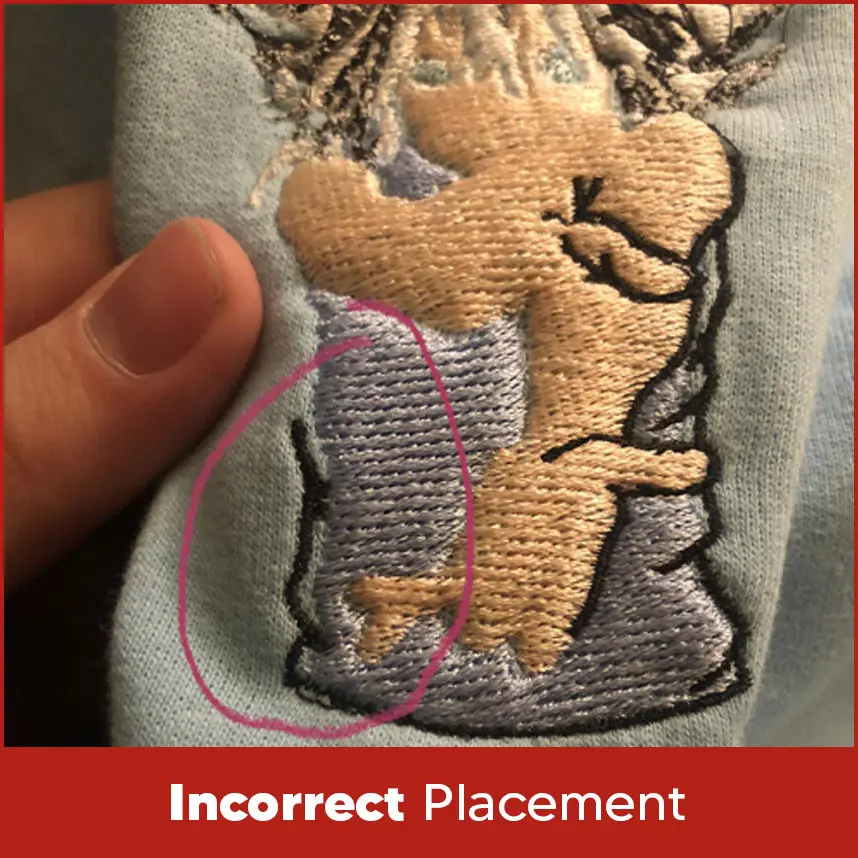
If your design is too low, off-center or too close to the seam, it won’t look right. Even a small shift in placement can make the embroidery look uneven.
Solution
Before starting, use a ruler or measuring tape to find the center of your cap. Mark it with chalk or a washable pen. Keep your design about half an inch above the brim seam to avoid bending or stretching.
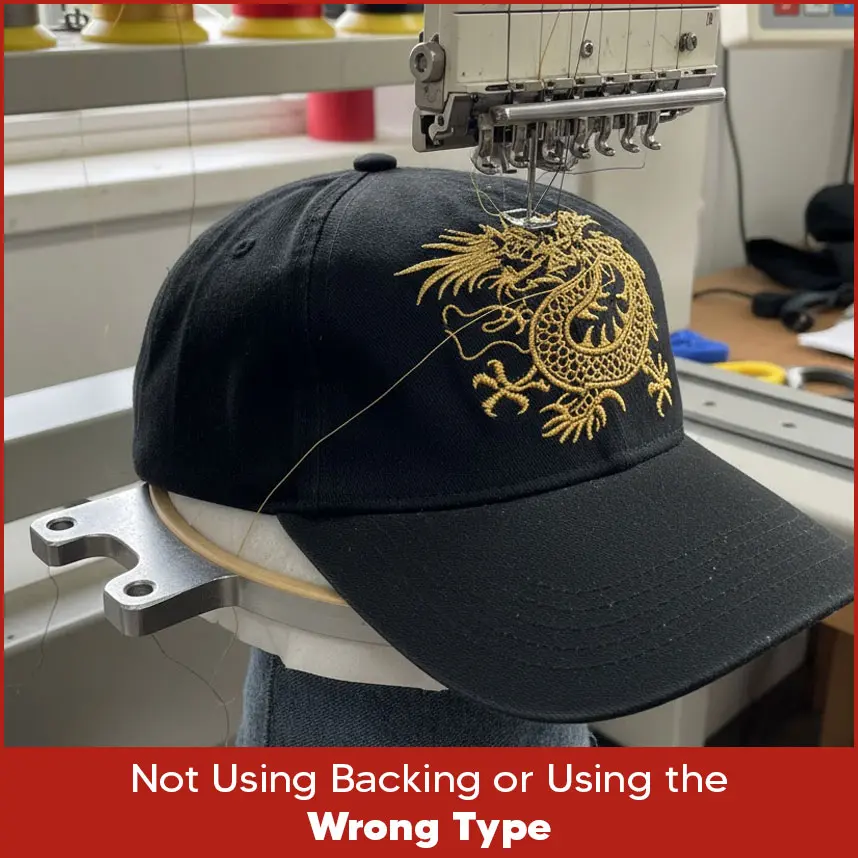
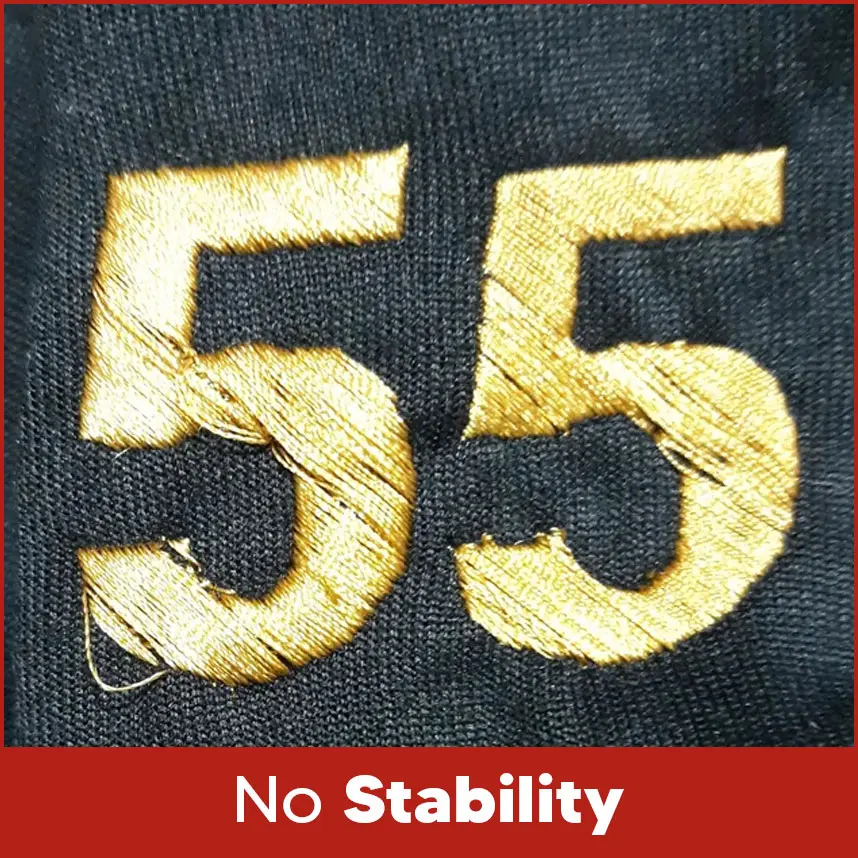
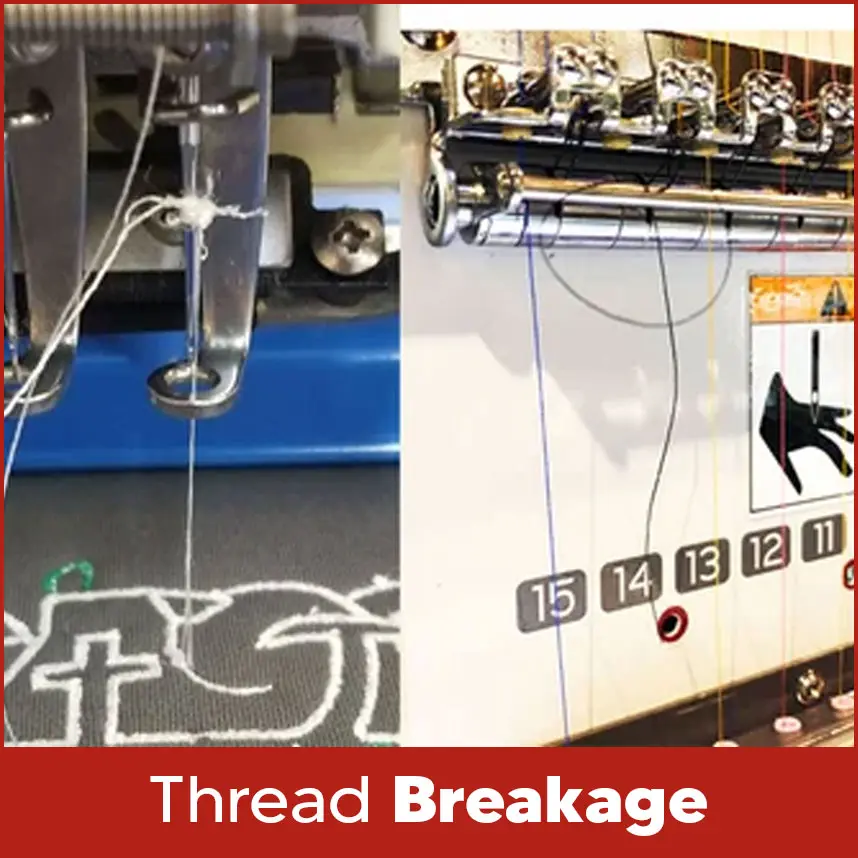
If you’re not sure, print your design on paper and tape it on the cap to test placement. Look from the front and sides to make sure it’s straight. Once everything is done right & you are satisfied, start stitching. Backing keeps your fabric stable while the machine stitches. Without it, your cap can shift or stretch, making the design lose shape. Using the wrong kind of backing can also make the cap too messy or uneven. Use tear-away or cut-away backing made for caps. Tear-away is good for most structured caps because it’s easy to remove. Cut-away gives stronger support and works well on soft or stretchy caps. For thin caps, use two layers of backing. You can also use a little spray adhesive to hold the backing in place before hooping. This stops the fabric from moving while you stitch. Caps have limited space for embroidery. Trying to fit a big or detailed design can cause wrinkles, gaps or distortion. Check your design size before you start. Most caps can fit embroidery about 2 to 2.5 inches tall. If your design is bigger, adjust it. Use bold letters and clear lines. Avoid small text or thin outlines. Before working on the final cap, test your design on a sample one to see how it fits and stitches. This saves time and materials. The design may appear uneven or double-lined if the cap moves during the stitching process. A slight movement can ruin the entire design. Use a basting stitch around your design before starting the main embroidery. It helps keep the cap in position. You can also use temporary spray glue or sticky stabilizers for extra hold. During stitching, stop halfway to check if the cap is still tight. If it’s loose, fix it before continuing. A stable setup gives you clean and even designs. If your finished design looks tilted or off-center, it usually means the cap wasn’t straight in the hoop. Misalignment is common when stitching near seams or curved parts. Make sure your cap is set correctly in the hoop before you start. Line it up with washable pen markings or chalk. Designs should not be placed across seams as this may result in uneven stitching. If your machine has special cap frames or guides, use them to keep your design centered and straight. Thread breakage is one of the most frustrating embroidery problems. It wastes time and ruin your design. This often happens when the machine runs too fast, the thread is old or the tension is not set right. Slow down your machine, especially in thick or dense parts of the design. Use strong, good quality embroidery thread. Avoid using old spools that look dry or weak, they break easily. Check your threading path for sharp spots that might cut the thread. Make sure the needle size matches your thread weight so it runs smoothly through the fabric. Now its time to wind up blog. Let's summarize this, so in short cap embroidery takes some patience and more practice. If you slow your machine, hoop correctly, use good backing and pay proper attention to digitizing, you’ll get smooth & professional results. Small details make a big difference. If you want to save time and get perfect stitching,Digitizing USA is here. Our skilled digitizers know how to make embroidery files that fit caps perfectly so your design stitches neatly every time. Want your cap embroidery to look clean and professional? Reach out to Digitizing USA today and get your embroidery files prepared by our experts. You’ll enjoy smooth stitching and perfect results every single time.Challenge #8: Not Using Backing or Using the Wrong Type
Solution
Challenge #9: Not Enough Space
Solution
Challenge #10: No Stability
Solution
Challenge #11: Misalignment in Design

Solution
Challenge #12: Thread Breakage
Solution
Summary


