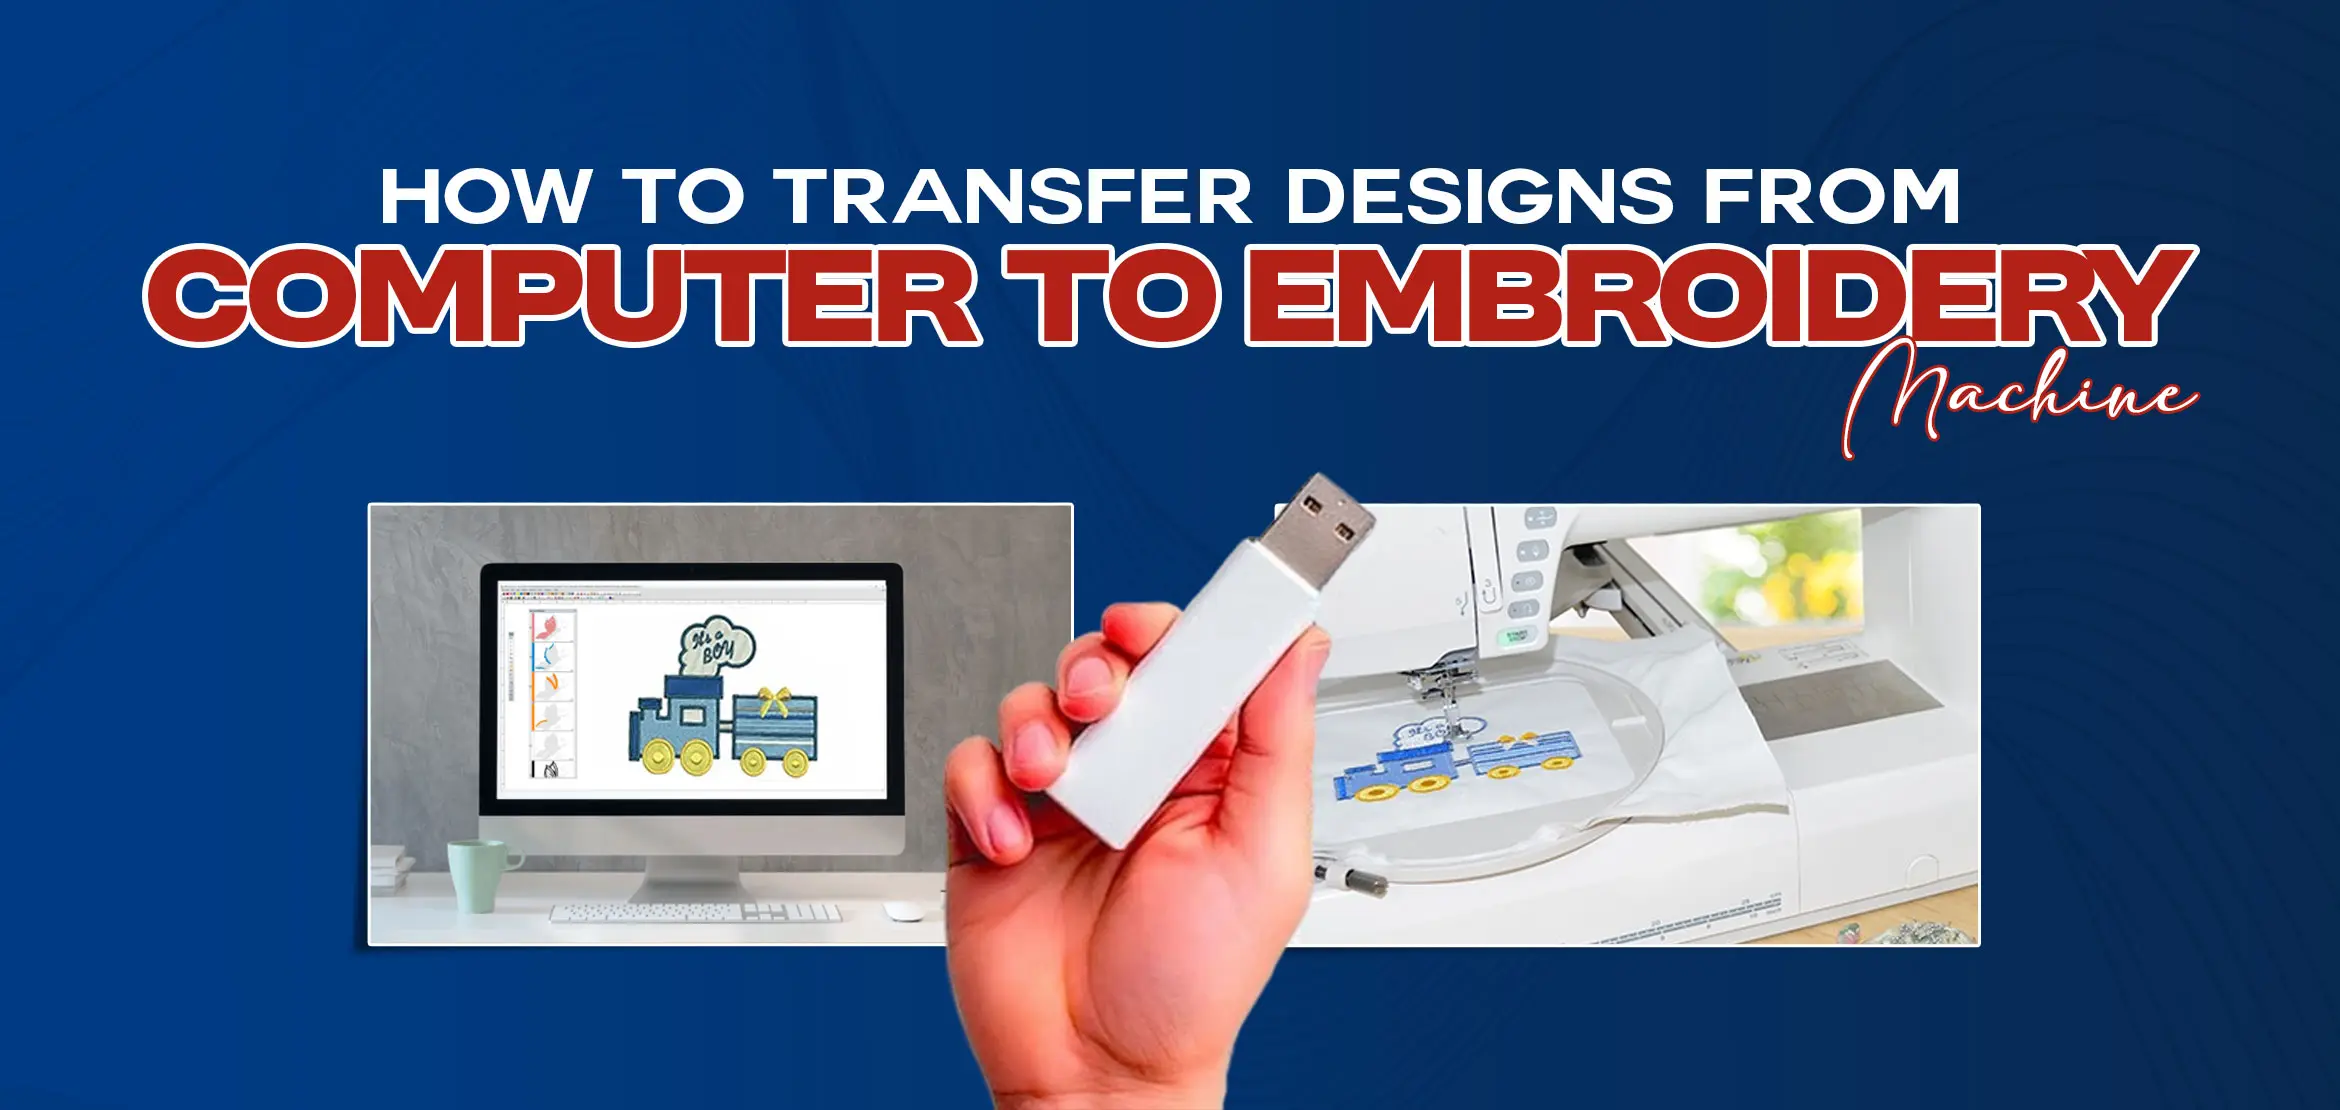
How to Transfer Designs from Computer to Embroidery Machine
Table Of Content
- The Basics of Design Transfer You Need to Understand
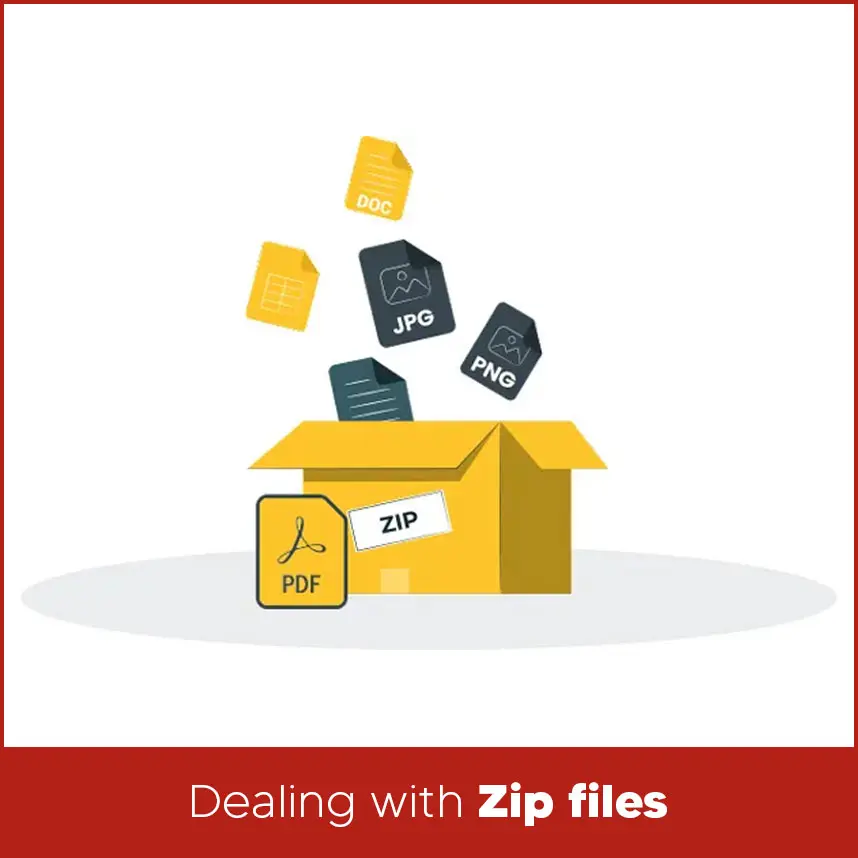
- Dealing with .ZIP Files
- Do You Need Software?
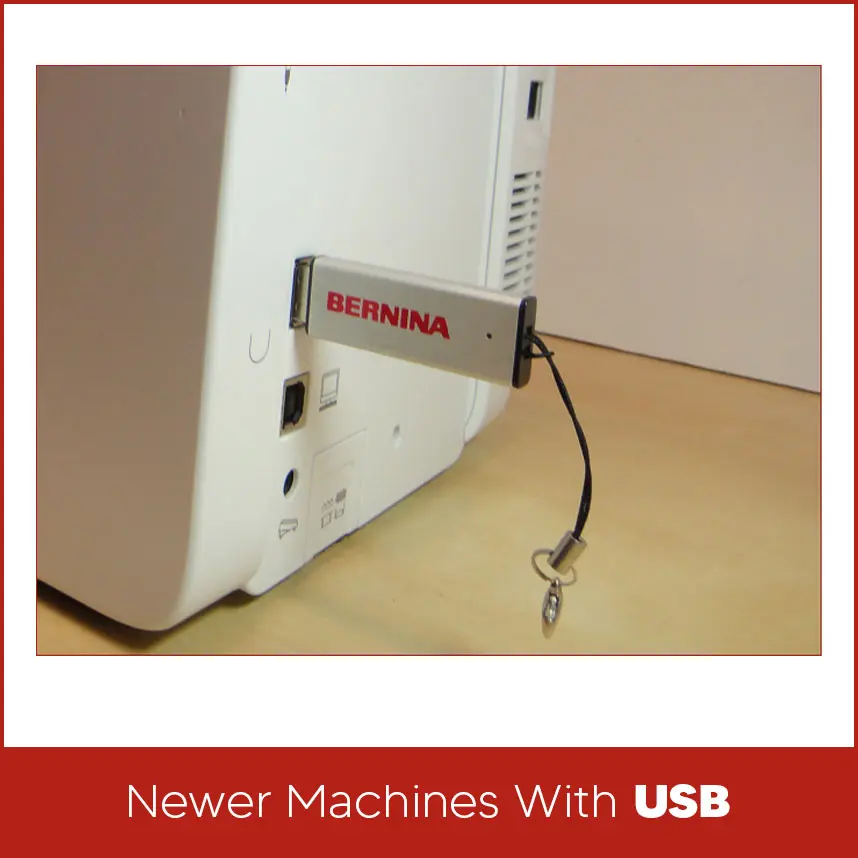
- Newer Machines with USB
- Older Machines with Cards
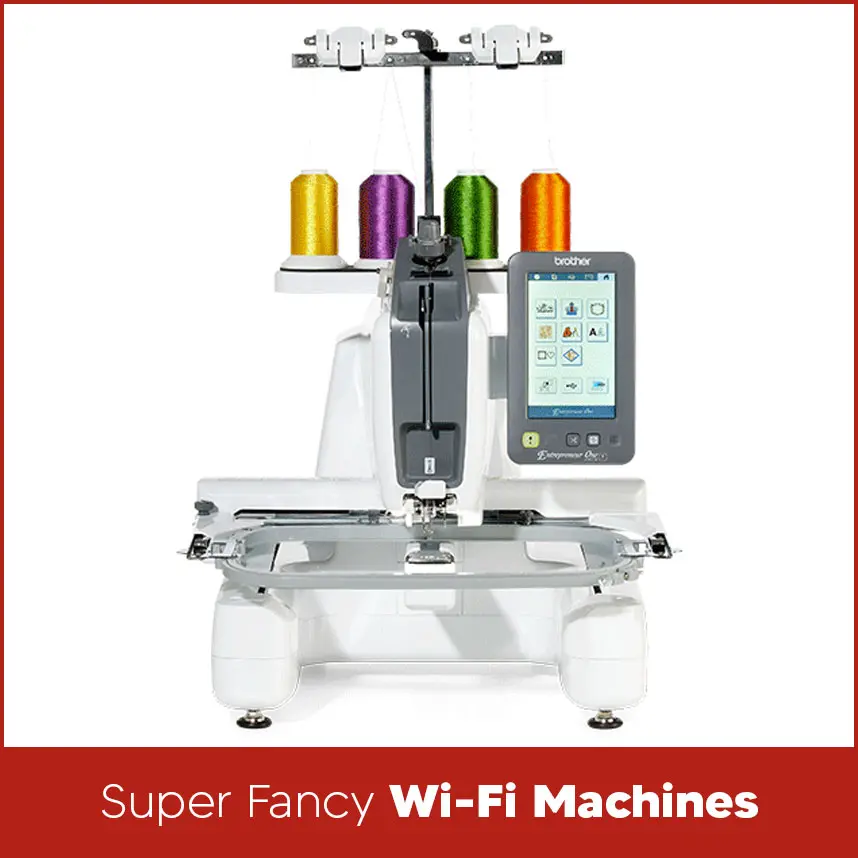
- Super Fancy Wi-Fi Machines
- Step-by-Step Guide on How to Transfer Designs from Computer to Embroidery Machine
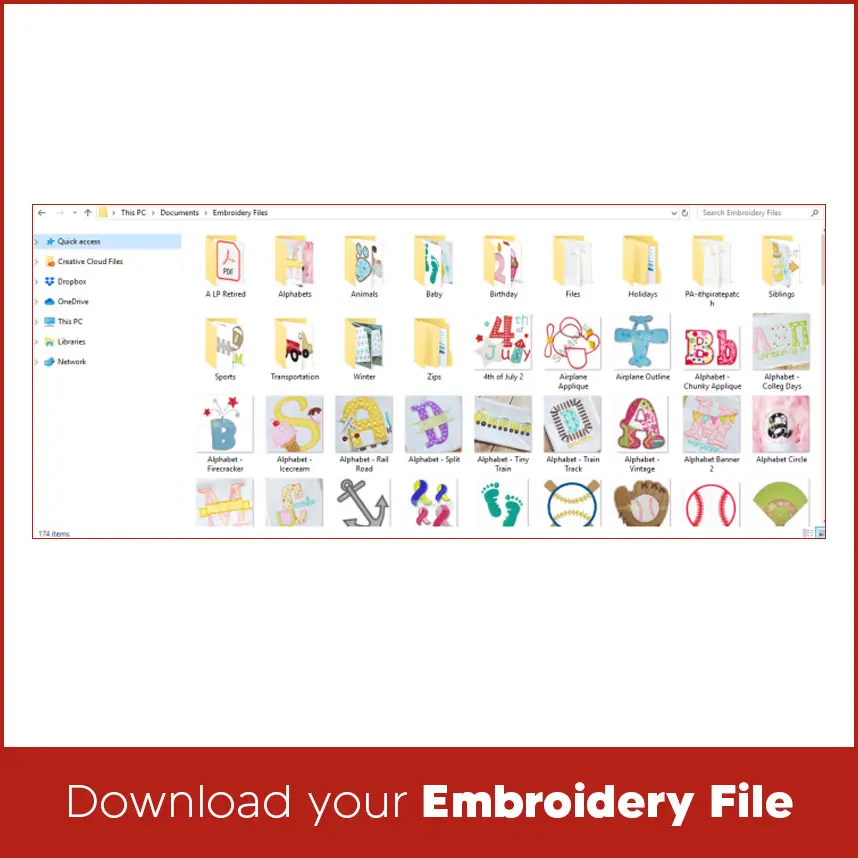
- Download Your Embroidery File
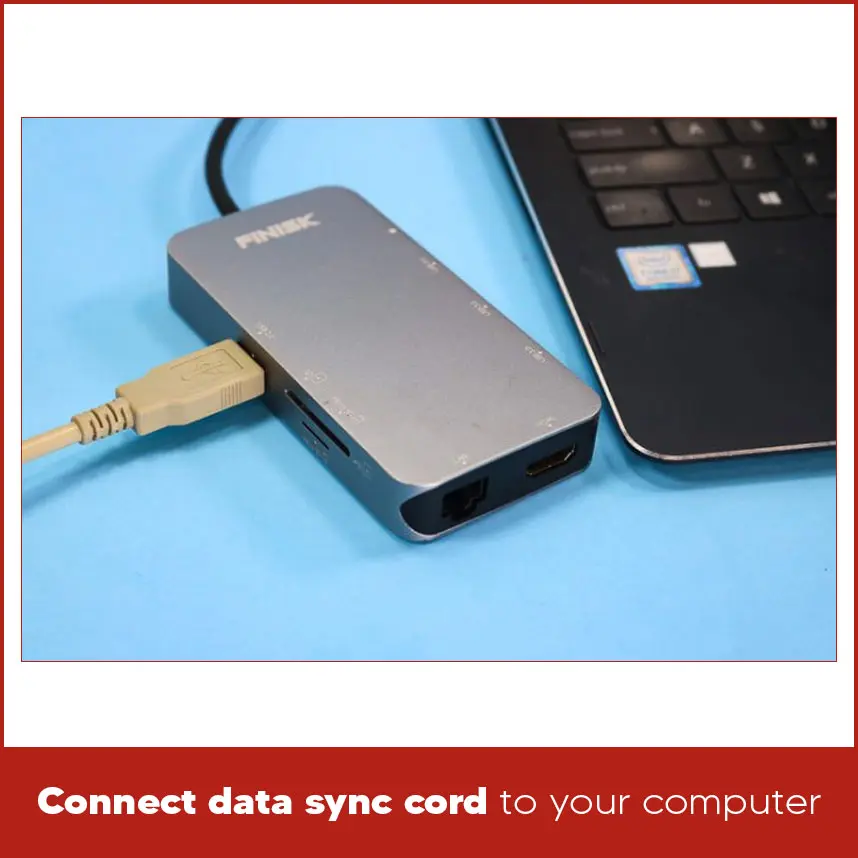
- Connect Data Sync Cord to Your Computer
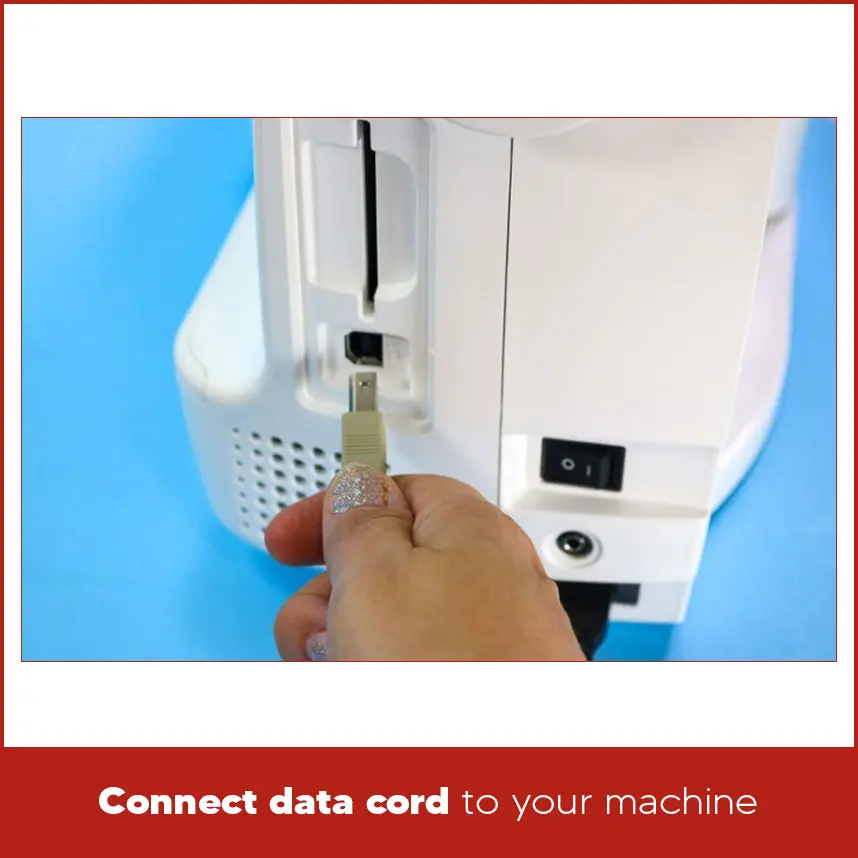
- Connect Data Cord to Your Machine
- Turn Your Machine On
- Open Folder of Designs
- Drag & Drop Designs
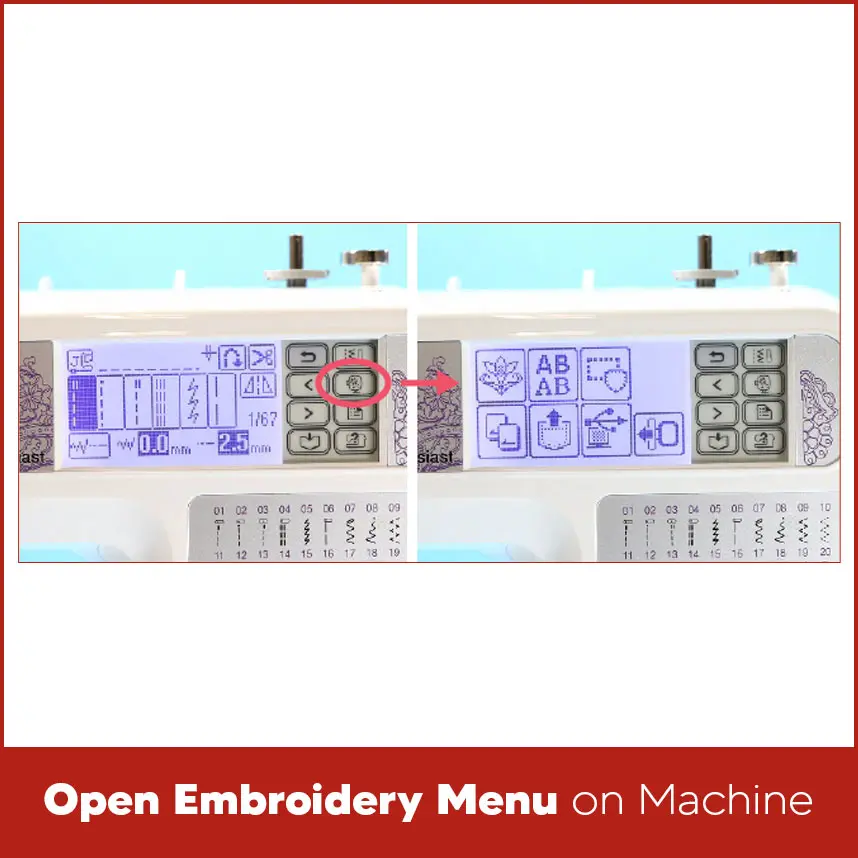
- Open Embroidery Menu on Machine
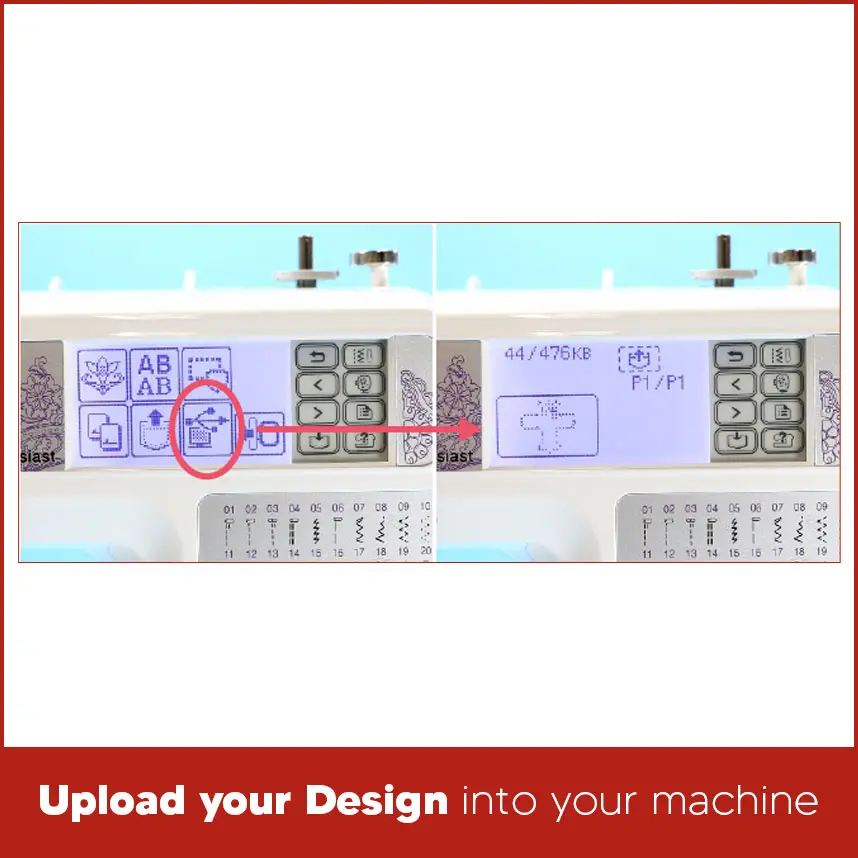
- Upload Your Design into Your Machine
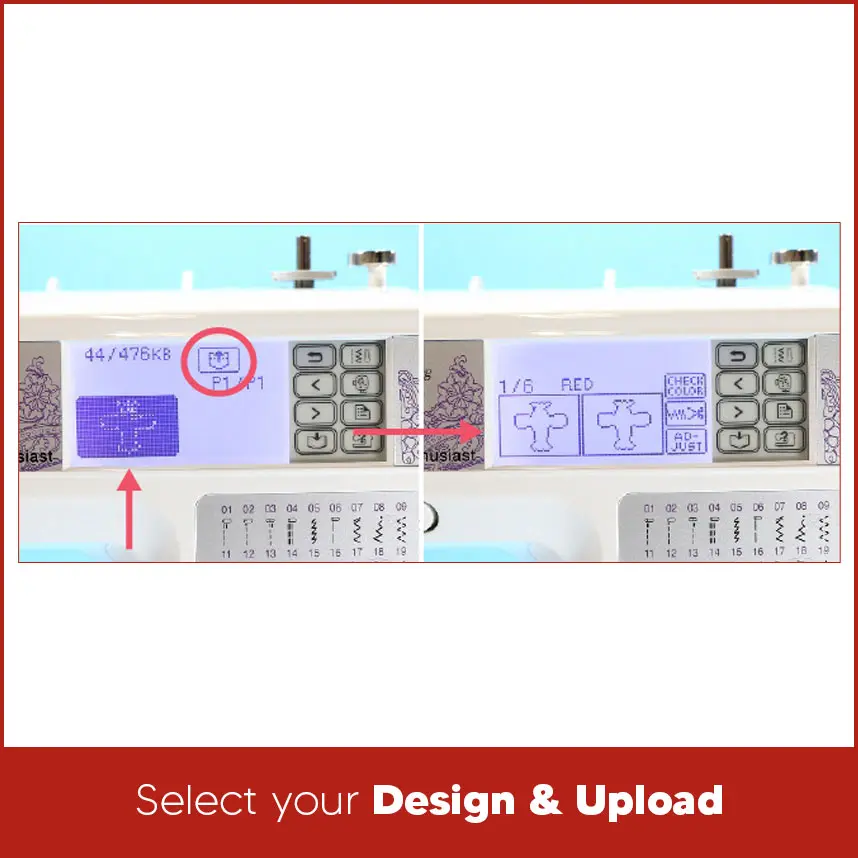
- Select Your Design & Upload
- Save Your Design to Your Machine (Optional)
- Where to Buy Embroidery Designs?
- Summary
You have digitized your embroidery design in software. It looks perfect on your computer screen and now it's time to transfer that design from computer to machine to give new life to fabric. But the confusion starts here. You plug in your machine, transfer your design but suddenly you notice nothing works. The problem starts with the wrong transfer process, which is why you face difficulties and this situation annoys many freshers and sometimes experienced embroiderers.
This guide covers embroidery design transfer process in depth so next time you can move your designs without mistakes. Transferring embroidery designs from computer to embroidery machine looks simple but small details sometimes cause a major problem. File formats, folders, cables, and machine types matter the most. Once you understand the process, the entire transfer process becomes easy. Before transferring any embroidery design...you need to understand a few basic points. Embroidery machines never understand normal image files like JPG or PNG. They always read embroidery files like DST, PES, EXP, JEF, VP3 or more. Each machine brand supports specific formats. Always check your machine manual before downloading a design. Your machine also reads designs from specific locations. Some machines use USB drives. Some older models use memory cards. Newer machines connect through Wi-Fi. If you use the wrong method, the design won't show on your screen. File size matters as well. Large designs may not load if they exceed your machine’s stitch or memory limit. Clean and properly digitized files load faster and stitch better. Most embroidery designs download as ZIP files. A ZIP file works like a folder that holds one or more designs. Your embroidery machine can’t read ZIP files. You must unzip them first. To unzip a file: - Right click the ZIP file. - Select “Extract” or “Extract All”. - Open the new folder that appears. Inside the folder, you will see multiple file formats. Choose the format that matches your machine. Copy only that file to your USB drive or transfer method. This step alone fixes many “design not showing” problems. You don't need embroidery software to transfer designs. If you already have a digitized embroidery file then you can transfer it directly. Software becomes useful when you want to resize or edit design. Basic software often comes with embroidery machines. Advanced software helps professionals manage stitch density, colors, and placement. For simple transfers, a file manager on your computer works fine. Most newer embroidery machines use USB flash drives. These machines read designs directly from the USB. You just need to copy the correct file format into the right folder. Avoid placing designs inside extra folders unless your machine allows it. Always safely eject the USB from your computer. This step protects the file from corruption. Some older embroidery machines use memory cards instead of USB drives. These machines require a card reader and special software to write designs onto the card. The process takes more steps, but it still works well if done correctly. Please make sure the card matches your machine brand. Not all cards work with all machines. New embroidery machines now support Wi-Fi transfers. These machines connect to your computer or cloud account through a dedicated app. You send designs wirelessly without cables or USB drives. Wi-Fi transfers are convenient but they still need right file formats and stable internet connection. Keep your machine software updated to avoid connection problems. Follow these steps in order. Given method works for most embroidery machines that use a USB data cord or direct computer connection. Download your embroidery file from a trusted source. Organize your files from the start. Create a folder on your computer, such as “My Embroidery Designs.” Save all purchased or downloaded embroidery files in this one location. This habit saves time later. You avoid wasting minutes searching through random folders when you want to stitch a design. Always confirm that the file matches your machine format before moving to the next step. Take the data sync cord that came with your embroidery machine. Plug the USB end of the cord into your computer. If your laptop only supports USB-C ports then use a compatible dongle. Make sure the connection is secure. A loose cable interrupts the transfer and may prevent the file from appearing. Insert the data cord into the port on the side of your embroidery machine. Push the connector carefully & avoid forcing it. A proper connection helps smooth transferring between the computer and the machine. Turn on your embroidery machine and give it time to open. In many cases, computers automatically open a window showing the contents of the machine. If nothing opens, go to File Explorer on your computer. Locate the external drive that represents your embroidery machine and double click it to open the machine’s storage window. Open embroidery folder you created earlier and place it next to the open machine window on your screen. If file shows in a ZIP format, extract it before moving forward. Always work with the actual embroidery file, not the ZIP folder. This step helps your machine read the design correctly. Select the embroidery file that you have design in. Drag it from your design folder and drop it into the open machine window. Don’t rename the file unless your machine manual allows it. Keeping the original name helps avoid loading issues. On your embroidery machine’s touch screen, tap the icon that looks like an embroidery hoop. This action opens the embroidery menu where all transferred designs show. Wait a few seconds for the screen to refresh before continuing. Inside the embroidery menu, tap the icon that looks like a computer with a data cord. This option opens the list of designs you transferred from your computer. You should now see your design displayed on the screen. Tap the design you want to stitch. Then press the upload button, which usually looks like a pocket with an arrow. The machine loads the design and displays the first stitch and thread color. Embroidery designs have multiple layers, so expect several stitch steps. Once the design loads, press the green start button when you are ready to start stitching. If you plan to use this design, save it to your machine’s internal memory. This step helps you skip the transfer process next time. If you plan to stitch the design only once then don’t save it. Keeping your memory clear helps your machine run smoothly. To save the design, tap the pocket icon with the outgoing arrow in the right-hand menu. Choose the right embroidery design service provider is a wise decision because poorly digitized designs cause thread breaks, puckering and uneven stitching. DigitizingUSA provides high-quality embroidery designs within your budget. We offer a wide range of embroidery digitizing services. Whether you want designs for shirts, hats, or jackets. We carefully digitize your designs and deliver quality work to our customers. For some reason you don't like your design or want to edit, we also offer minor editing and revisions free of cost, so contact us now and get quality work at reasonable prices Transfer designs from computer to embroidery machine is actually not a hard and fast rule, it is just a piece of cake. Once you understand file formats, machine types, and transfer methods, the process become eaiser. Always unzip files, choose the correct format, and follow your machine’s loading steps carefully.The Basics of Design Transfer You Need to Understand
Dealing with .ZIP Files
Do You Need Software?
Newer Machines with USB
Older Machines with Cards
Super Fancy Wi-Fi Machines
Step-by-Step Guide on How to Transfer Designs from Computer to Embroidery Machine
Download Your Embroidery File
Connect Data Sync Cord to Your Computer
Connect Data Cord to Your Machine
Turn Your Machine On
Open Folder of Designs
Drag & Drop Designs
Open Embroidery Menu on Machine
Upload Your Design into Your Machine
Select Your Design & Upload
Save Your Design to Your Machine (Optional)
.webp)
Where to Buy Embroidery Designs?
Summary
If you want custom embroidery designs that load smoothly and stitch cleanly, DigitizingUSA stands ready to help. Contact us today to get professional embroidery digitizing at fair prices and dependable quality.


