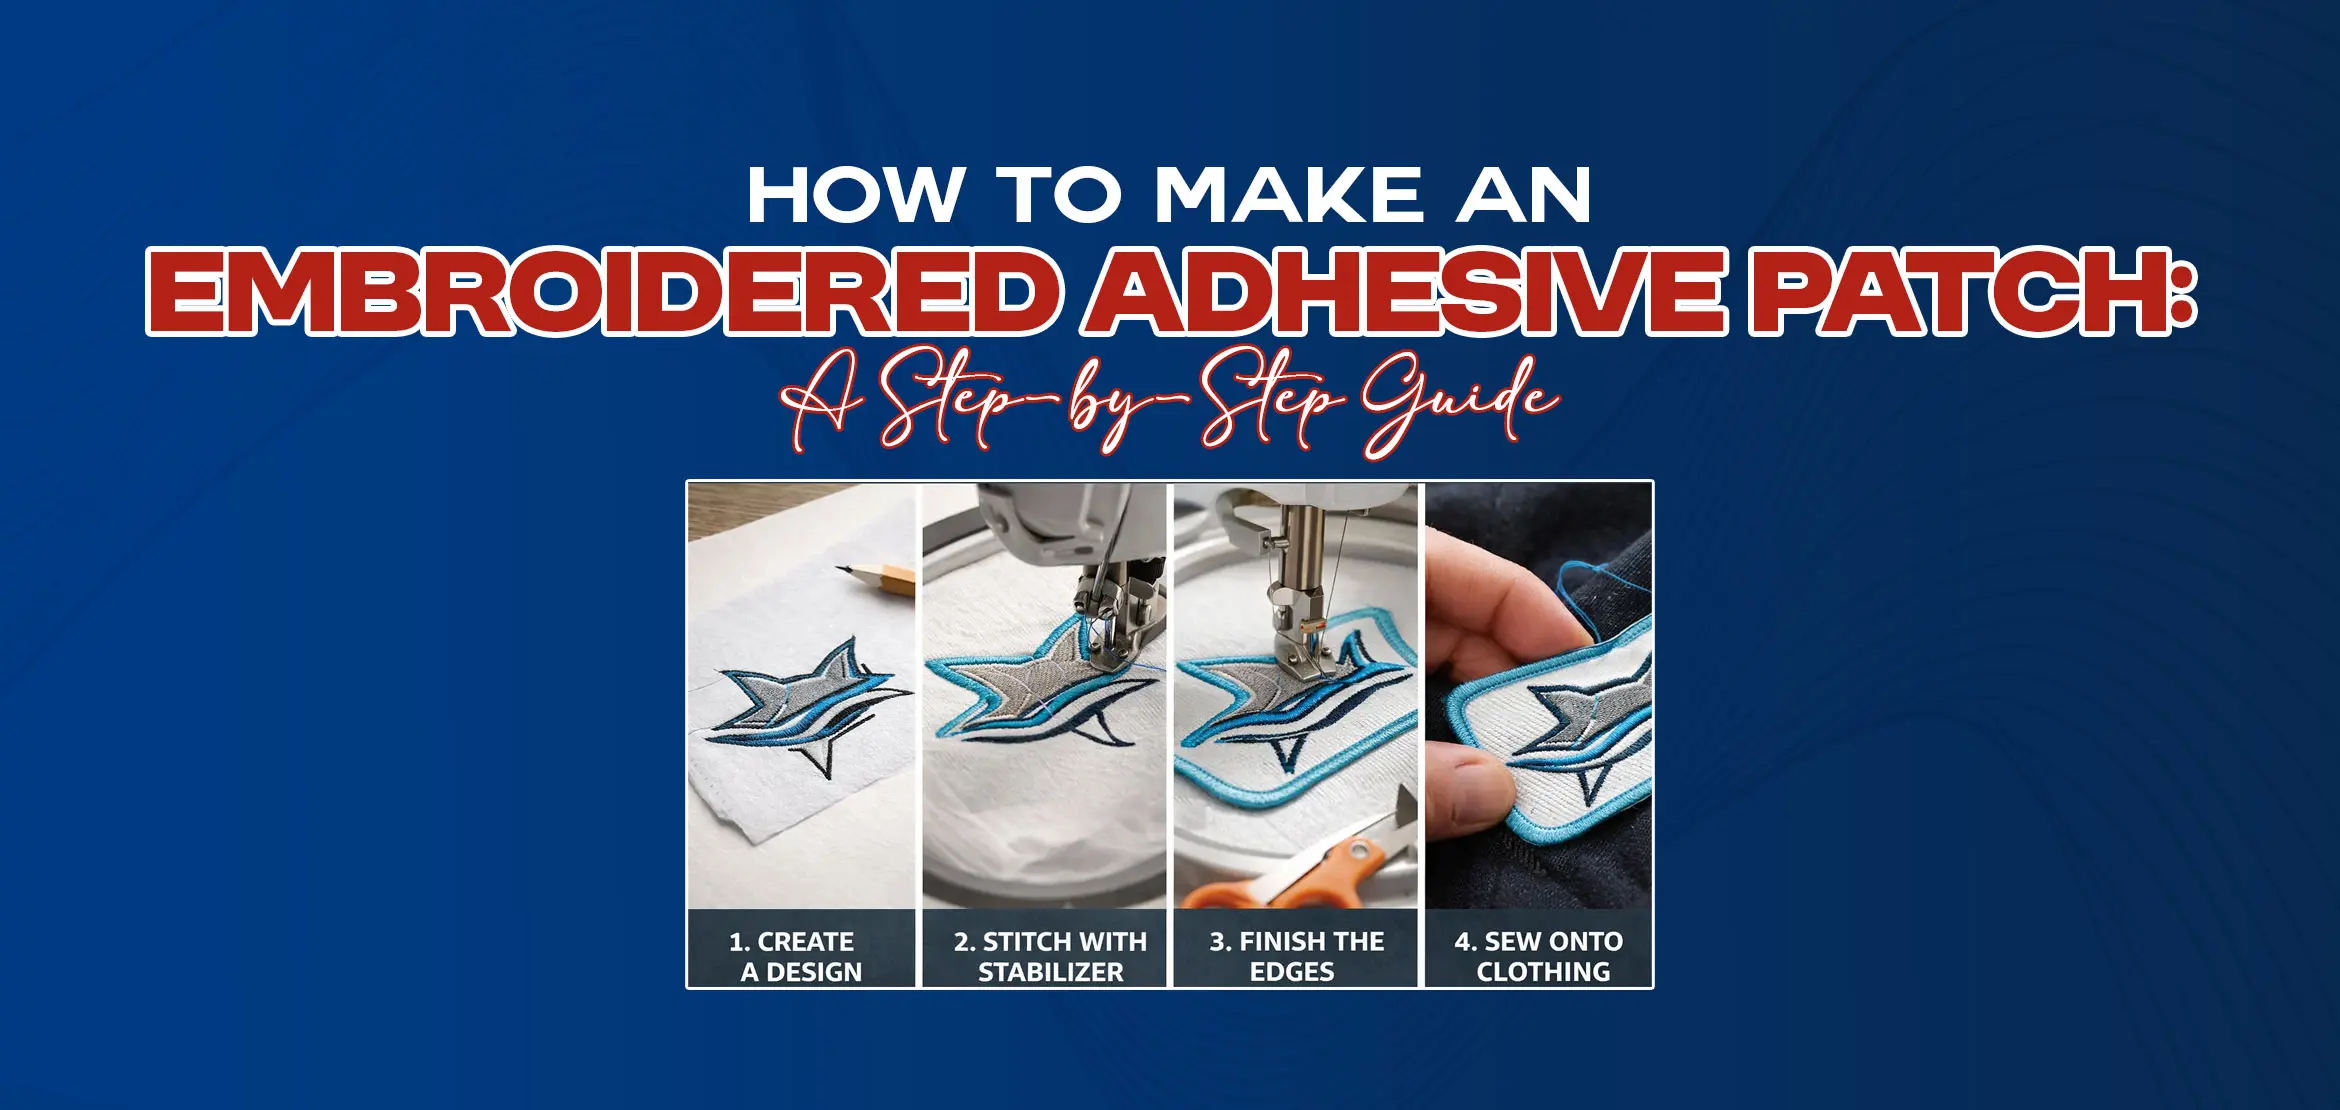
How to Make an Embroidered Adhesive Patch: A Step-by-Step Guide
Table Of Content
- Step-by-Step Guide on How to Make an Embroidered Adhesive Patch
- Material You Needed
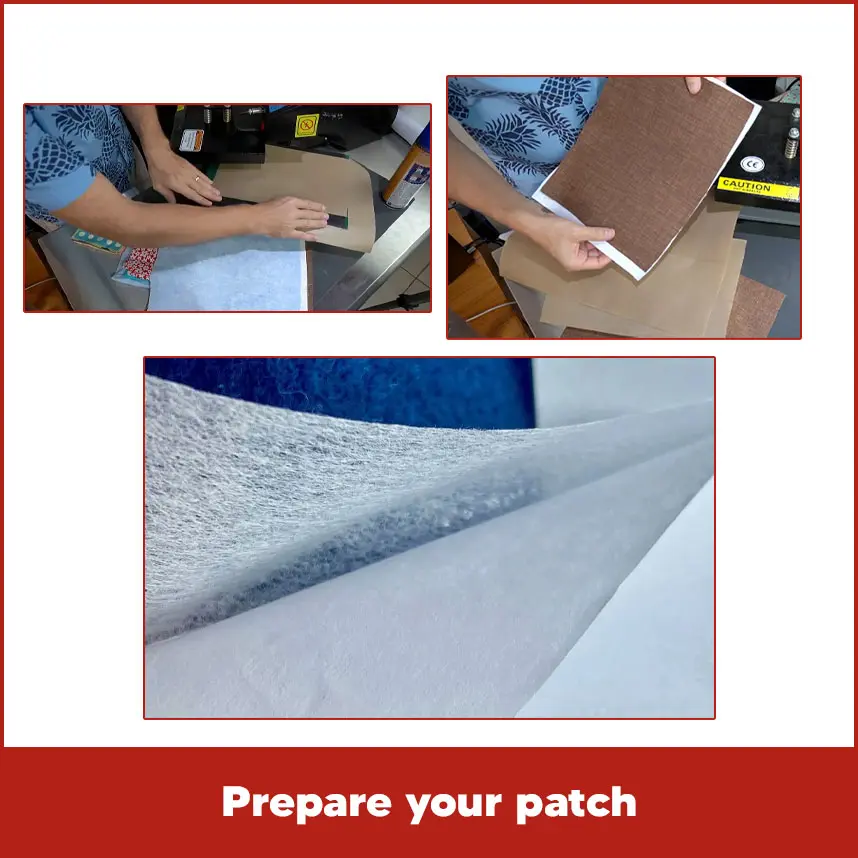
- Prepare Your Patch
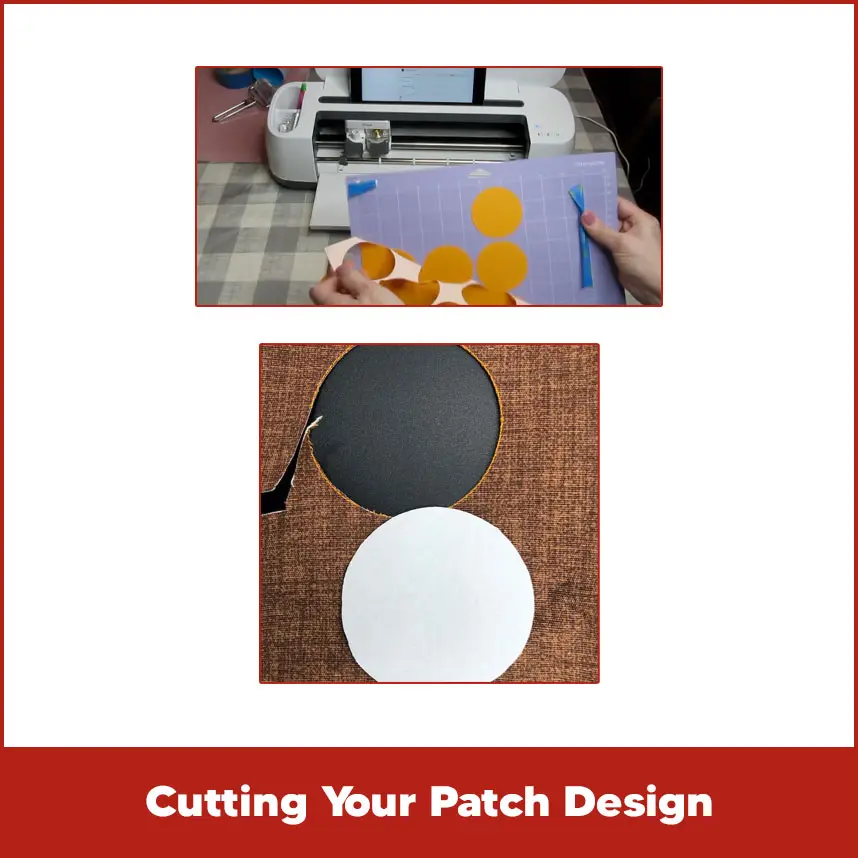
- Cutting Your Patch Design
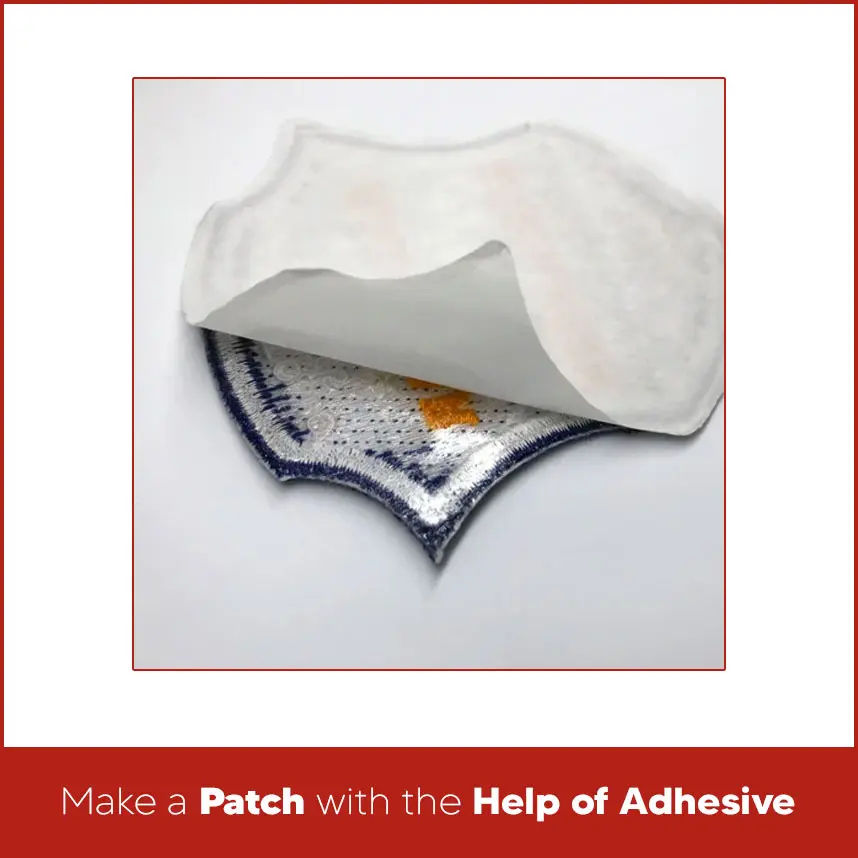
- Make a Patch with the Help of Adhesive
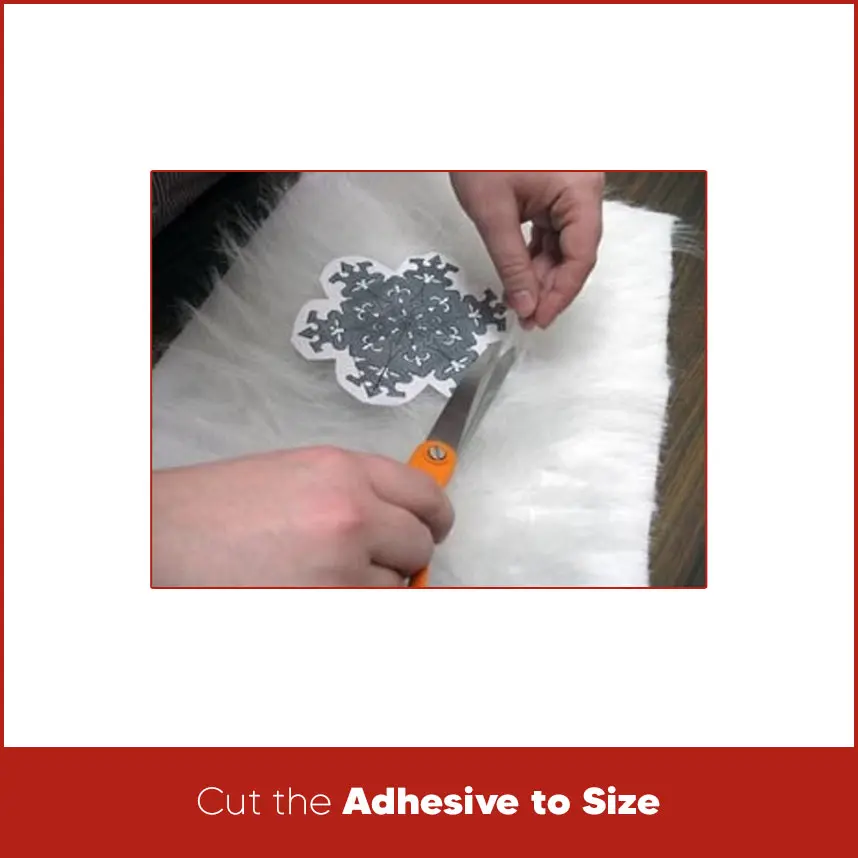
- Cut the Adhesive to Size
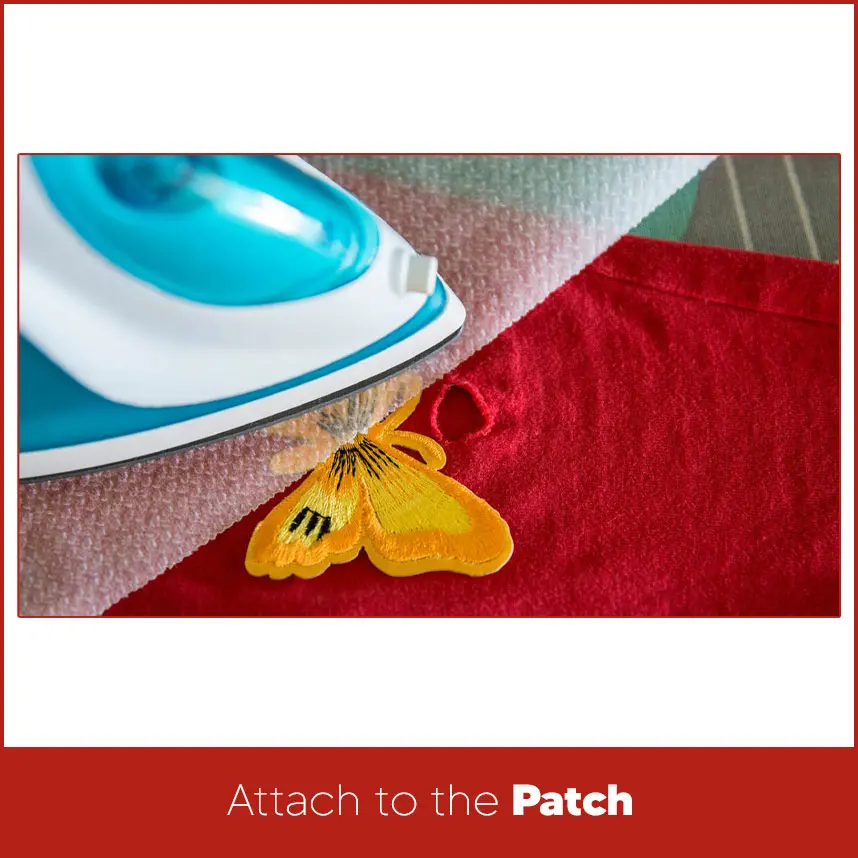
- Attach to the Patch
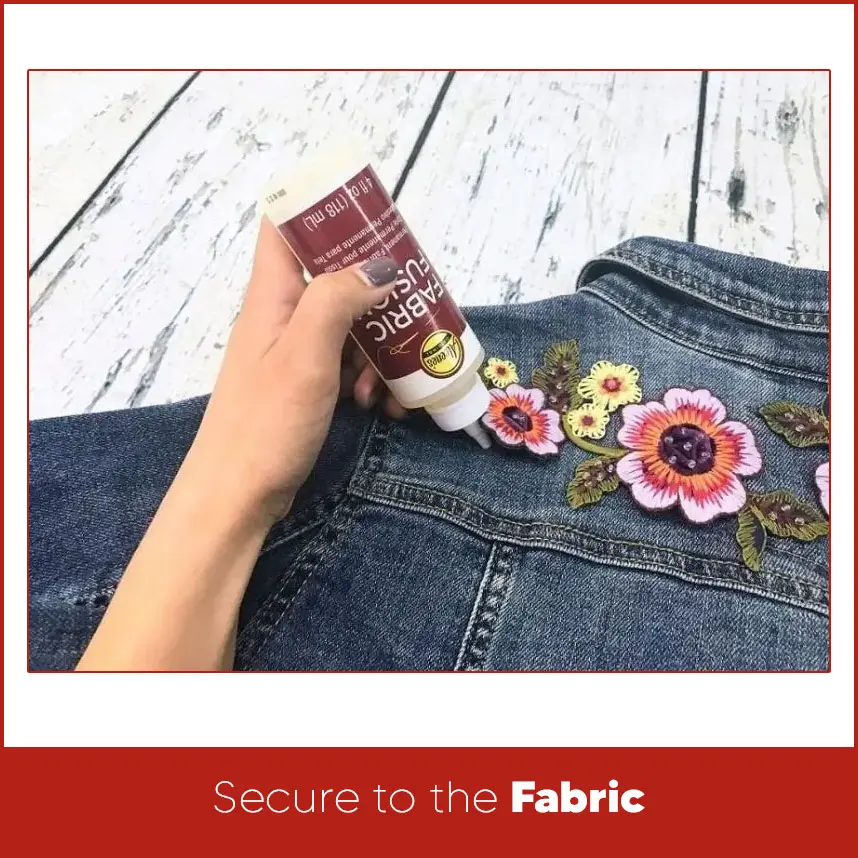
- Secure to the Fabric
- How Do You Attach Adhesive Patches?
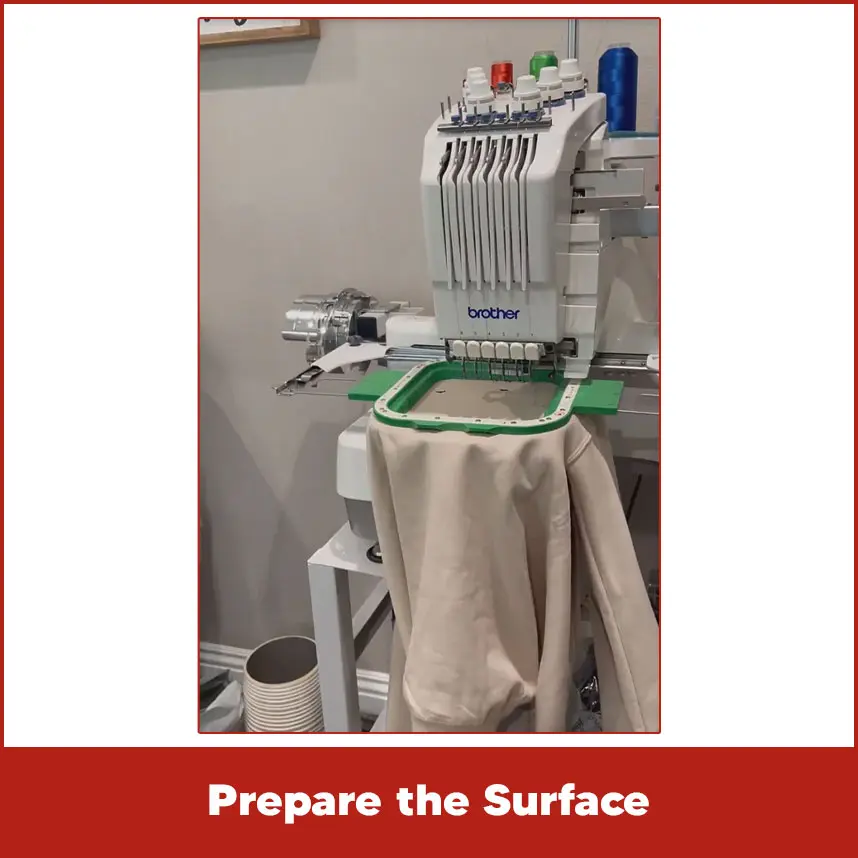
- Prepare the Surface
- Follow the Instructions
- Reinforce if Necessary
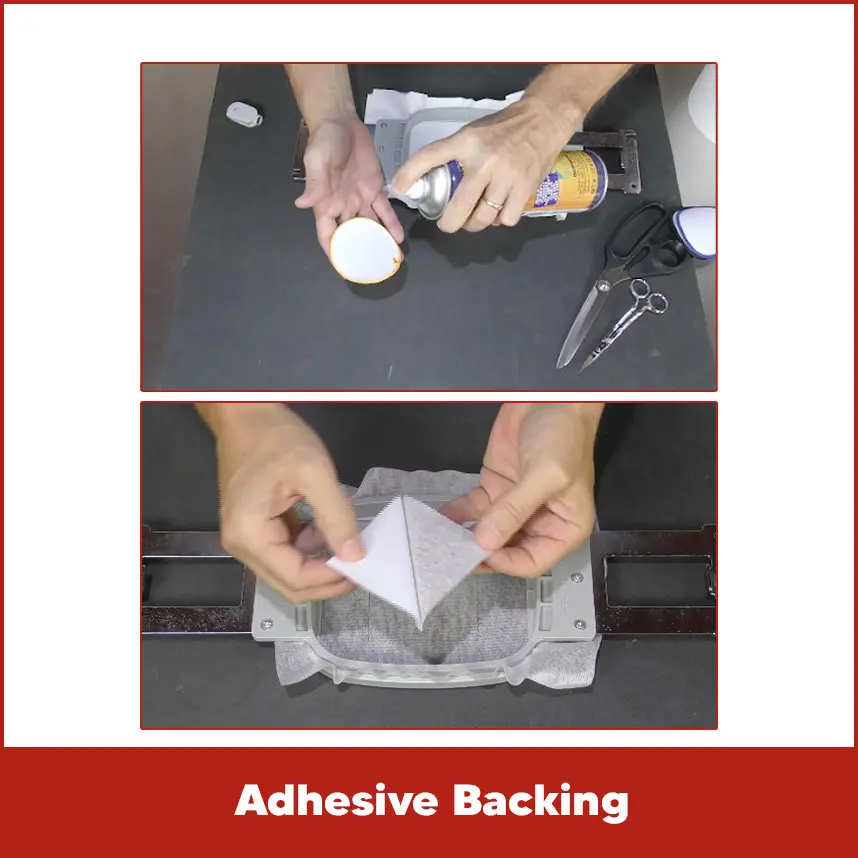
- Adhesive Backing
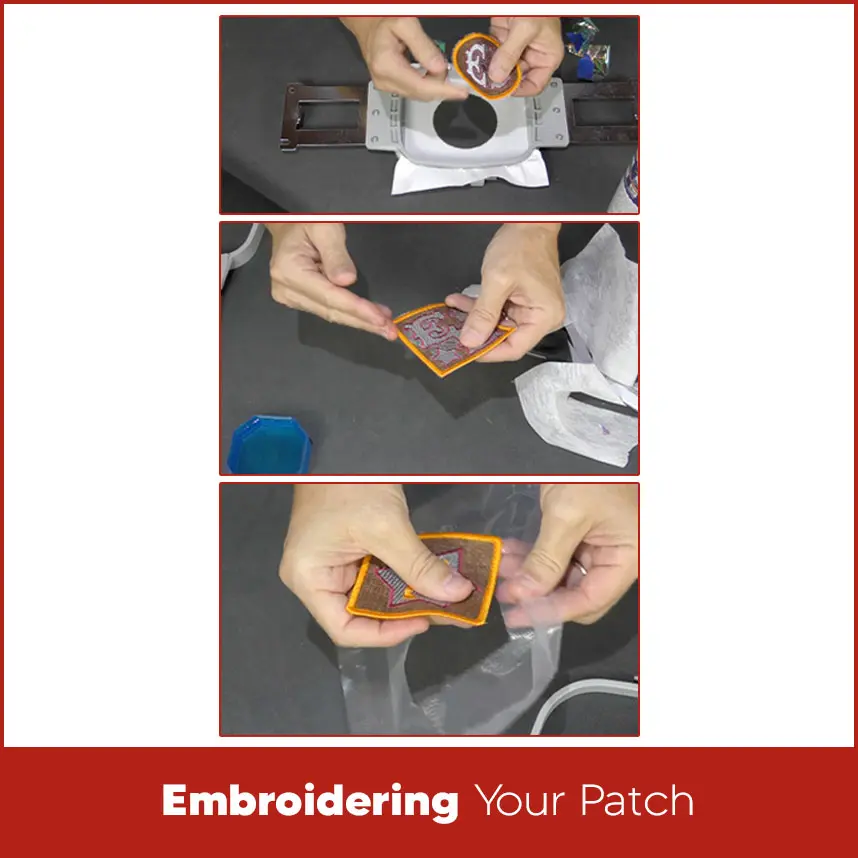
- Embroidering Your Patch
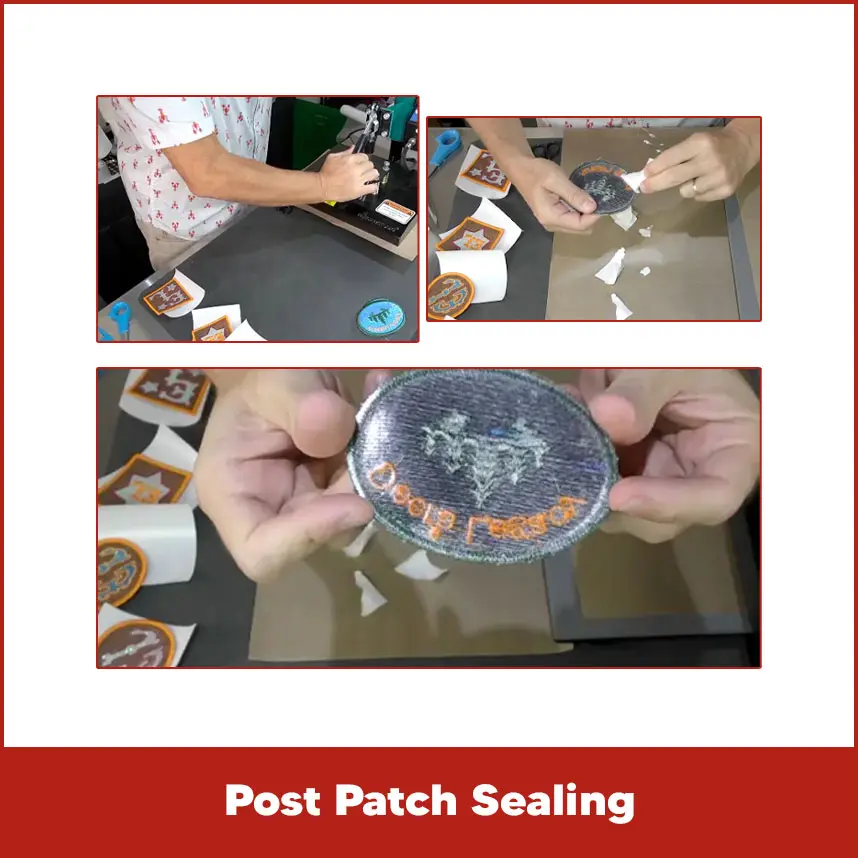
- Post Patch Sealing
- Summary
Embroidered adhesive patches are getting popular for all types of uniforms, hats & bags. Almost 60 to 70% increase in demand because they look professional and attach easily without sewing. Usually people prefer adhesive patches because they save your time. If you want to learn how to make an embroidered adhesive patch, we are pretty sure this guide will definitely help you.
This guide will be focused on practical steps and real methods used in patchwork. As long as every step is done carefully, the patch will stay flat, hold well, and last longer.
Step-by-Step Guide on How to Make an Embroidered Adhesive Patch
Making embroidered adhesive patches usually based on three main stages.
First, prepare the embroidered patch.
Second, apply the adhesive backing correctly.
Third, attach and seal the patch for long-term use.
Every previous step supports the next one. Skipping or rushing any part causes peeling, lifting, or uneven edges.
Material You Needed

Gather all materials before starting. This keeps the process smooth and avoids mistakes.
You will need: - Embroidered fabric such as twill, felt, or polyester. - Embroidery machine. - Heat-activated adhesive sheet. - Sharp scissors or rotary cutter. - Heat press or iron. - Parchment paper or Teflon sheet. - Clean and flat surface. - Cotton cloth Using proper materials improves bonding strength and patch life. Start with a clean and well embroidered patch. Tight and even stitches keep their shape during heat pressing. Loose stitches lift when adhesive melts, which weakens edges and details. Make sure: - The back of the embroidery stays flat to allow full adhesive contact. - No loose threads remain because exposed threads harden or melt under heat. - The fabric stays smooth and wrinkle-free before pressing. Lightly press the patch if needed, but keep heat low at this stage. A flat and clean patch creates a strong base for adhesive bonding. Key points for proper preparation: - Trim jump threads to prevent melting and rough backing. - Check stitch density because overly loose stitches lift under heat. - Remove lint or dust from the back of the patch before applying adhesive. Cutting defines the final shape and appearance of the patch. Clean cuts improve both durability and visual quality. Leave a small border around the embroidery to protect edge stitches. Cutting too close exposes threads, which loosen after washing. Keep edges smooth and even to prevent lifting. Avoid sharp corners when possible. Rounded edges handle stress better and stay attached longer. Cutting tips that improve patch life: - Use sharp scissors or a rotary cutter for clean edges. - Keep border width consistent around the entire patch. - Round corners slightly to reduce edge peeling over time. Adhesive backing supports patches to attach without sewing. Heat activated adhesive works best because it melts evenly & bonds with fabric fibers. Choose adhesive designed for textiles. Quality adhesive stays same after cooling and bends with the fabric. Avoid household glue because it dries stiff, cracks under heat, and leaves stain on fabric. Place the adhesive sheet behind the patch and cut it slightly smaller than the patch shape. Smaller adhesive prevents glue from leaking out during pressing. Clean edges look professional and resist dirt buildup. Precise cutting keeps adhesive inside the patch area and supports embroidery evenly. Why precise adhesive cutting matters: - Smaller adhesive prevents sticky residue around the platch. - Clean edges improve bonding strength and final appearance. Place adhesive on the back of the patch with the glue side touching the fabric. Position it evenly around the stitched area. Cover the patch with parchment paper or a Teflon sheet. Apply firm, steady pressure using a heat press or iron. Hold pressure in one spot for the recommended time. Do not slide the iron. Movement spreads adhesive unevenly and weakens bonding. Allow the patch to cool completely after pressing. Cooling hardens the adhesive and locks it into the fabric fibers. Check the bond by gently lifting one edge. If the adhesive holds firmly, the patch is secure. If any area lifts, apply heat again with light pressure. Attach adhesive patches works best when the fabric is clean, flat, and stable. Proper surface preparation controls the final result more than heat alone. First wash then dry the garment before attaching the patch. Oil, dust, and fabric finishes block adhesive bonding. Place the garment on a hard surface and remove wrinkles. Avoid stretch areas because movement weakens adhesion. Flat woven areas provide the strongest hold. Each adhesive brand gives specific heat and time settings. Follow them closely to avoid weak bonding or fabric damage. Place the patch adhesive side down, cover it and apply light pressure. Hold heat for the full recommended time. Let the fabric cool completely before moving it. High-use items benefit from reinforcement. Jackets, bags, and workwear face frequent movement and friction. You can: - Press again from the back side to strengthen bonding. - Add a few hidden stitches along the edge. - Use edge sealing film to lock borders. Reinforcement improves lifespan without changing appearance. Adhesive backing adds flexibility and convenience. It works best on stable fabrics that tolerate heat well. Cotton and denim hold adhesive strongly. Workwear fabrics also perform well. Avoid high-stretch or waterproof fabrics because stretch breaks adhesive bonds and coatings block heat penetration. Strong embroidery supports strong adhesion. Clean digitizing controls stitch density, underlay, and borders. Use balanced stitch density to prevent stiffness. Avoid thin borders because heat flattens weak edges. Lock stitches properly to stop unraveling. Well digitized designs stay stable during heat pressing. Sealing protects patch edges and prevents peeling. It also improves resistance to washing and moisture. Effective sealing methods include: - Heat sealing film for edge protection. - Edge stitching for mechanical strength. - Clear fabric sealant to block moisture. - Post sealing improves long-term durability. Making embroidered adhesive patches needs clear embroidery, perfect cutting, proper adhesive use, and controlled heat application. Every single step plays an important role in how well the patch looks and how long it lasts. If you want clean, professional results, strong digitizing matters as much as proper patch making. DigitizingUSA offers custom embroidery patch digitizing services at minimal flat rates. Our digitized designs stitch clean, hold shape during heat pressing, and support strong adhesive bonding.Prepare Your Patch
Cutting Your Patch Design
Make a Patch with the Help of Adhesive
Cut the Adhesive to Size
Attach to the Patch
Secure to the Fabric
How Do You Attach Adhesive Patches?
Prepare the Surface
Follow the Instructions
Reinforce if Necessary
Adhesive Backing
Embroidering Your Patch
Post Patch Sealing
Summary
Get your custom embroidery patch designs from DigitizingUSA today and create patches that look sharp and last longer.
Related Blogs


