How to Turn Your Artwork into Cricut-Friendly SVG Files
Table Of Content
- What are Cricut-Friendly SVG Files?
- How to Turn Artwork into Cricut-Friendly SVG Files (Step-by-Step)
- Step 1: Choose Clean Artwork
- Step 2: Using Design Software to Convert Artwork into SVG
- Step 3: Remove Background and Extra Details
- Step 4: Convert the Artwork into Vector Paths
- Step 5: Fix and Simplify Paths
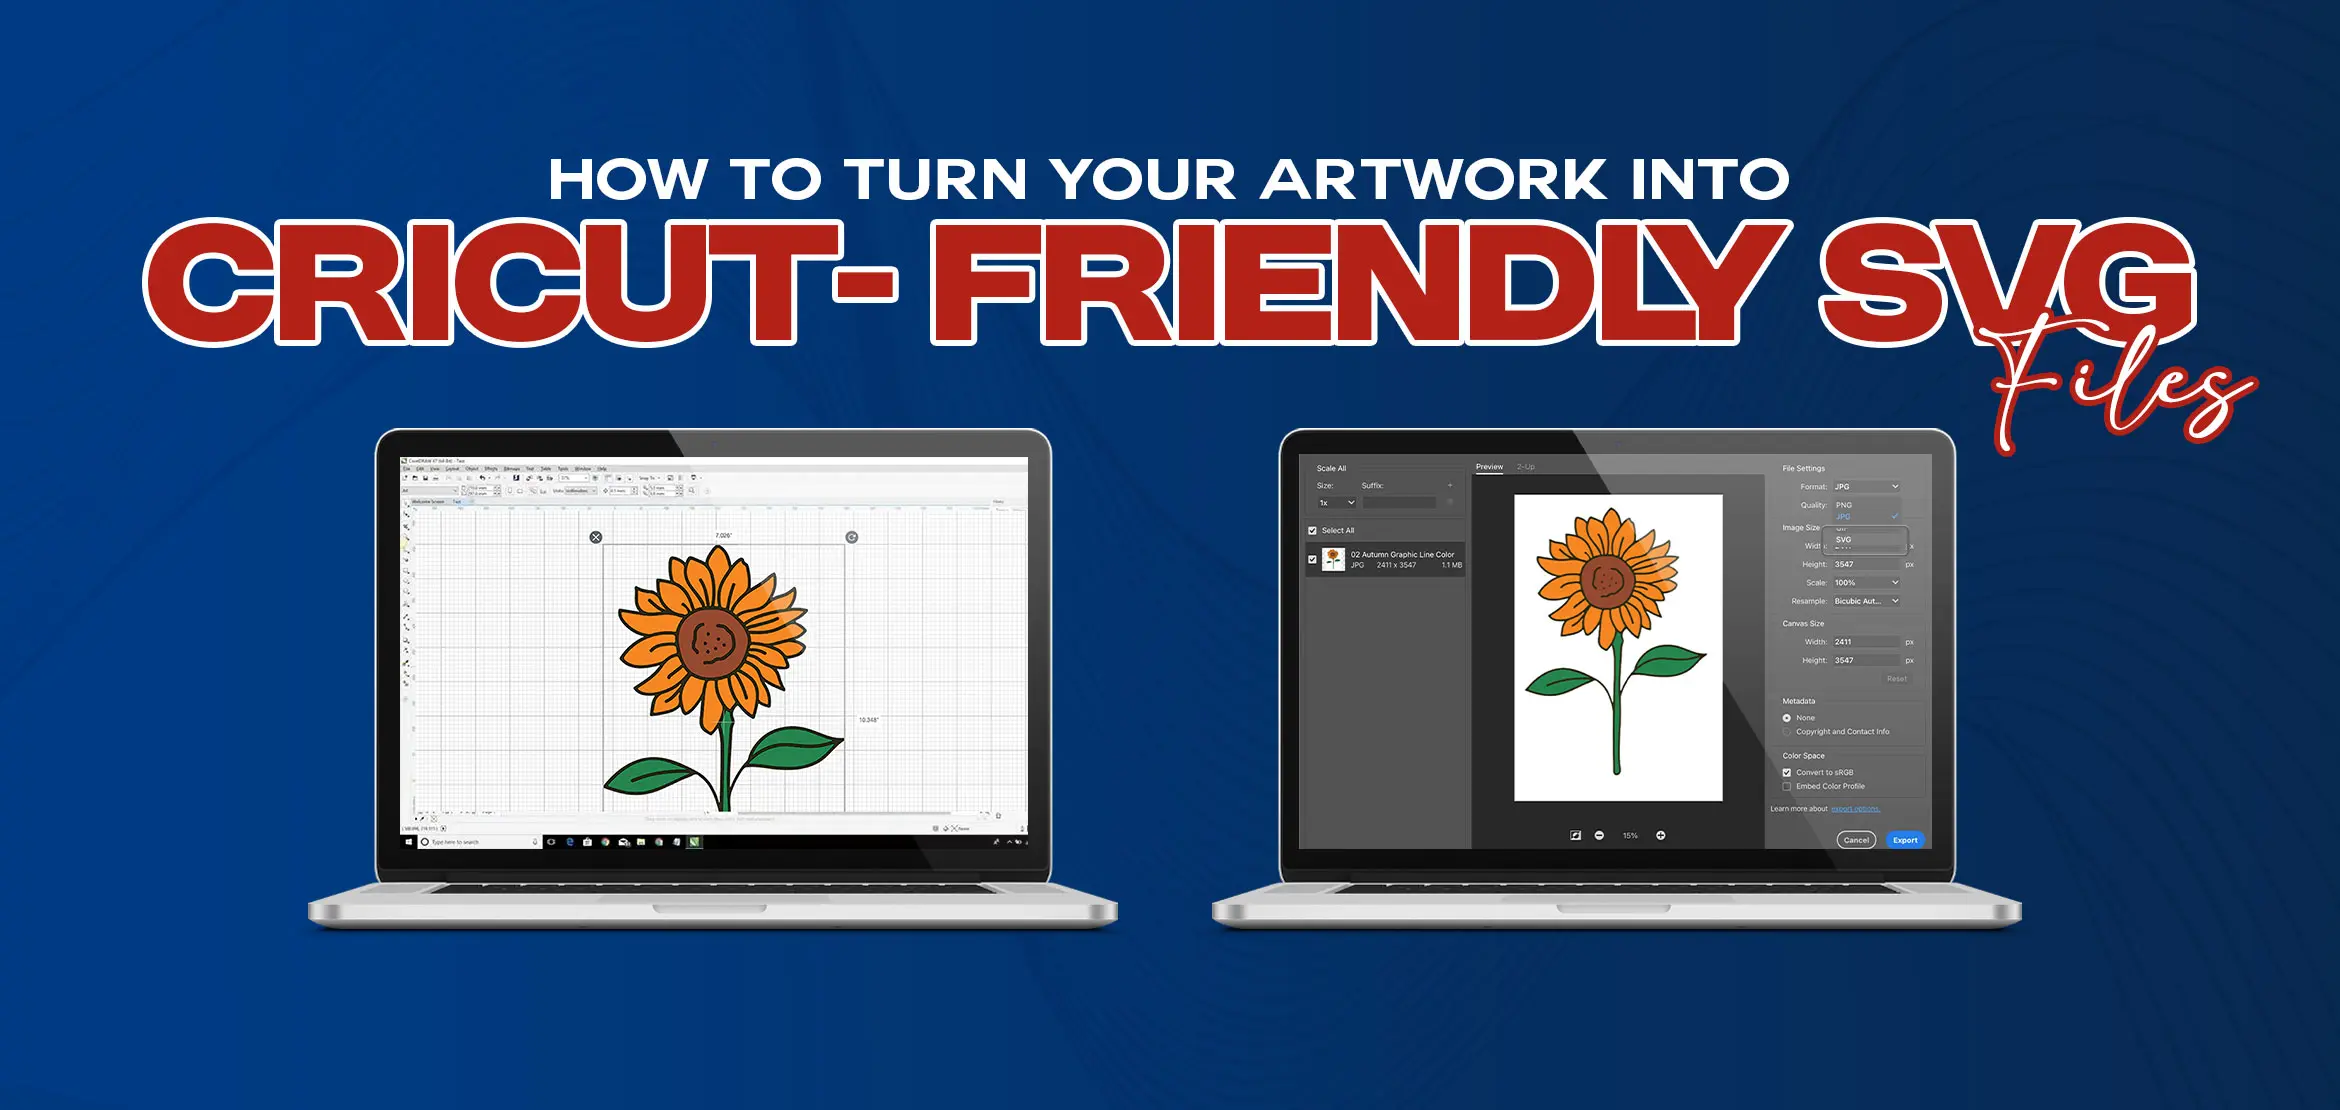
- Step 6: Save as an SVG File
- Common Problems When Converting Cricut-Friendly SVG Files
- How to Fix Cut Issues in Cricut SVG Files?
- Why Professional SVG Conversion Gives Better Cricut Results?
- Summary
Creating designs for Cricut should feel exciting, not stressful. Many people struggle when their artwork doesn't cut the way it should. Sometimes lines break, shapes cut unevenly and suddenly small details disappear. This happens when the artwork is not prepared in the right file format.
Most of the designs start as JPG or PNG files. These formats look fine on screen but Cricut machines need more than just a clear image. They need clean paths, smooth edges and proper structure to cut correctly. When those things are missing, even a good design turns into a messy and frustrating project.
That's why cricut friendly SVG files are so important. When artwork is converted the right way, Cricut cuts exactly what you see. The process becomes smooth, accurate and stress free. This simple guide explains how to turn your artwork into Cricut-friendly SVG files in a simple and clear way.
What are Cricut-Friendly SVG Files?
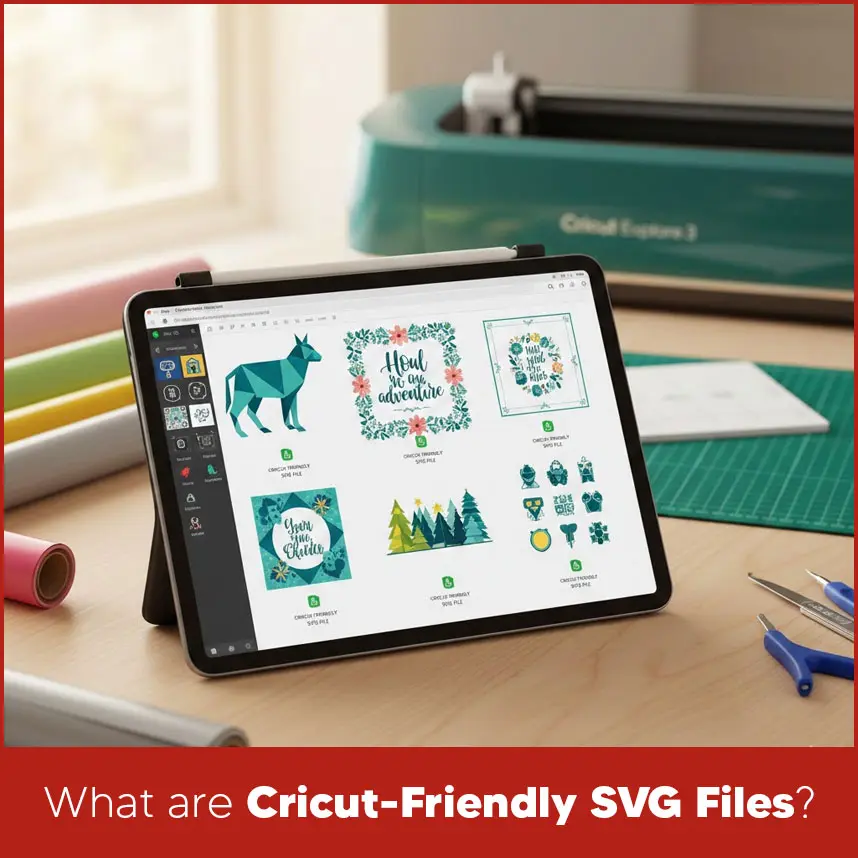
SVG stands for Scalable Vector Graphics. Unlike regular image files, SVG files are made from paths instead of pixels. This means the design stays sharp and clean at any size.
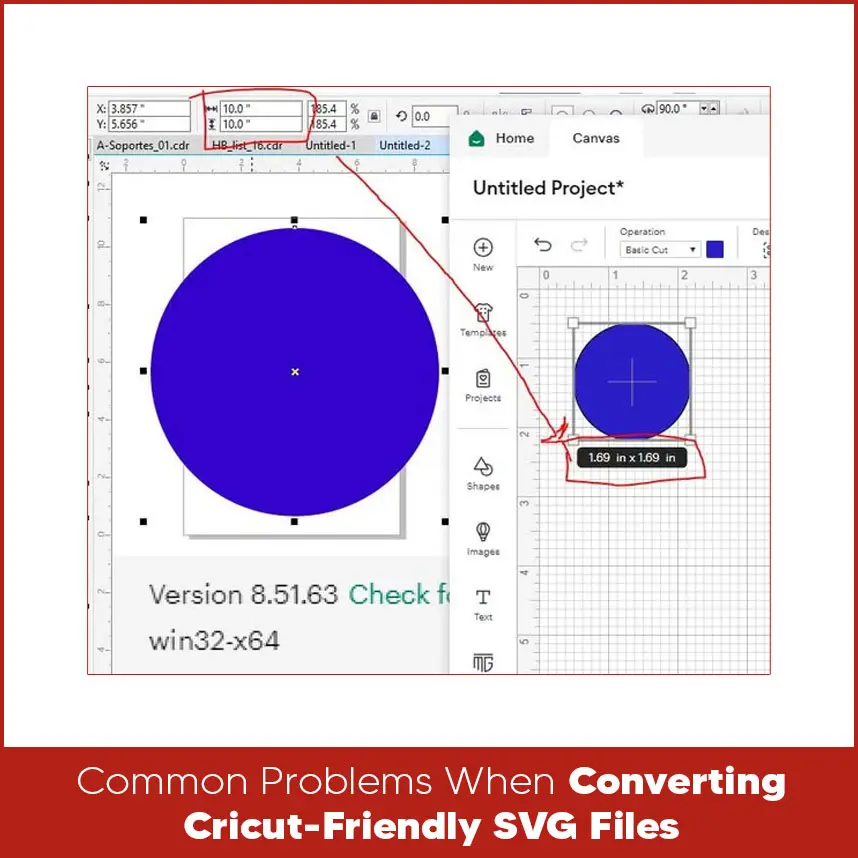
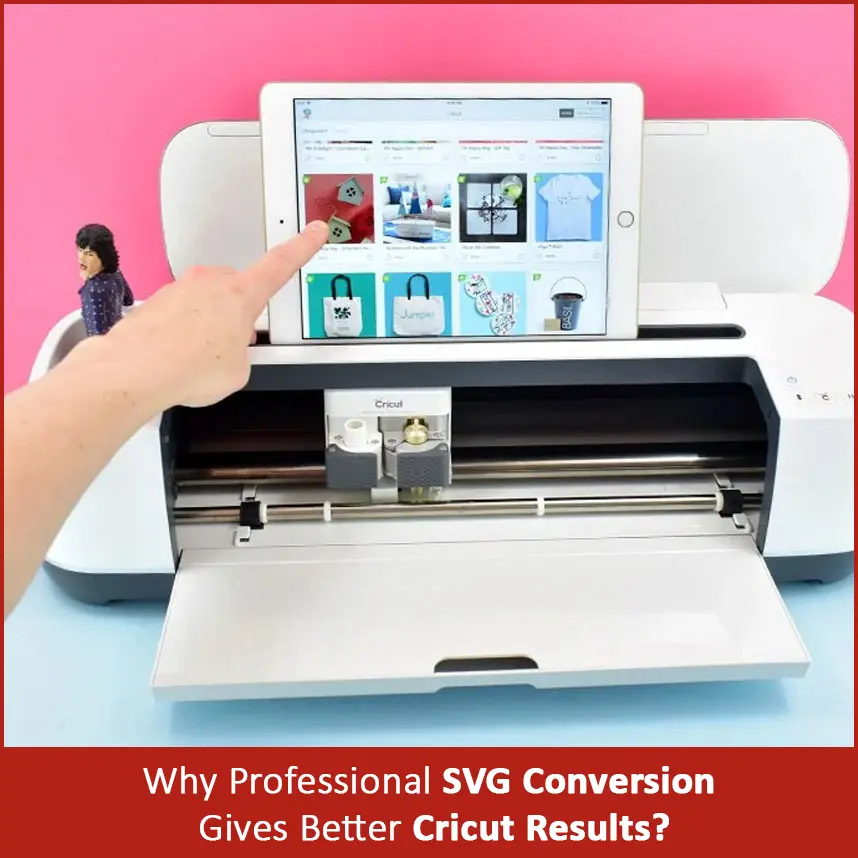
A Cricut-friendly SVG file is an SVG that: Has clean and closed paths. Contains no background or extra details. Uses proper layers for cutting. Uploads smoothly into Cricut Design Space. These files give Cricut clear cutting instructions. As long as the SVG is built correctly, the machine follows the design without errors. Here is a simple 6 step process that works for most designs. Start with clear artwork. Avoid blurry images or designs with shadows. High-contrast artwork works best, especially logos, icons, and line drawings. Different tools can help create Cricut-friendly SVG files. The key is using them the right way. Adobe Illustrator Adobe Illustrator is a reliable choice for SVG creation. It allows you to: Convert images using Image Trace. Draw clean paths with the Pen Tool. Control layers and strokes easily. After tracing, always expand the artwork and clean the paths before saving the SVG. CorelDRAW CorelDRAW works very well for logo and vector designs. It offers: Accurate vector tracing. Easy node editing. Smooth control over paths. Always simplify nodes and remove overlaps to prevent cutting issues. Inkscape Inkscape is a free tool and can produce good results when used carefully. You can: Trace bitmap images. Edit nodes manually. Export clean SVG files. Even though it is free, proper cleanup is still needed to make files Cricut-ready. Only keep what you want Cricut to cut. Remove backgrounds, textures, and extra colors. Clean artwork always leads to cleaner cuts. Use vector software to trace or redraw the design. This converts pixels into paths, which Cricut understands. Check for broken lines, overlapping shapes, or open paths. Every cut shape should be closed and clean. Export the final design as an SVG file. Name layers clearly, especially if the design has more than one part. Even after converting artwork to SVG, you can face some problems. Common issues include: Too many nodes in a single path. Open paths instead of closed shapes. Overlapping or duplicate lines. Very small details that Cricut cannot cut. These problems often cause rough or failed cuts. If a design doesn’t cut correctly, try these fixes: Remove unnecessary nodes. Combine shapes where possible. Delete hidden or duplicate paths. Test the design at a smaller size. Always preview the file in Cricut Design Space before cutting. This step saves time and materials. DIY tools can help but they don’t always deliver clean results. Automatic tracing creates rough edges, broken paths, and extra points. Professional SVG conversion focuses on: Smooth and clean paths. Proper layer setup. Correct sizing and scaling. Reliable cutting performance. This is where Digitizing USA stands out. Our team manually converts artwork into Cricut-friendly SVG files instead of relying on quick auto-trace tools. Each file is checked for clean cuts, correct layers, and smooth edges. As a result, the SVG files upload easily and cut cleanly. If your artwork matters and you want consistent results, professional conversion is a smart option. Turning artwork into Cricut-friendly SVG files takes attention and care. Clean artwork, proper vector paths, and correct file setup make a real difference.How to Turn Artwork into Cricut-Friendly SVG Files (Step-by-Step)
.webp)
Step 1: Choose Clean Artwork
Step 2: Using Design Software to Convert Artwork into SVG
Step 3: Remove Background and Extra Details
Step 4: Convert the Artwork into Vector Paths
Step 5: Fix and Simplify Paths
Step 6: Save as an SVG File
Common Problems When Converting Cricut-Friendly SVG Files
How to Fix Cut Issues in Cricut SVG Files?
Why Professional SVG Conversion Gives Better Cricut Results?
Summary
By following the steps in this guide, you can avoid most cutting problems. And if you ever need reliable, ready to use SVG files without the hassle, professional services like Digitizing USA can help you get perfect results every time. Contact us now.


