Multi-Positional Hooping Techniques for Perfect Large Embroidery Designs
Table Of Content
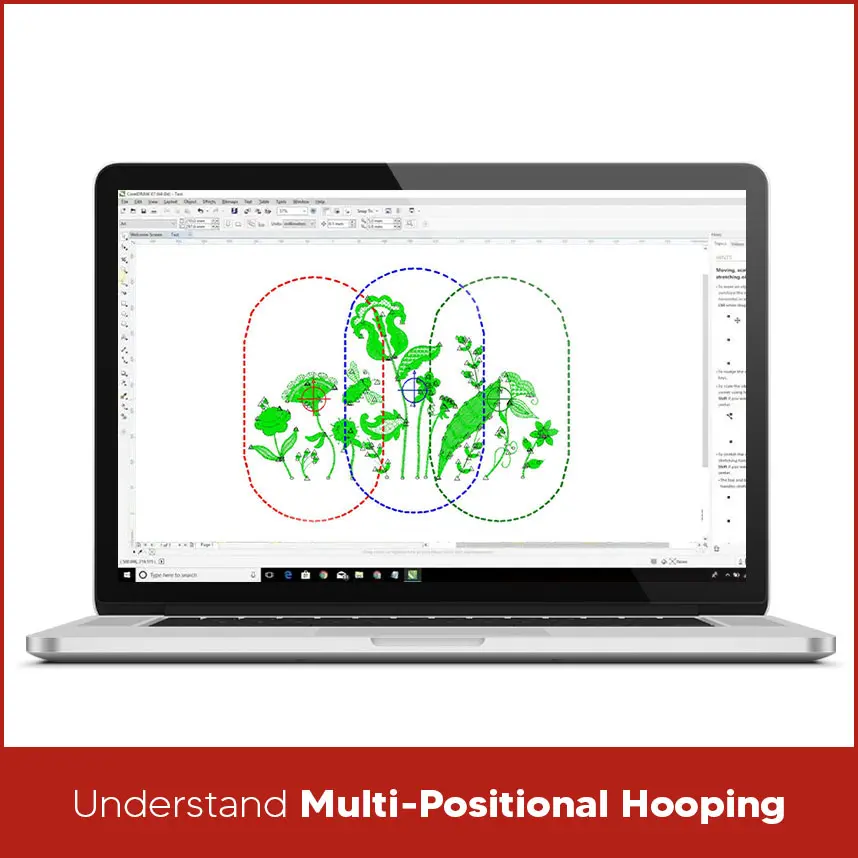
- Understand Multi-Positional Hooping
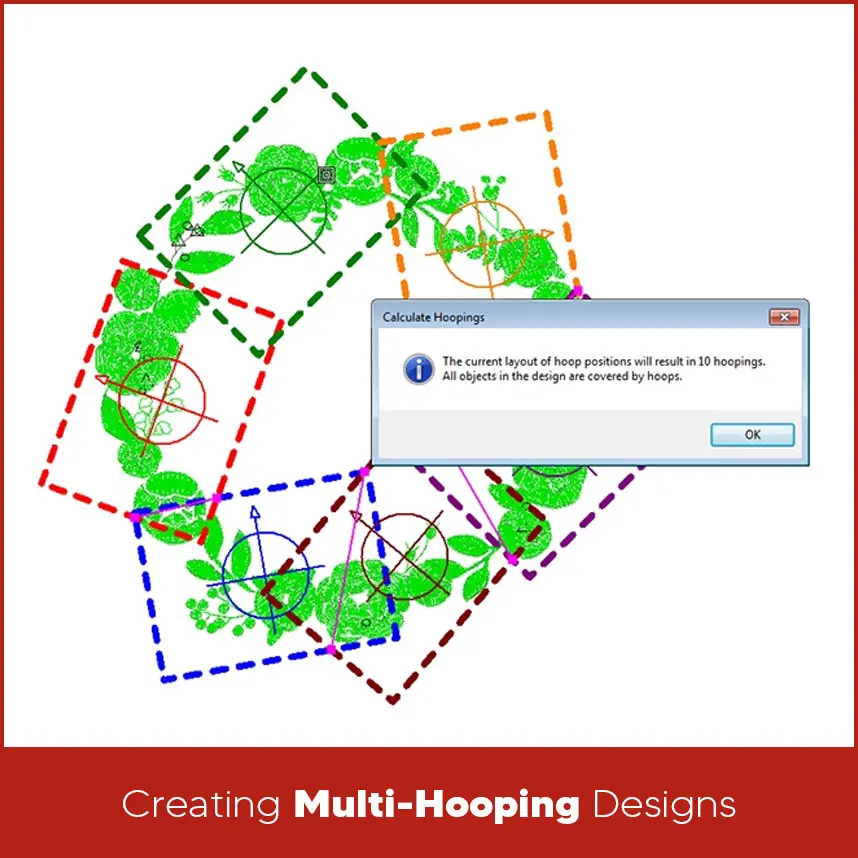
- Creating Multi-Hooping Designs
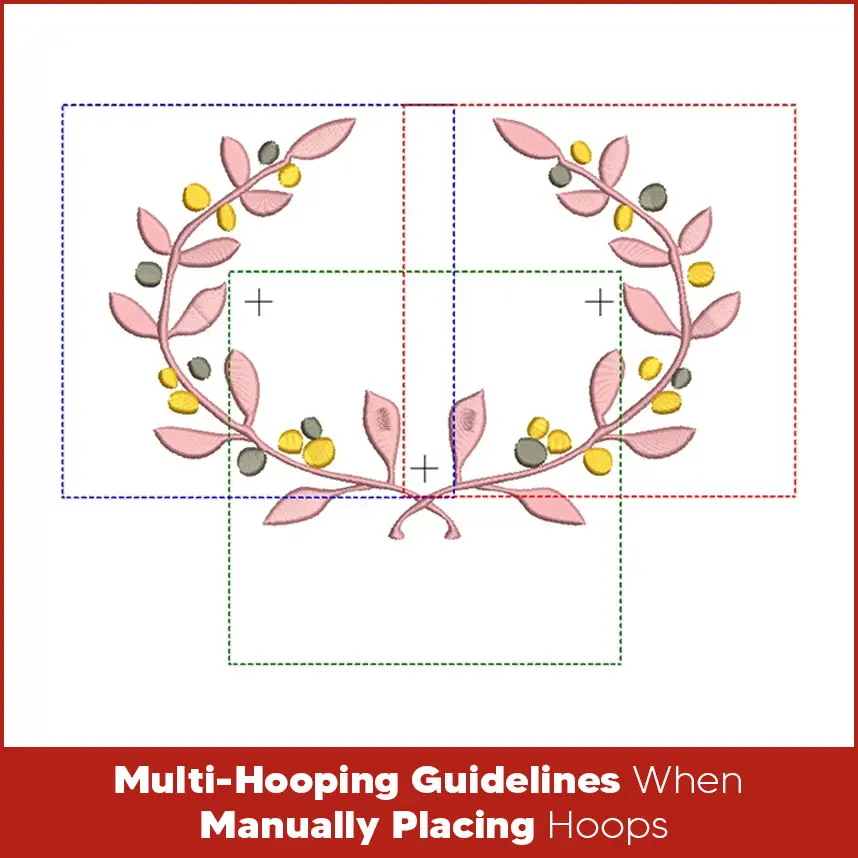
- Multi-Hooping Guidelines When Manually Placing Hoops
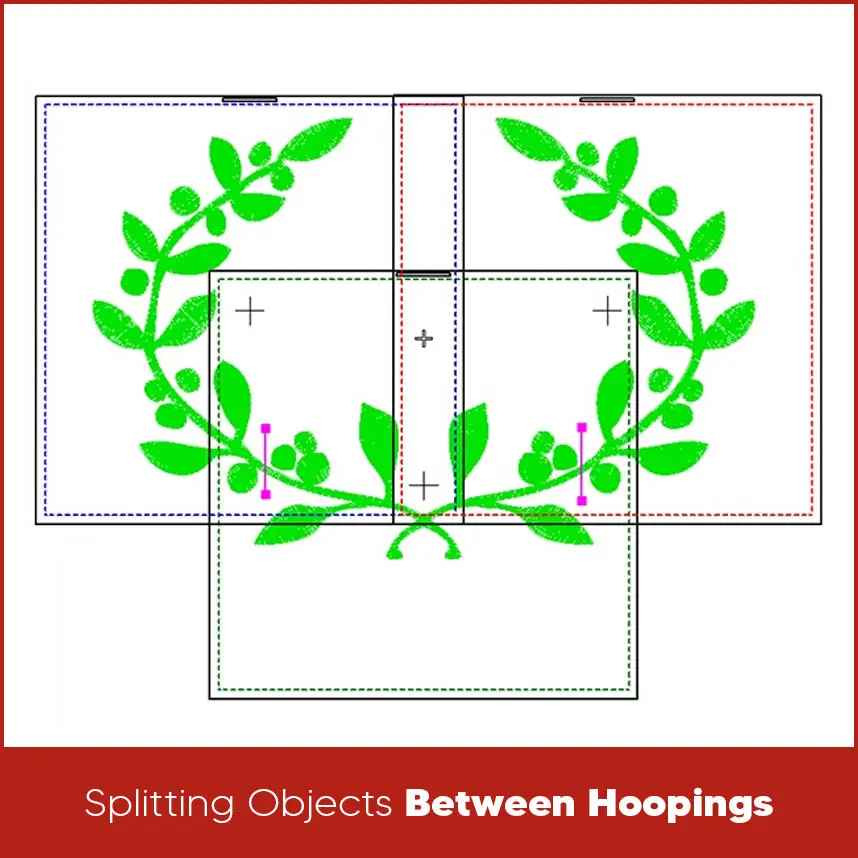
- Splitting Objects Between Hoopings
- Step 1: Look at the Full Design First
- Step 2: Decide Where the Design Can Be Divided
- Step 3: Use Color Sections to Your Benefits
- Step 4: Keep Heavy Details in One Section
- Step 5: Maintain the Same Stitch Direction
- Step 6: Add Overlap Carefully (If Needed)
- Step 7: Preview the Split Design
- Step 8: Save Each Section Clearly
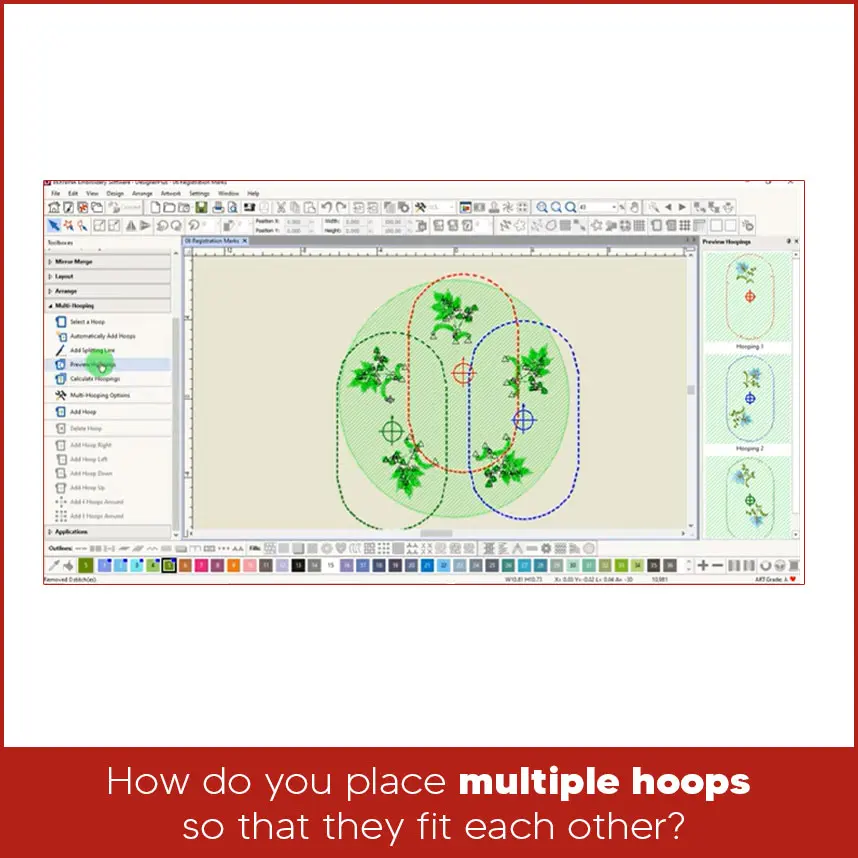
- How Do You Place Multiple Hoops So That They Fit Each Other?
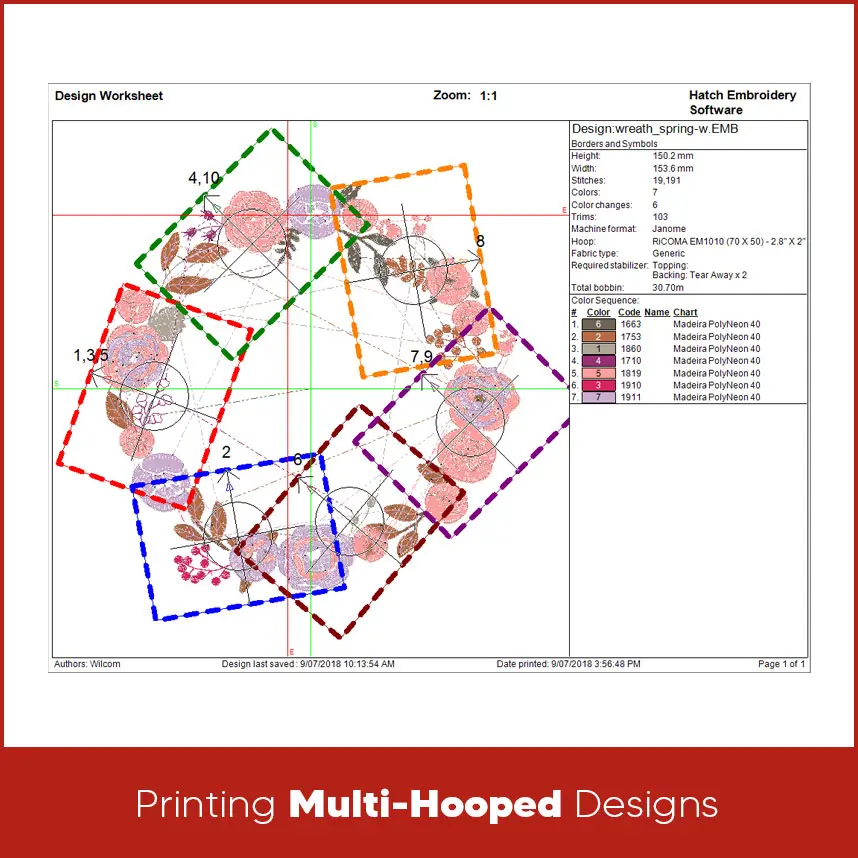
- Printing Multi-Hooped Designs
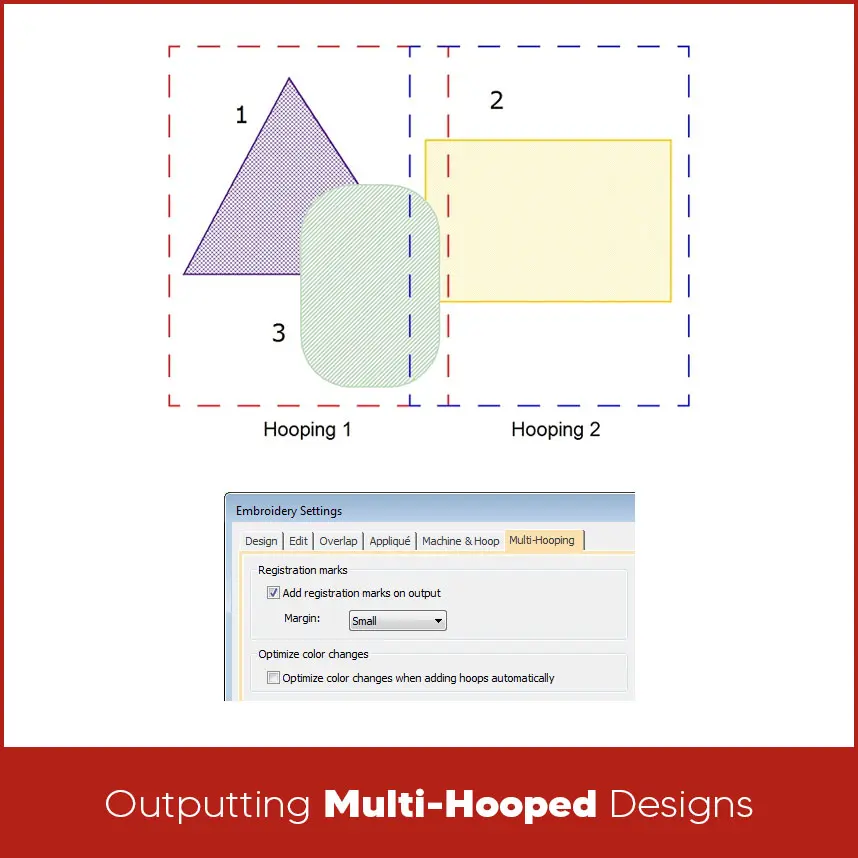
- Outputting Multi-Hooped Designs
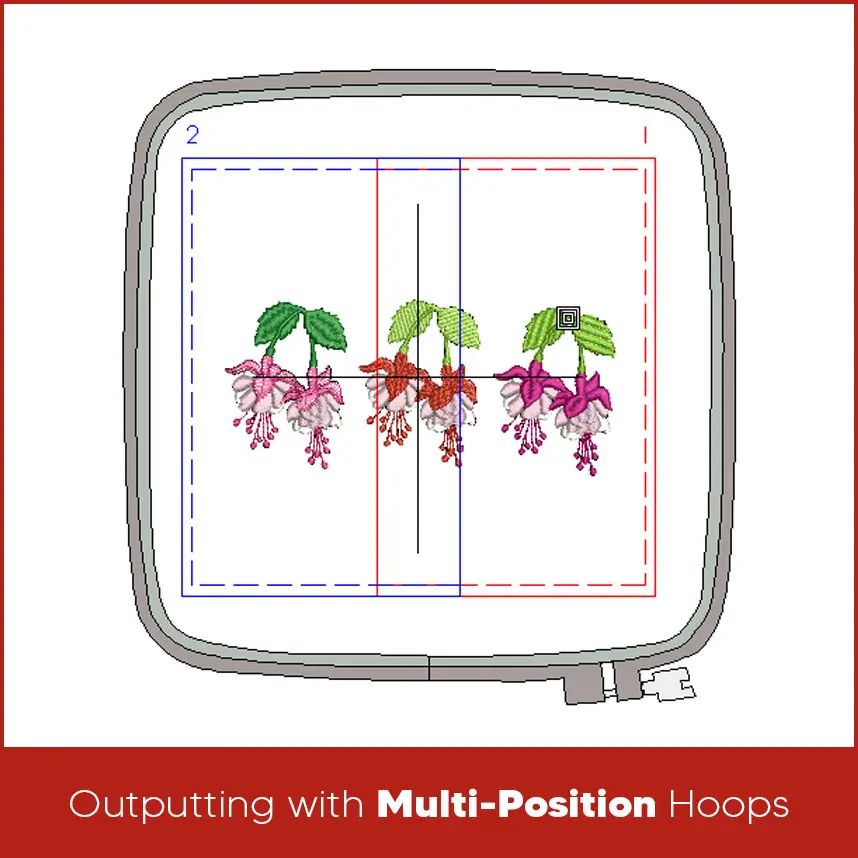
- Outputting with Multi-Position Hoops
- How Embroidery Machines Handle Multi-Positional Hooping?
- Summary
For clean and accurate results in multi-positional hooping, proper planning is essential. The stitching order should be set so that background areas are completed before foreground details. Careful placement of each hoop ensures that all sections align perfectly and the design comes out smooth and professional. Checking the order and flow beforehand helps prevent mistakes and saves time during stitching.
This is exactly why multi-positional hooping techniques matter the most. When large designs are handled the right way, they don't look stitched in parts. They look smooth, balanced and clean, as if they were done in a first run. The good news is that this is not about having expensive embroidery software. It is about understanding how hooping, software and machine settings work together. Multi-positional hooping means stitching one embroidery design across multiple hoop placements. Instead of shrinking a large design or changing its layout, the design is divided into sections. Each section is stitched separately but all sections connect cleanly on the fabric. The embroidery machine doesn’t adjust automatically when the fabric is moved. It follows the design exactly as programmed. That’s why correct planning, accurate placement, and proper digitizing are necessary. As long as each hoop placement matches the design layout, the final embroidery will align correctly. This method is commonly used for jacket backs, large logos, uniforms, & large text. A successful multi-hooping design starts with the embroidery software. Large designs must be prepared with hoop limits in mind. The design should be sized correctly and checked for stitch density, stitch direction, and overlaps. Designs should never be split randomly. Each section must flow naturally into the next. Clean edges and smooth stitch transitions help hide joining lines. If the design is prepared properly, the stitching process becomes much easier. When placing hoops manually, always plan the stitching order first. Stitch background areas before foreground details so nothing gets covered or misaligned after re-hooping. Use the Sequence tool in your software to check the stitch order and place hoops correctly. Before stitching, run the Stitch Player to review the design one last time. This helps catch mistakes early and ensures clean alignment between hoopings. When splitting, the following should be considered: Before splitting anything, look at the complete design carefully. Check its size, shape, and layout. Understand where the design is wide, where it is empty, and where it has heavy stitching. Never rush this step because poor planning causes alignment problems later. Find areas that naturally allow a break. These are usually straight edges, background areas, or open spaces. Avoid curved lines, small text, and detailed elements. The split should feel hidden, not obvious. If the design has multiple colors, split it where one color ends and another begins. This makes the transition smooth and natural. Color breaks help hide any small alignment changes during re-hooping. All thick stitches, dense fills, and small details should stay inside one hoop section. Don’t cut these areas into two parts. Heavy stitches show gaps easily. Make sure the stitch direction stays the same in every section. Changing stitch direction between hoopings makes the fabric reflect light differently, which shows the separate line. A very small overlap between sections can help hide joins. This overlap should be light, not dense. Too much overlap can cause thick lines or thread build-up. Zoom in and preview how both parts meet. Check edges closely. If the connection looks uneven on screen, it will look worse on fabric. Fix any issues before saving the file. Save or label each hooping section properly. Clear names help prevent confusion when stitching, especially when working with large designs. Note: A good split makes the design look like it was stitched in one attempt. Take time during splitting, and the hooping process will become much easier and cleaner. Placing multiple hoops correctly depends on alignment and reference points. Registration marks or alignment stitches are usually used to guide placement. These marks help position the fabric in the same place every time it is re-hooped. Before starting the next section, the needle should be lowered manually to check alignment. If the needle enters exactly where expected, the hoop is placed correctly. If not, the fabric must be adjusted before stitching continues. Taking time during hoop placement prevents gaps, overlaps, and uneven stitching. Printing templates of multi-hooped designs helps visualize placement before stitching. Printed templates show hoop boundaries, design sections, and alignment marks. These printouts act as guides during hooping. They help ensure that each section is positioned correctly on the fabric. Printing designs also reduces mistakes, especially when working with large designs. This step is mostly skipped but it plays a major role in accuracy. When outputting multi-hooped designs, each section must be saved correctly. The stitch order should remain consistent, and the file should clearly identify each hooping sequence. Proper output settings ensure that the embroidery machine reads the design in the correct order. If sections are mixed or saved incorrectly, alignment problems can occur. Clear file organization helps avoid confusion during production. Some embroidery machines support multi-position hoops. These hoops allow the fabric to slide within a guided system while maintaining alignment. Even with these hoops, correct design preparation is still necessary. The machine follows the design exactly as it is digitized. Multi-position hoops reduce manual work but they don’t fix design errors. Accurate digitizing and proper setup remain essential. Embroidery machines follow stitch paths exactly as programmed. They don’t adjust automatically if the fabric shifts. The machine assumes the hoop is placed perfectly every time. That’s why careful hooping and correct software setup matter more than machine brand or price. Accuracy comes from preparation, not automation. Multi-positional hooping techniques allow large embroidery designs to look clean, balanced, and professional. When designs are prepared correctly in embroidery software and hooped with care, even very large patterns stitch smoothly.Understand Multi-Positional Hooping
Creating Multi-Hooping Designs
Multi-Hooping Guidelines When Manually Placing Hoops
Splitting Objects Between Hoopings
Step 1: Look at the Full Design First
Step 2: Decide Where the Design Can Be Divided
Step 3: Use Color Sections to Your Benefits
Step 4: Keep Heavy Details in One Section
Step 5: Maintain the Same Stitch Direction
Step 6: Add Overlap Carefully (If Needed)
Step 7: Preview the Split Design
Step 8: Save Each Section Clearly
How Do You Place Multiple Hoops So That They Fit Each Other?
Printing Multi-Hooped Designs
Outputting Multi-Hooped Designs
Outputting with Multi-Position Hoops
How Embroidery Machines Handle Multi-Positional Hooping?
Summary
If you want embroidery designs that are digitized, well-aligned, and ready for multi-position hooping, Digitizing USA is here. Our digitizing services focus on clean stitch flow and accurate placement, making large embroidery projects easier and more reliable.


