Complete Guide to 3D Embossed Embroidery for Beginners
Table Of Content
- What is 3D Embossed Embroidery?
- Understanding the Unique Effect
- Distinguishing from 3D Puff
- Essential Supplies and Setup
- Hooping Your Stabilizers
- Hooping and Foam Preparation
- Applying 3D Foam
- Trimming for Precision
- Mastering the Embroidery Process
- Machine Setup and Design Orientation
- Embroidering and Weeding the Foam
- Attaching the Garment Without Hooping
- Final Touches: Finishing and Adhesion
- Removing Excess Stabilizer
- Heat Adhering for Durability
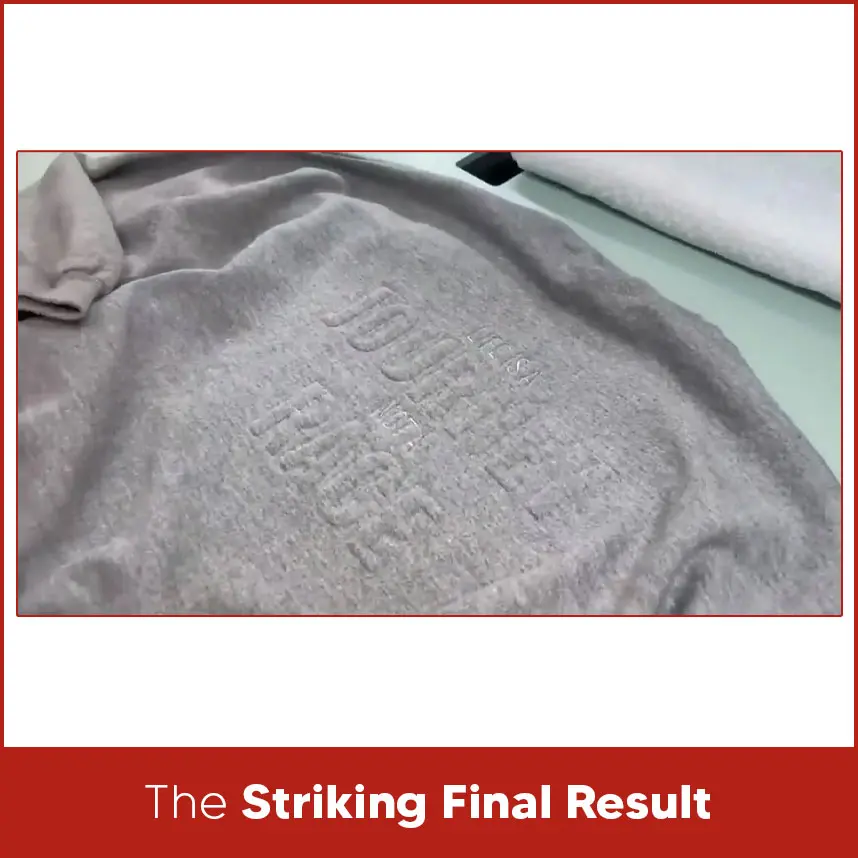
- The Striking Final Result
- Showcasing Your Embossed Design
- Software Requirements for Digitizing 3D Embossed Embroidery Designs
- Wilcom
- Embird
- BERNINA Embroidery Software V8.1
- PE-Design 11
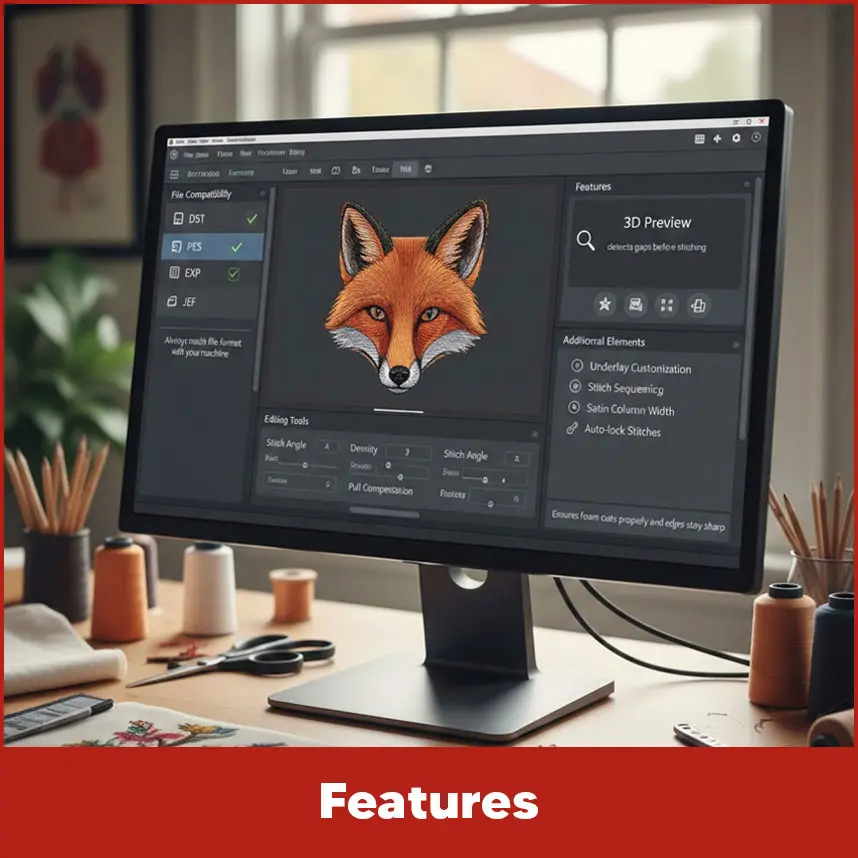
- Features
- File Compatibility
- 3D Preview and Editing Tools
- Support for Additional Elements
- Summary
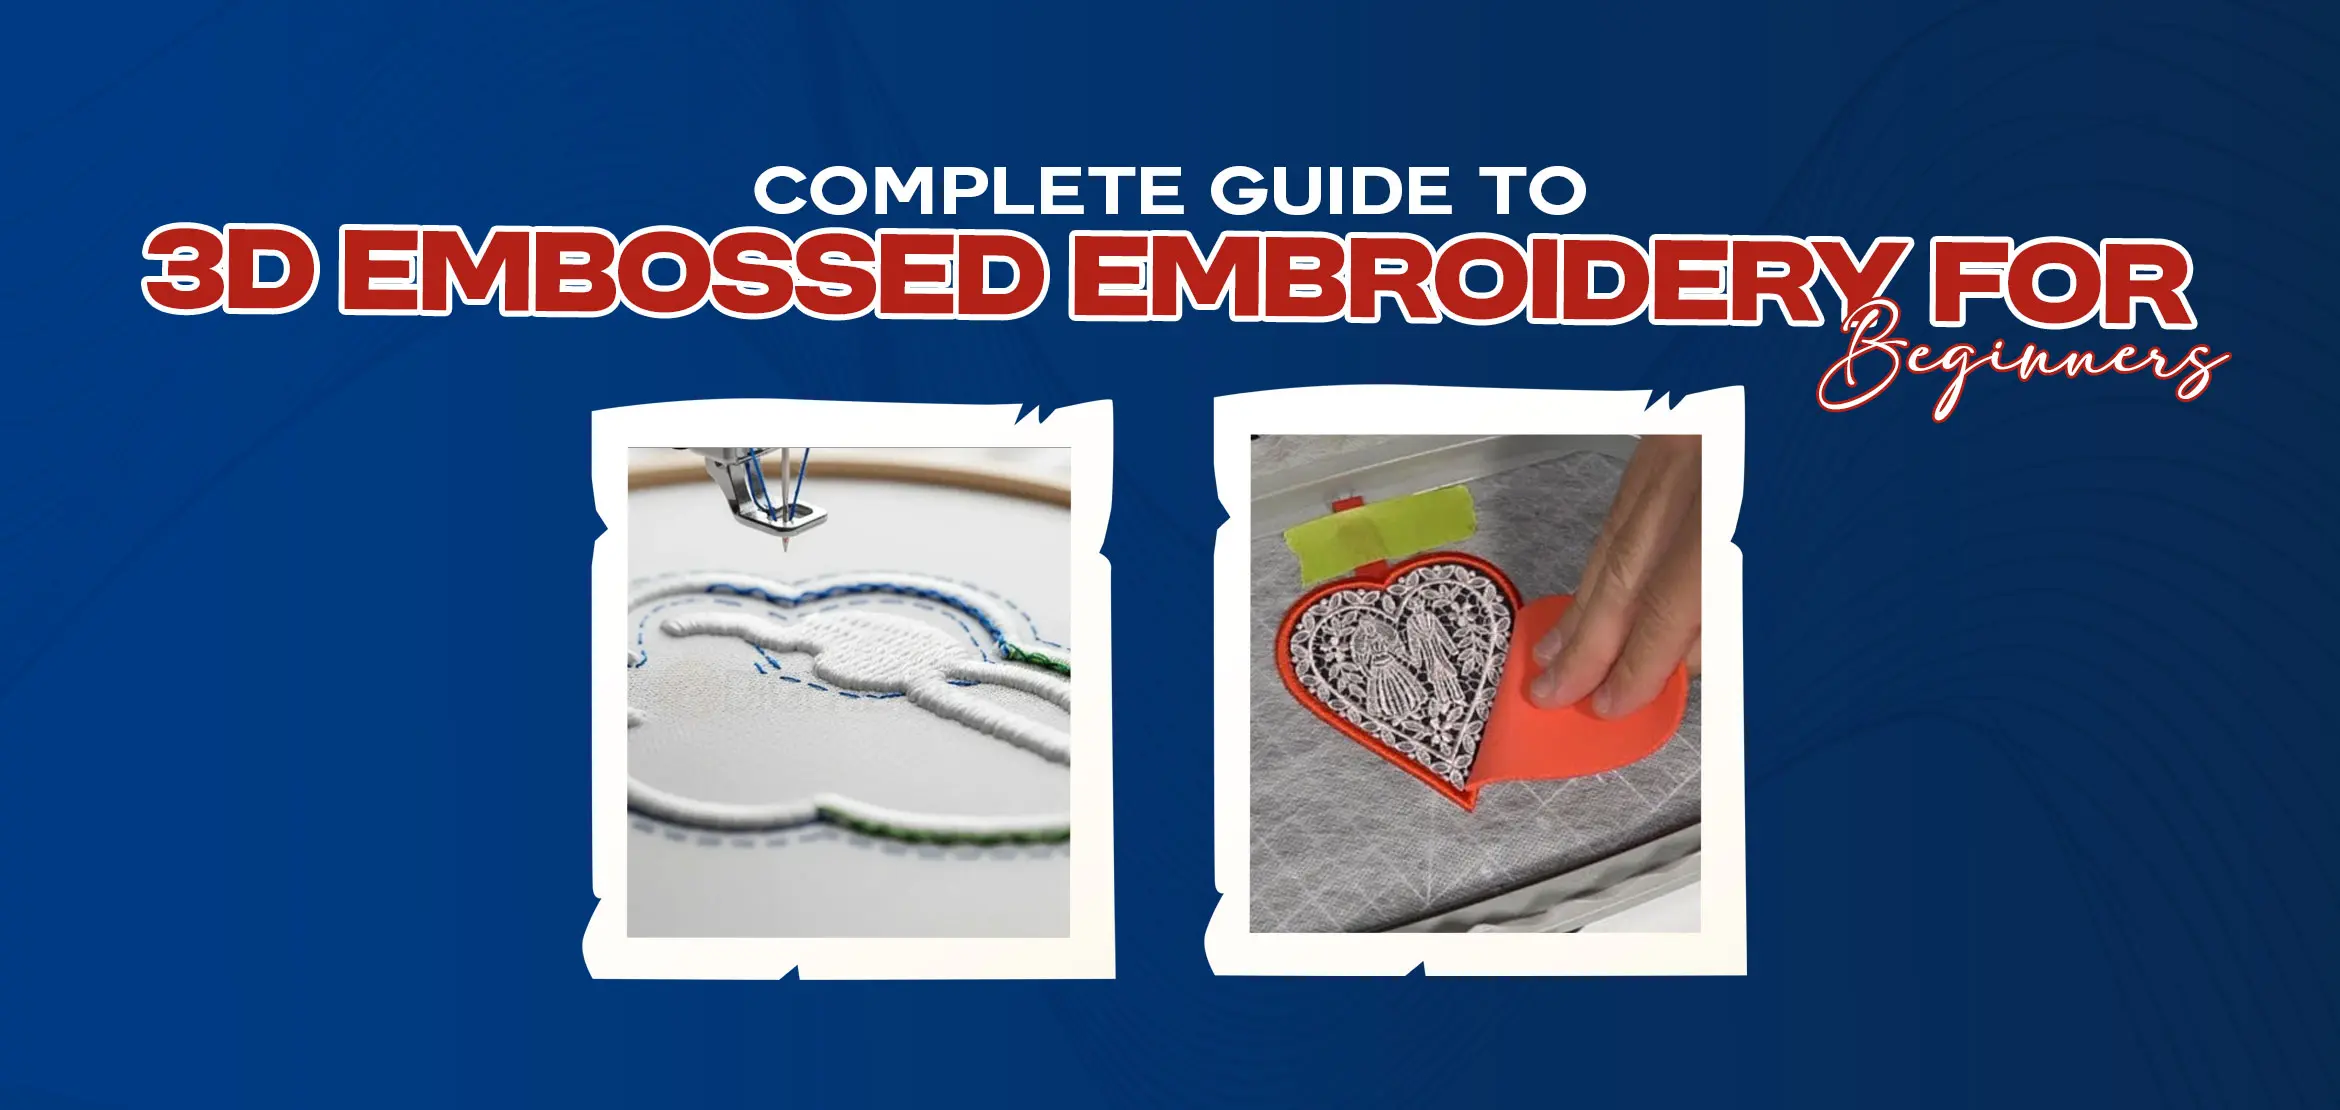
Flat embroidery looks clean. Satin stitches look smooth. But when a design rises from the fabric and you can actually feel the shape with your fingers, it creates a different impact. That raised, bold look is what makes 3D embossed embroidery stand out.
When someone touches a design and feels the raised surface under their fingers, the reaction changes. The design no longer looks printed. It looks crafted. It looks strong and professional. Mostly beginners think this technique is complicated but guys, trust me, it is not complicated. If you understand the process carefully and practice, you will be able to create clean and bold 3D embossed designs without stress.
This complete guide explains everything from the basics. You'll understand step by step process, what supplies you need, and how to digitize it properly.
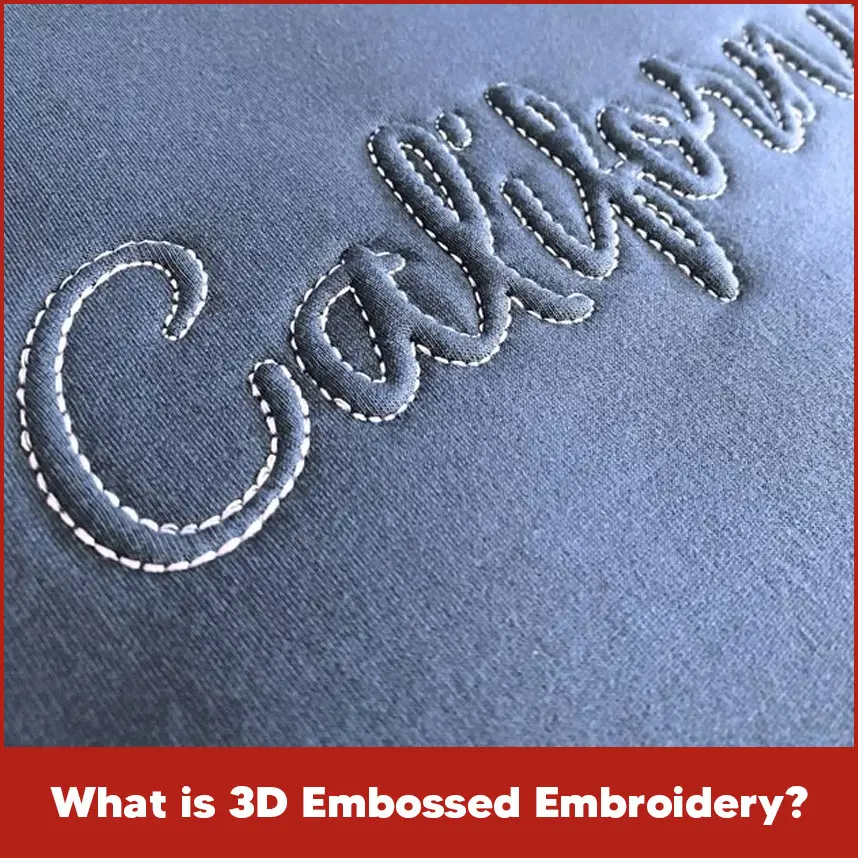
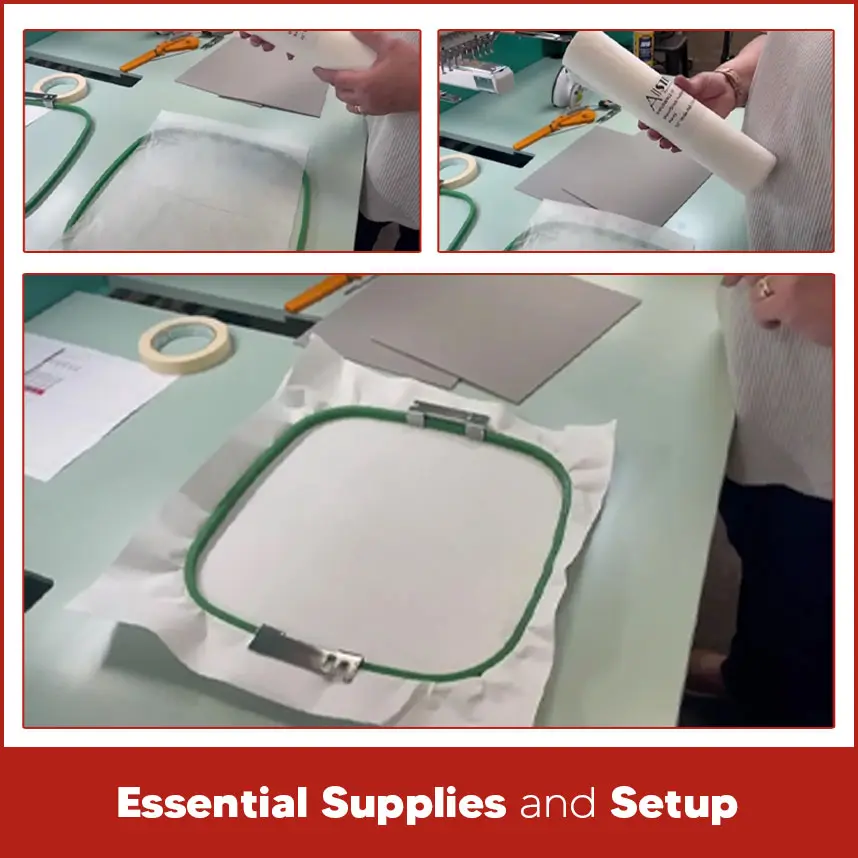
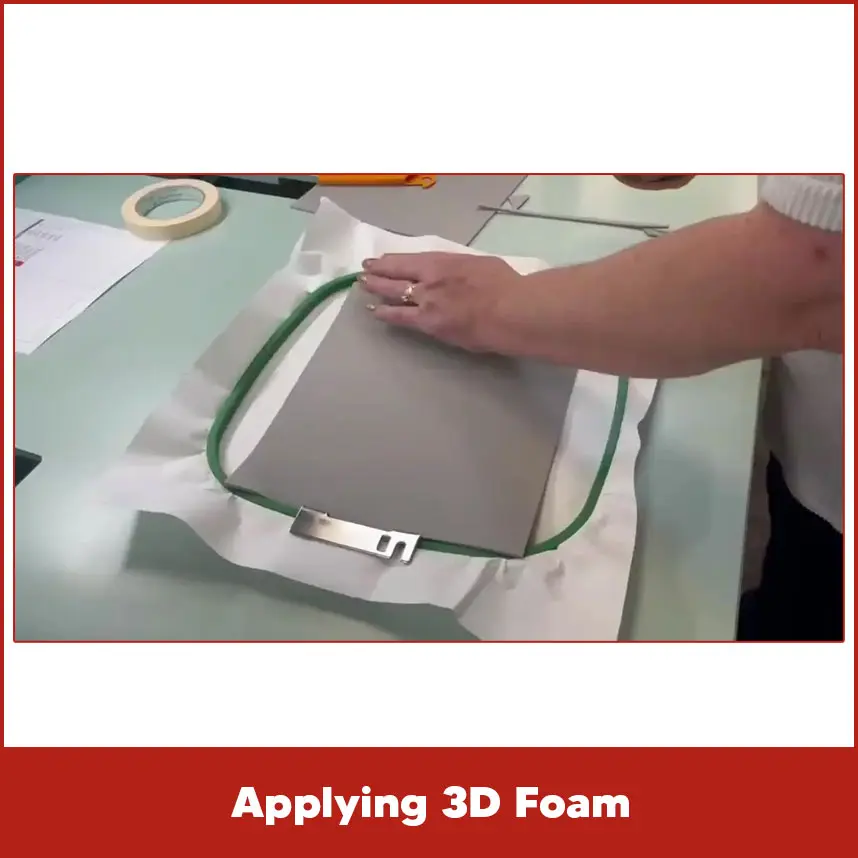
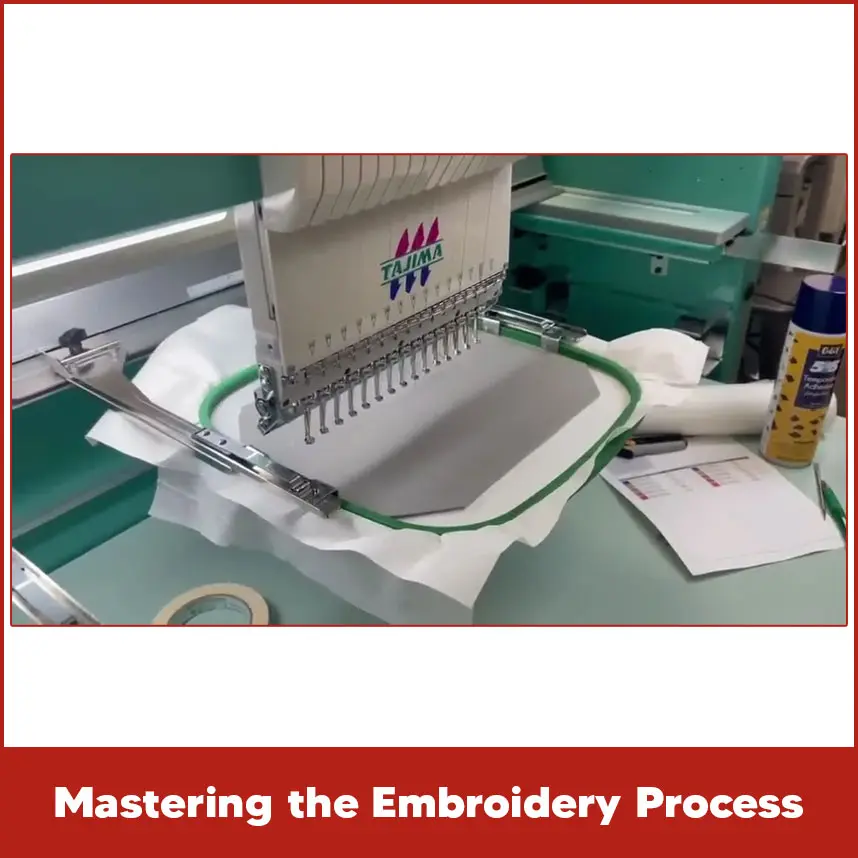
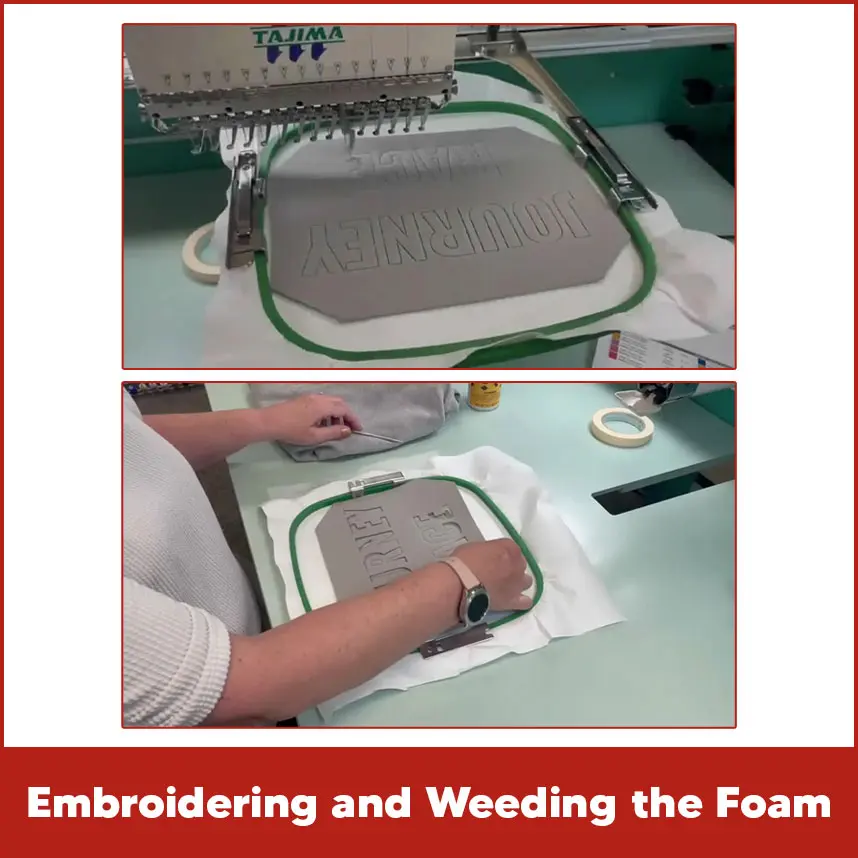
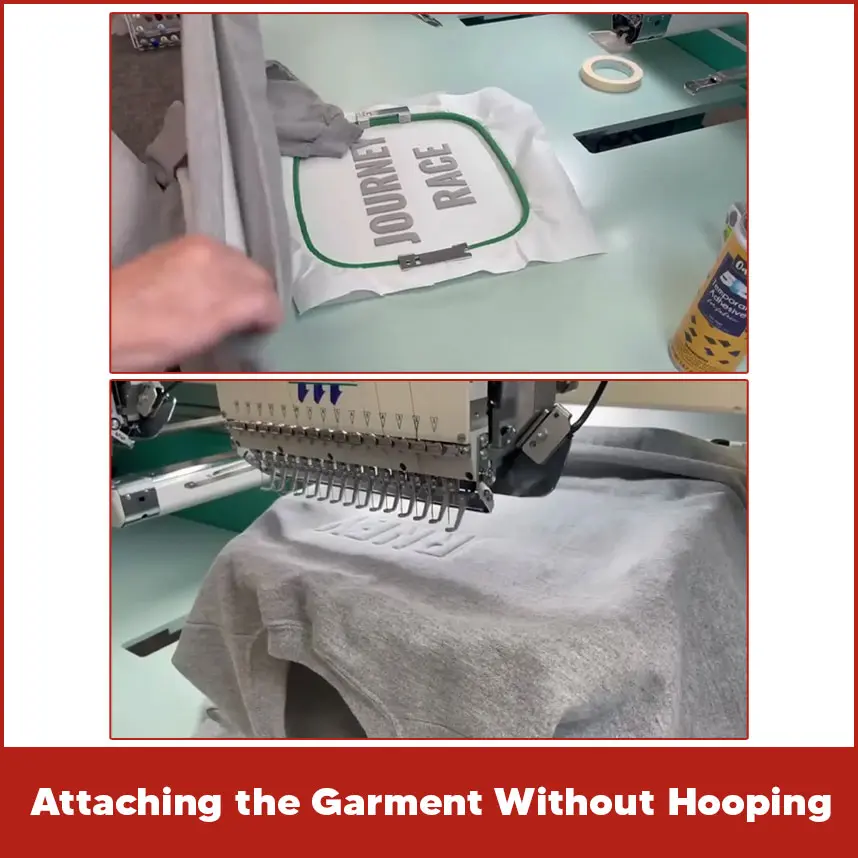
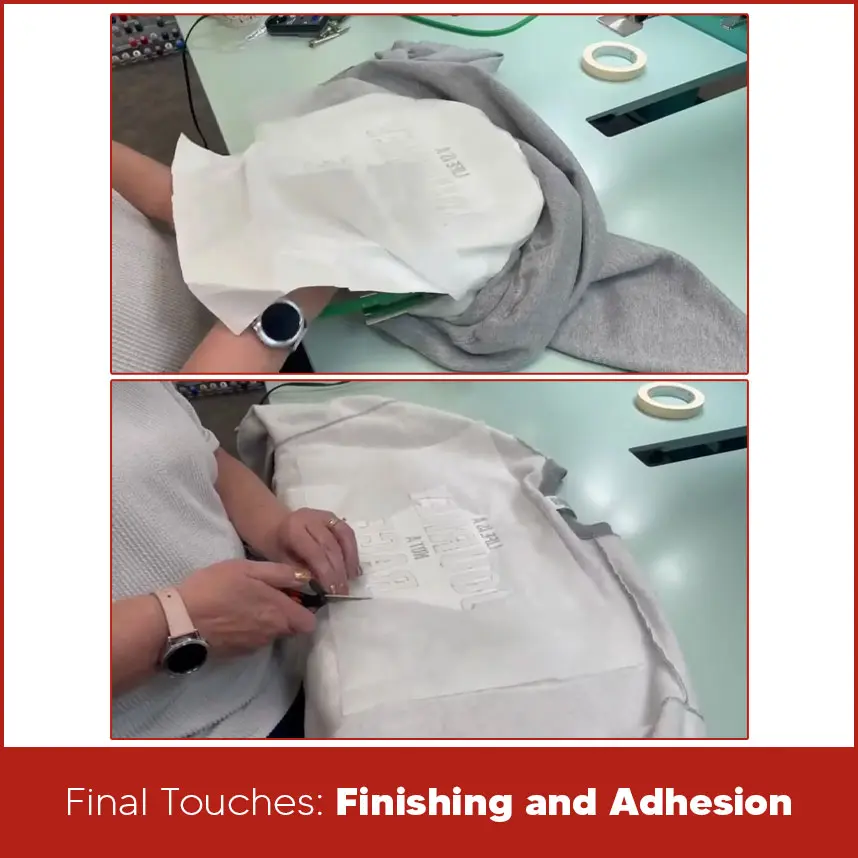
Let’s understand from the basics & step by step process. 3D embossed embroidery creates a raised design on fabric by placing special foam under the stitches. The top thread covers the foam, and once stitched, the design appears lifted and bold. You often see this technique on caps, jackets, and structured garments where logos need to stand out clearly. In 3D embossed embroidery, the machine stitches over a layer of embroidery foam, the foam pushes the stitches upward, which creates a structured and elevated 3d embossed effect. The key to this technique is: Dense satin stitches. Clean edges. Proper foam thickness. Correct digitizing settings. When digitized properly, the design looks sharp and professional. The edges appear clean because the stitches penetrate and cut the foam neatly. This method works best with bold shapes, block letters, and simple logos. Thin lines do not hold foam well, so beginners should start with thicker designs. 60% to 80% beginners confuse 3D embossed embroidery with 3D puff embroidery. They look similar but they are a little bit different. 3D puff embroidery mainly focuses on thick satin columns placed over foam, usually for caps. The puff effect appears round and bold. 3D embossed embroidery focuses more on structured shapes and controlled elevation. It often combines flat stitching with raised areas to create contrast. In simple terms: 3D puff = bold raised letters (mostly caps). 3D embossed = raised design with structured control and detailed shaping. Understanding this difference helps you choose the right method for your project. Before you start stitching, you need the right tools. Good preparation prevents design failure. Materials You Need: Embroidery machine. 3D embroidery foam (2mm or 3mm for beginners) Sharp embroidery needle (size 75/11 or 80/12) Cut-away stabilizer Heat press or iron for finishing Sheerstitch Fusible (bottom stabilizer) Ripstitch Soft Tear Away (top stabilizer) 505 spray adhesive Metallic embroidery thread Metallic embroidery thread works best as it is strong & holds tension properly. Rayon thread looks shiny, but polyester gives better durability, especially on caps. Choose foam color close to your thread color. If small gaps appear, matching foam prevents visible contrast. Use a strong cut-away stabilizer. 3D embroidery needs firm support because dense stitches create tension. Hoop the stabilizer tightly. The fabric must stay smooth without wrinkles. Loose hooping causes uneven stitching and poor foam coverage. Use a proper hoop frame with strong backing. This step controls the final result. If you place the foam incorrectly, the design will look messy. After hooping the stabilizer and fabric: Stitch a placement line (if included in design). Lay the foam carefully over the stitched outline. Secure it with light tape if needed. Make sure the foam fully covers the design area. Do not stretch the foam. Keep it flat and even. After stitching finishes, you remove excess foam. Gently tear it away from the edges. If small pieces remain, use tweezers carefully. Do not pull too hard. Clean edges make the design look professional. The stitches should cut the foam cleanly. If foam sticks out, your stitch density may be too low. Machine setup is next. On the embroidery machine, flip your design upside down, a crucial adjustment because the garment loads face down later. Before pressing start: Check thread tension. Confirm needle condition. Set proper speed (medium speed works best). High speed can shift foam and reduce stitch accuracy. Medium speed allows better control. Check design orientation carefully, especially for caps. A misplaced logo cannot be corrected after stitching. When the machine starts stitching over foam, you will notice the design rising. Let the machine complete all satin sections. Do not stop midway. After finishing: Tear off the visible foam. Brush the design gently. Check edges for leftover pieces. This process is called weeding the foam. For thick garments like jackets, you may avoid hooping the fabric directly. In that case: Hoop only stabilizer. Use temporary spray adhesive. Press the garment firmly onto the stabilizer. This method prevents hoop marks while keeping stability. Finishing determines durability. Trim extra stabilizer from the back, but leave enough to support stitches. Do not cut too close. Dense designs need backing support for long-term durability. Use gentle heat from the back of the garment. Heat slightly softens remaining foam particles and sets stitches in place. Do not overheat. High heat can flatten the raised effect. When done correctly, 3D embossed embroidery looks bold, clean, and professional. Raised letters catch light differently than flat stitches. The design appears strong and premium. You can use 3D embossed embroidery for: Cap logos. Sports team branding. Company uniforms. Streetwear collections. Promotional merchandise. Bold fonts and simple shapes give the best results. Proper digitizing plays a major role. Not every design file works for foam embroidery. Wilcom EmbroideryStudio supports advanced satin controls and density adjustments. It allows precise column width editing, underlay settings, and foam compensation. Embird provides customizable stitch parameters. Users can adjust density and pull compensation for foam projects. BERNINA Embroidery Software V8.1 offers 3D preview tools that help visualize raised effects before stitching. PE-Design 11 allows clean satin column editing and stitch direction control, which is important for foam cutting. Good software supports formats like DST, PES, EXP, and JEF. Always match file format with your machine. Preview feature helps detect gaps before stitching. You can adjust stitch angle and density easily. Advanced software supports: Pull compensation control. Underlay customization. Density adjustments. Stitch sequencing control. Satin column width editing. Auto-lock stitches. These features ensure foam cuts properly and edges stay sharp. 3D embossed embroidery creates bold and raised designs that stand out on caps and garments. The process requires proper foam placement, strong stabilizer, correct stitch density, and careful finishing. Beginners can achieve clean results by using thick fonts, medium machine speed, and quality materials. Digitizing also plays a major role. Poor digitizing leads to uneven foam cutting and messy edges. At DigitizingUSA, we digitize custom embroidery designs with careful stitch control and proper density balance. We understand how to manage simple and complex logos so they stitch cleanly over foam. Our team converts artwork into production-ready files that deliver sharp edges and professional raised effects. We deliver quality work within your timeline.What is 3D Embossed Embroidery?
Understanding the Unique Effect
Distinguishing from 3D Puff
Essential Supplies and Setup
Hooping Your Stabilizers
Hooping and Foam Preparation
Applying 3D Foam
Trimming for Precision
Mastering the Embroidery Process
Machine Setup and Design Orientation
Embroidering and Weeding the Foam
Attaching the Garment Without Hooping
Final Touches: Finishing and Adhesion
Removing Excess Stabilizer
Heat Adhering for Durability

The Striking Final Result
Showcasing Your Embossed Design
Software Requirements for Digitizing 3D Embossed Embroidery Designs

Wilcom
Embird
BERNINA Embroidery Software V8.1
PE-Design 11
Features
File Compatibility
3D Preview and Editing Tools
Support for Additional Elements
Summary
If you want your designs digitized correctly, contact DigitizingUSA today and get professional results that stand out.


