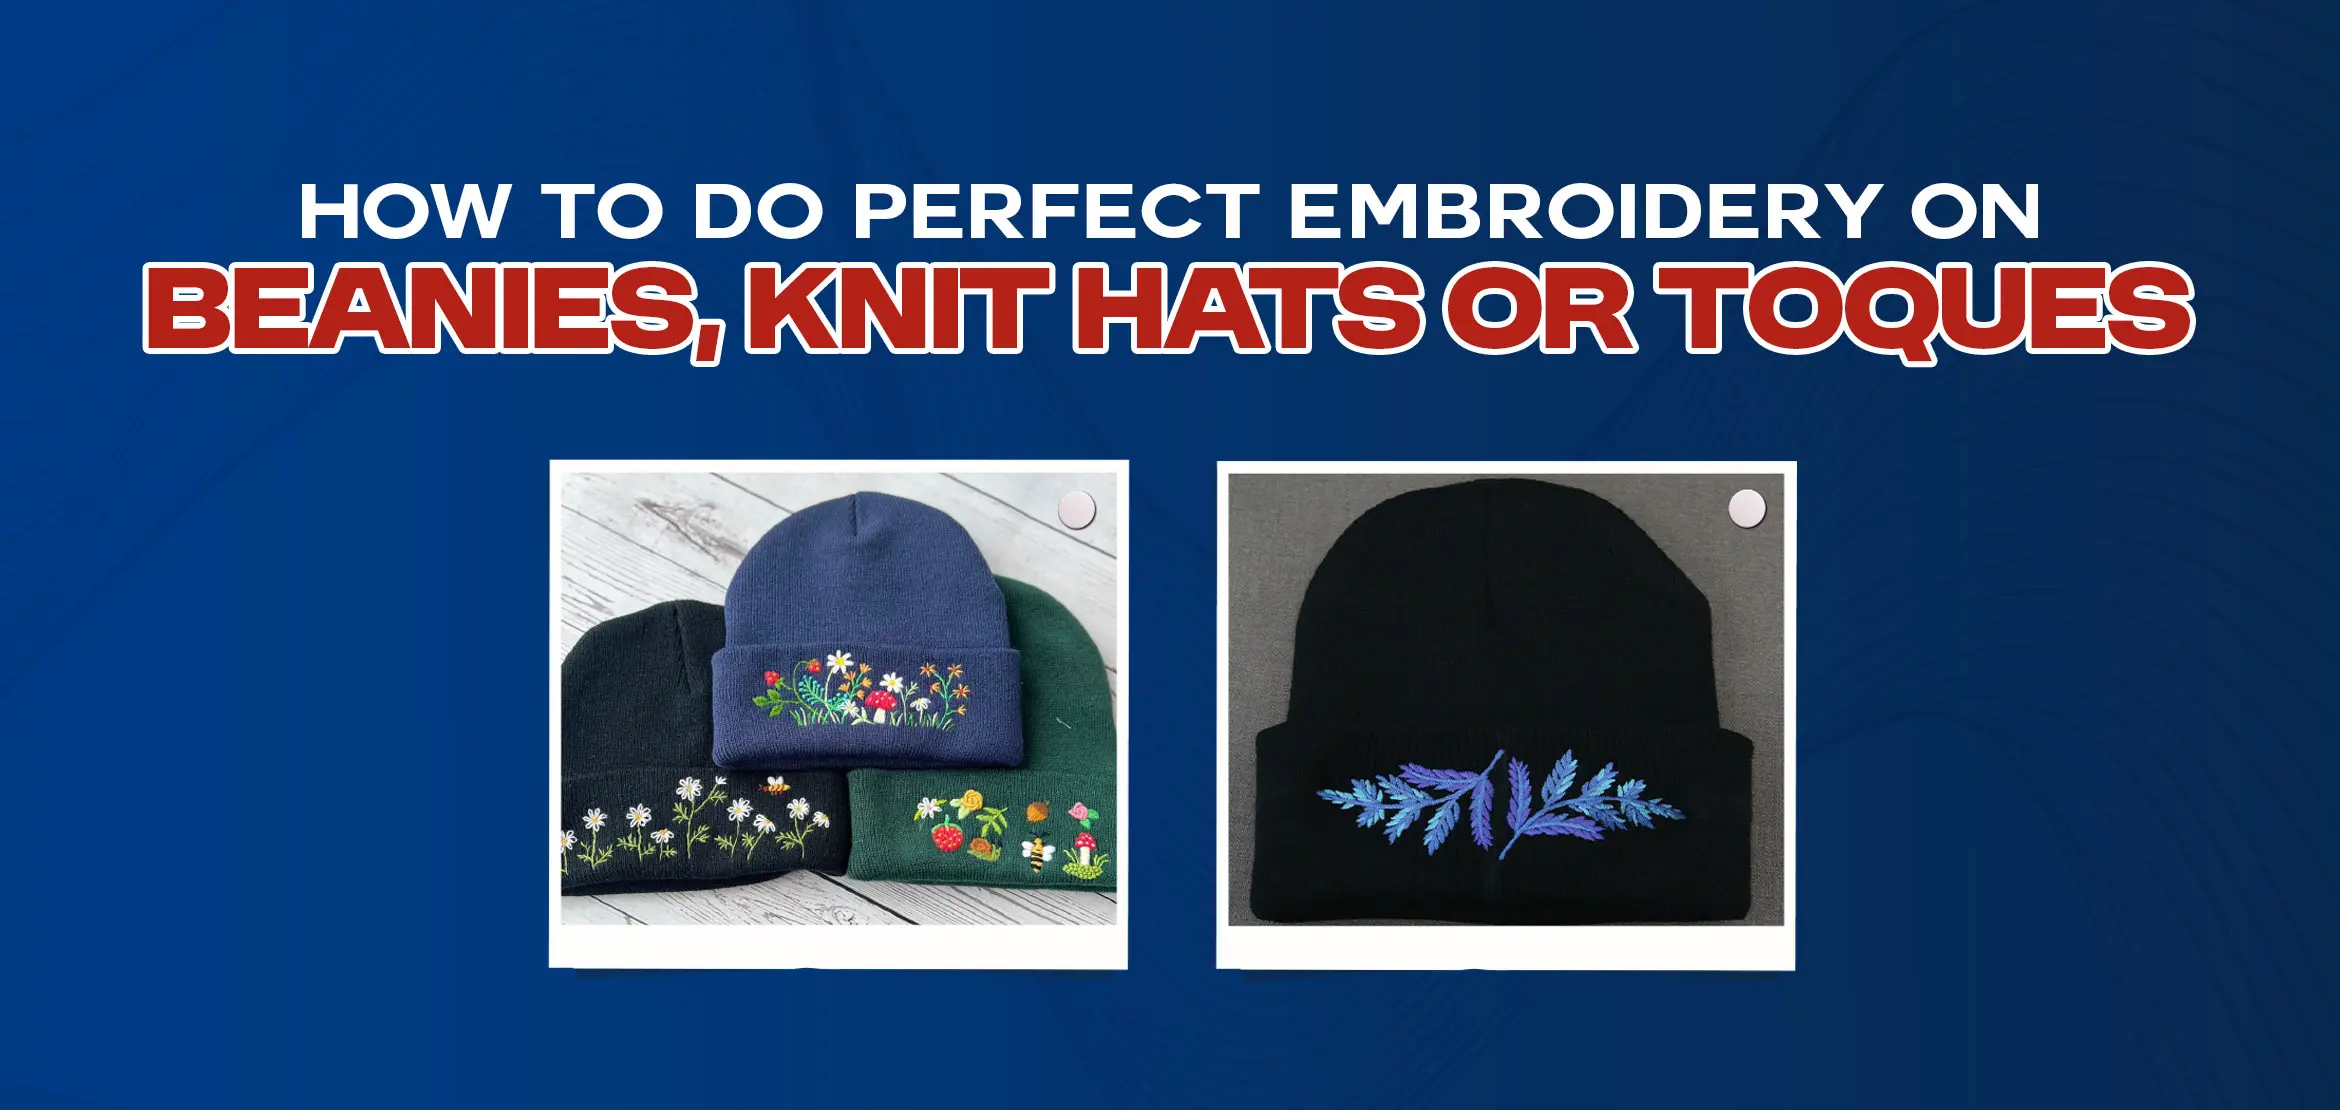
How to Do Perfect Embroidery on Beanies, Knit Hats, or Toques
Table Of Content
- Essential Tools and Materials for Beanies, Knit Hats, or Toques and Setup
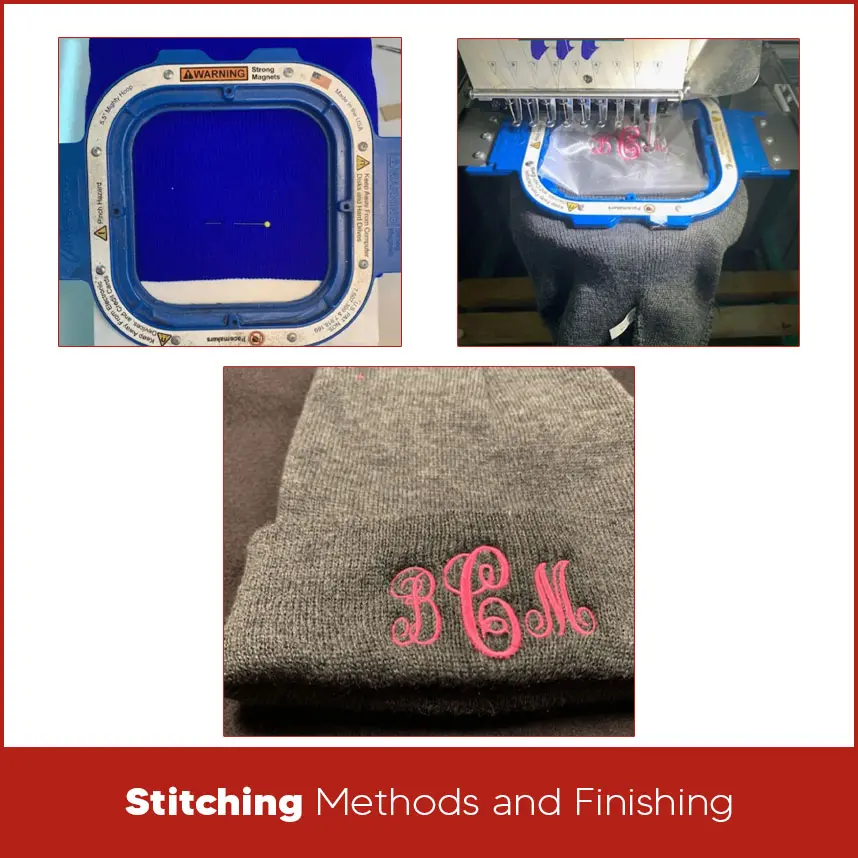
- Stitching Methods and Finishing
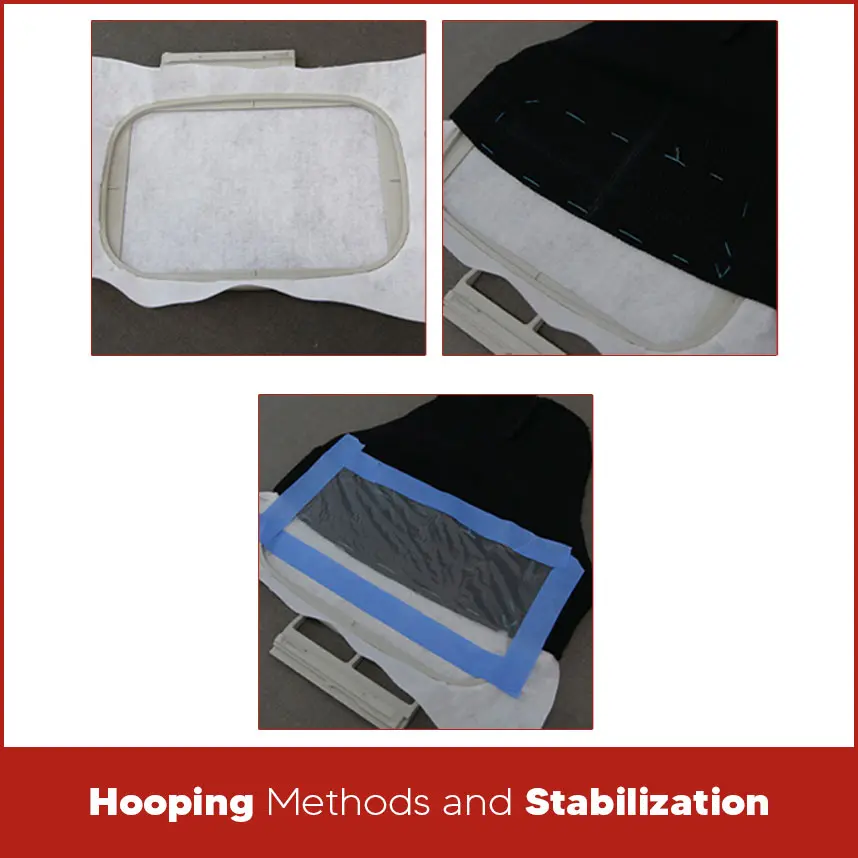
- Hooping Methods and Stabilization
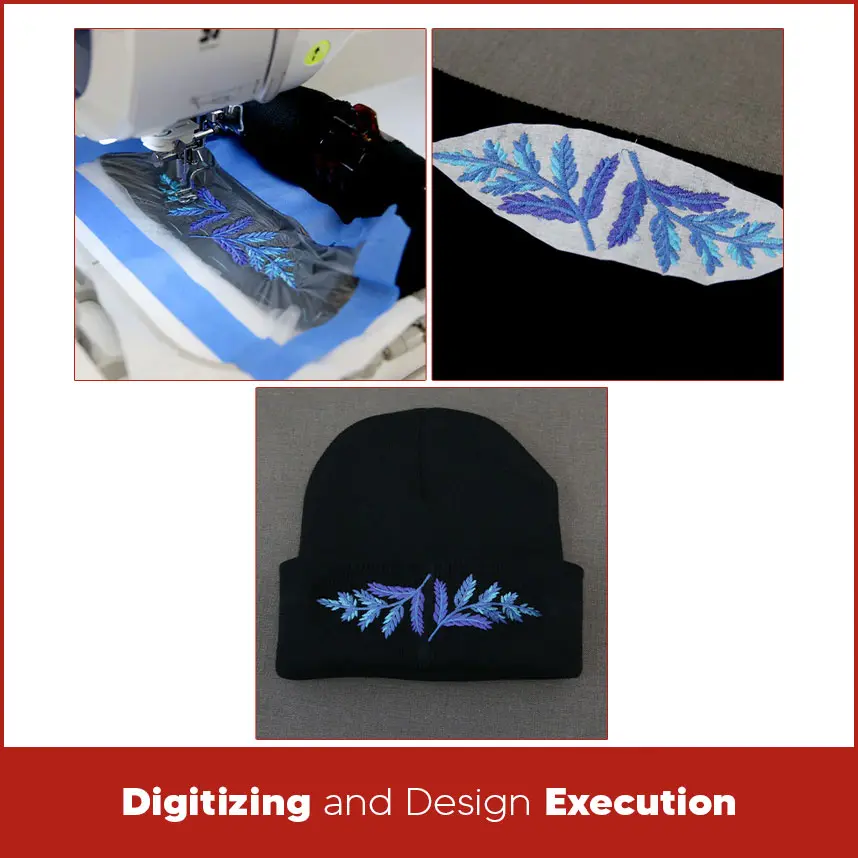
- Digitizing and Design Execution
- Choosing the Right Fabric Stabilizer for Knit Hats
- Choose the Right Stabilizer for Stretchy Hats
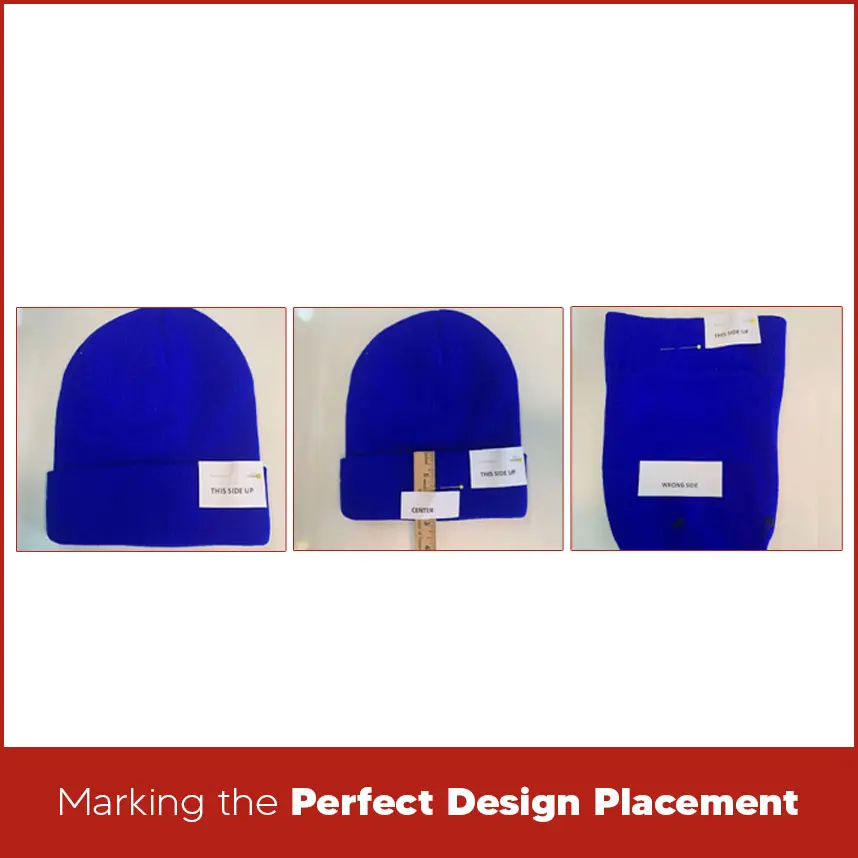
- Marking the Perfect Design Placement
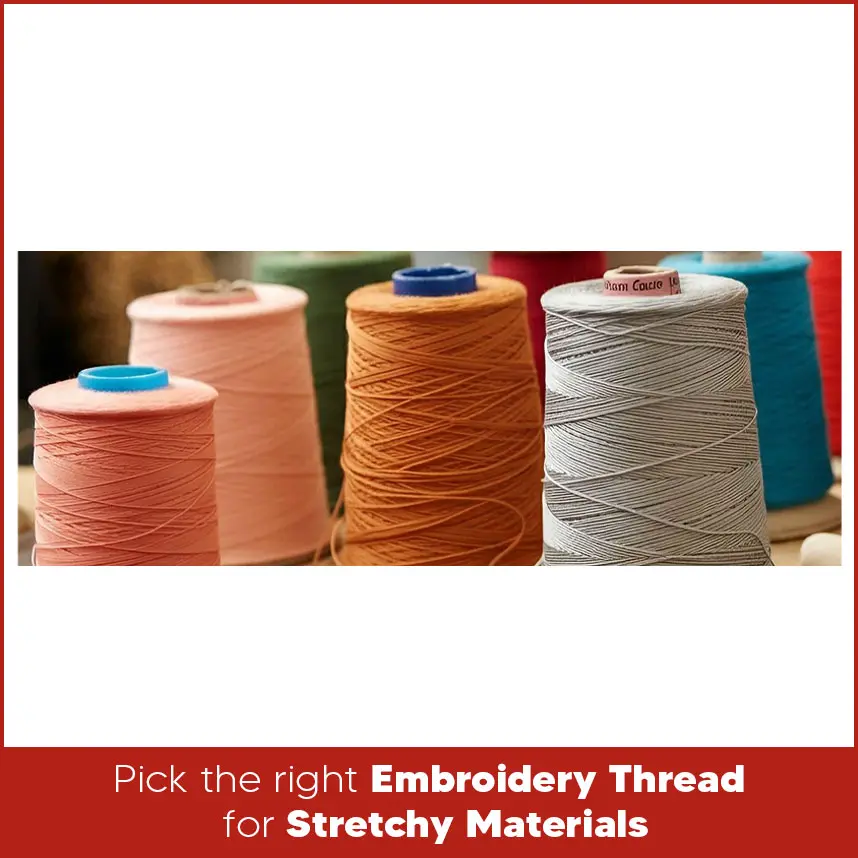
- Pick the Right Embroidery Thread for Stretchy Materials
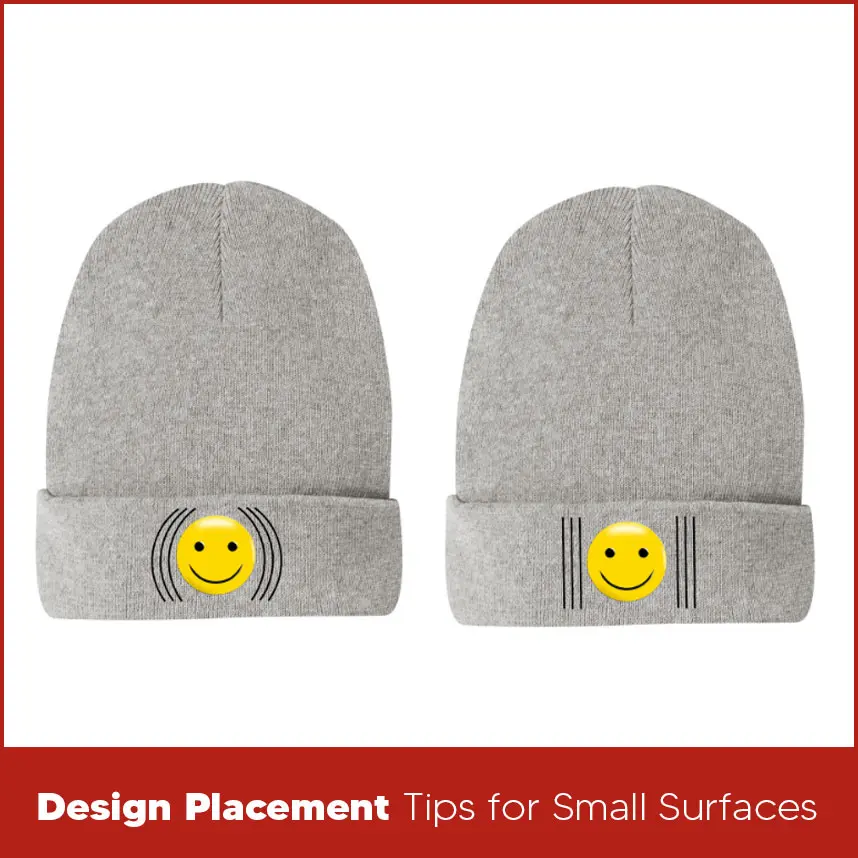
- Design Placement Tips for Small Surfaces
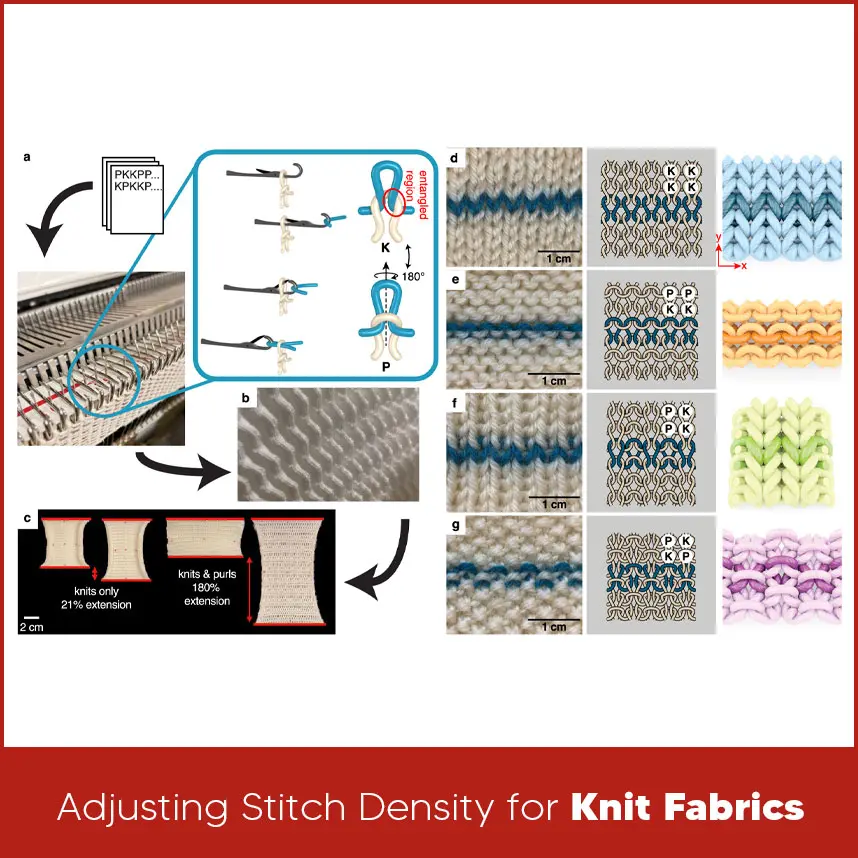
- Adjusting Stitch Density for Knit Fabrics
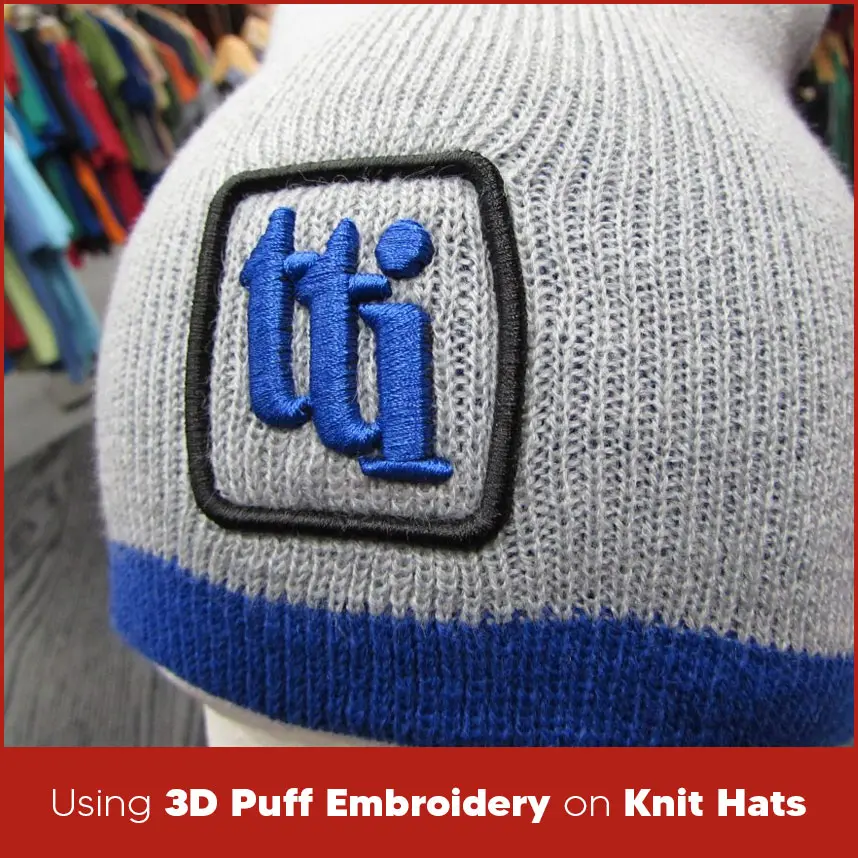
- Using 3D Puff Embroidery on Knit Hats
- Beginner-Friendly Approaches
- Simple Projects and Time Management
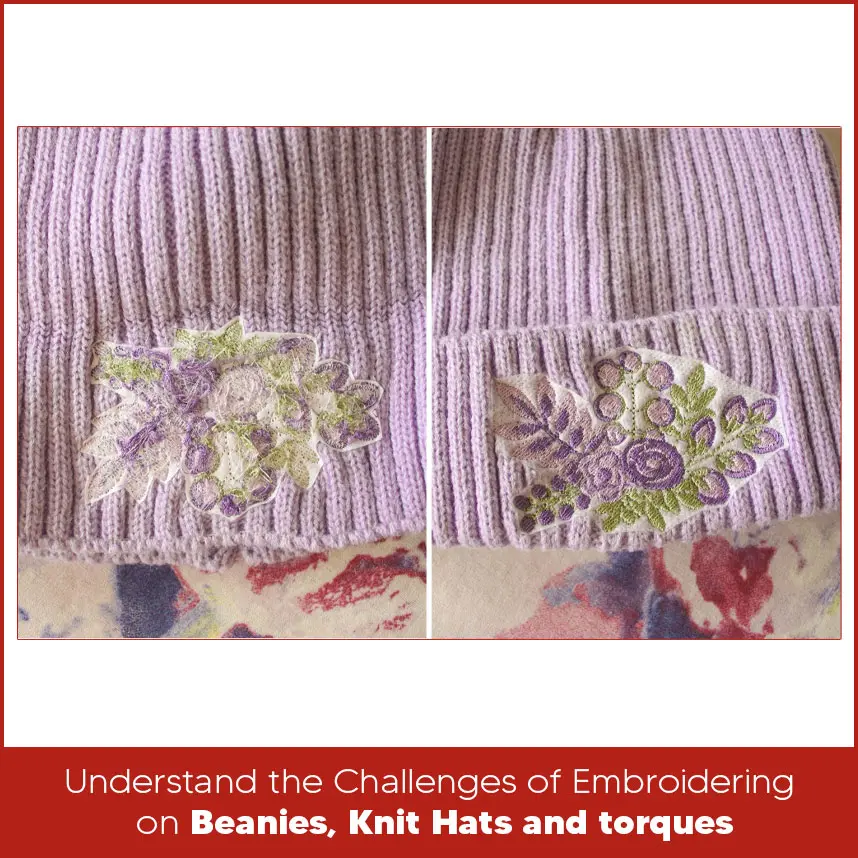
- Understand the Challenges of Embroidering on Beanies, Knit Hats and Toques
- Summary
Guys you add a logo or design to beanies, knit hats and torques but unluckily stitches don't support you and they end up breaking into the fabric, the hat stretching out of shape or the whole thing looking puckered and uneven. It mostly happens with beginners during their initial phase. Knit hats are cozy and popular but that stretchy material makes stitching tricky. With the right steps and a few simple tricks, you can create clean, professional embroidery on beanies that stays good even after wearing and washing.
In this blog, we'll cover everything you need to know to get perfect results every time. These examples show how great embroidered beanies, knit hats or torques look when done right. From simple logos to fun designs that stand out on beanies and hats. To start, gather the right items. You don't need expensive stuff, just basics that work well with stretchy knits. First you'll need an embroidery machine (single or multi-needle works), a hoop that fits the hat. Many people like magnetic hoops or small ones around 4 to 5 inches because they hold without leaving marks. A ballpoint needle, size 75/11, is best because it moves smoothly between the knit fibers. For materials, pick a knit beanie made of acrylic or cotton blend, they hold stitches better than loose wool. Use polyester embroidery thread for durability because polyester handles stretch and wash well. Temporary spray adhesive, like KK100, helps hold things. And don't forget clips or pins to keep extra fabric out of the way. Setup is simple Turn the beanies, knit hats or torques inside out for easier access. Print a template of your design to mark placement. Always test on a scrap hat first to check how everything behaves. First start by marking your design spot. Hoop the stabilizer only, spray it lightly with adhesive, then slide the beanie over it. Align carefully so the design sits straight when worn. Run the machine at a slower speed for better control of knits. After stitching, remove any topper by rinsing in water. Trim excess cutaway stabilizer close to the stitches, but leave enough for support. Finish by steaming lightly if needed. This keeps the hat soft and stretchy. Hooping is key on curved, stretchy hats. One common way is to hoop just the stabilizer tightly. Then position the beanie over it, using adhesive or basting stitches to hold. Turn the hat inside out and place the inner hoop inside. Stretch gently, just enough to match how it fits on a head, not too tight. Floating the beanie (not hooping the fabric directly) works great for thick knits and avoids hoop burn. Good digitizing makes all the difference. Keep designs small, around 2-2.5 inches, with bold lines. Fine details break in knit hats. Lower stitch density by 20-30% compared to regular fabrics. Add underlay stitches for a strong base. Use pull compensation to handle stretch. Simple shapes or text work best. Test your digitized file on scrap knit to adjust. When you embroider on knit hats, the stabilizer keeps everything in place. Knits stretch a lot and without any support, your design will pull, pucker and move. That's why most people use a cutaway stabilizer on the back. It stays there for longtime and holds the stitches, then no matter how much the hat gets pulled or washed. If the hat is really thick or loose, you can layer two sheets for extra hold. Just remember to trim the extra away carefully after stitching so it doesn't bulk up. For the top side, add a water-soluble topper. This thin layer goes right on the knit before you stitch. It stops the stitches from breaking in the fuzzy or ribbed fabric, so your design sits nicely and clearly on top. After you're done, just rinse the hat in warm water. Pair this with your cutaway on the back, and you'll get sharp results every time, no more lost details in the knit hats. Good placement starts with clear marks. Print a paper template of your design, or use a placement sticker if you have one. Fold the beanie in half to find the center, then mark vertical and horizontal lines with a water-soluble pen, chalk, or even a pin. For cuffed beanies, turn the design upside down when hooping, that way, when you fold the cuff up, everything reads right. Check twice: put the hat on your head or a foam head to see how it looks when worn. Polyester thread is the best choice here. It's strong, holds color well after frequent washes, and stretches a bit with the knit without breaking. Most embroiderers use 40-weight polyester for the top thread and 60-weight in the bobbin. Rayon aslo look shiny but it doesn't hold up well on hats, it can fray faster. Avoid metallic threads, unless you want a special look, because they snag on knit fibers. Stick with quality brands like Madeira or Isacord for smooth running and bright colors that last. By the way polyester gives vibrant, durable results on beanies. Beanies don't give you much space, so think smart. The folded cuff is the most visible spot, center your design there, about 0.5 to 1 inch from the edge so it doesn't get hidden when folded. For the front body, place it 2 to 2.5 inches up from the cuff for good balance. Keep designs small, 2 to 3 inches wide max so they don't wrap around the curve oddly. Measure from the bottom edge every time, and use pins to hold your marks steady. Cuff and front placements both look great when measured well. Knit hats need a lighter density than flat fabrics. If you pack in too many stitches, the hat gets stiff and puckers badly. Drop the density by 20 to 30 percent, aim for around 0.5 to 0.6 mm spacing instead of the usual 0.4 mm. This keeps the hat soft and flexible. Add good underlay stitches first to create a base, then lighter fill on top. Always test on a scrap piece of similar knit to see how it lies. 3D puff adds that cool raised look, and it works on knits if you're careful. Use special puff foam under the stitches. The machine stitches through it, and then you remove the extra material afterward. Digitize with satin stitches over the foam areas, and keep density high there so the foam gets covered well. It looks fun on logos or text but test first because thick knits can make the puff less even. Many people do it on beanies for a standout winter style. If you're new, start with simple text or outlines. Use pre-digitized designs made for hats. Take time to hoop carefully and run slowly. A basic logo takes 30 to 60 minutes once set up. Do one test hat, then go for others. Practice hooping a couple of times. Beanies, knit hats or toques are made from soft & stretchy fabric. This makes them comfortable to wear but it also creates problems when you try to add embroidery. The material doesn't stay still like flat cotton, so stitches can pull wrong or the design can change shape. These issues happen because the knit moves during stitching and after. Here are the main challenges: Too much stretch: The fabric pulls while the machine works, then goes back to normal and makes the design look according to your needs. Stitches are broken: The thick knit and soft fuzz can cover the stitches and make them hard to see so details are loose and the design looks bad. Puckering: Extra thread or a tight pull bunches the fabric up around the embroidery. Hoop marks: Tight hooping leaves marks. Design shifts: The stretchy hat moves under the needle during long stitches. Here are simple tips to prevent these problems: Stop too much stretching: Hoop only the stabilizer and float the hat on top. Stretch it lightly to match head size. Use basting stitches to hold it. Keep stitches from breaking: Add a water-soluble topper on the fabric. It holds stitches up until you wash it off. Avoid puckering: Lower stitch density. Use a ballpoint needle. Slow down the machine. Prevent hoop marks: Pick a special cap hoop or a magnetic one. Or float without tight hooping. Stop design shift: Use temporary spray adhesive. Add strong cutaway backing. With these easy steps, your beanies, knit hats or toques will look clean and professional. Getting perfect embroidery on beanies, knti hats or toques comes down to good stabilization, careful hooping, and adjusted designs. With cutaway backing, a topper, lower density, and gentle handling, your hats will look sharp and last long.Essential Tools and Materials for Beanies, Knit Hats, or Toques and Setup
Stitching Methods and Finishing
Hooping Methods and Stabilization
Digitizing and Design Execution
Choosing the Right Fabric Stabilizer for Knit Hats
Choose the Right Stabilizer for Stretchy Hats
Marking the Perfect Design Placement
Pick the Right Embroidery Thread for Stretchy Materials
Design Placement Tips for Small Surfaces
Adjusting Stitch Density for Knit Fabrics
Using 3D Puff Embroidery on Knit Hats
Beginner-Friendly Approaches
Simple Projects and Time Management
Understand the Challenges of Embroidering on Beanies, Knit Hats and Toques
Summary
If you want professional results without compromising quality, consider a digitizing service. At Digitizing USA, we are experts in providing custom embroidery digitizing services at the most affordable prices. We handle everything from simple to complicated designs with fast turnaround. Contact Digitizing USA today to get your designs digitized perfectly.


